JVC BR-DV3000UB BR-DV3000U Pro-DV recorder 71 page instruction manual - Page 17
Setting the date and time, Loading the cassette, Ejecting the cassette
 |
UPC - 046838325595
View all JVC BR-DV3000UB manuals
Add to My Manuals
Save this manual to your list of manuals |
Page 17 highlights
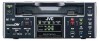
PREPARATION - Loading/ejecting cassettes - Please use standard DV cassettes or mini DV cassettes. Guide Standard DV cassettes Mini DV cassettes Slide REC SAVE Clip Reel Cassette indicator A.DUB INPUT SEL. LINE DV Y/C DVCAM NTSC PAL REC INH. CH-1/3 CH-2/4 BR-DV3000 EJECT MENIU REC PLAY PAUSE SET REW STOP FF Loading the cassette 1. Check the cassette. • Set the rear slide. Push it to "REC" for recording or "SAVE" to prevent its contents from being erased accidentally. • Check that the tape is not slackened. Use an object, such as a clip, to turn the reel in the direction of the arrow. If the tape is taut, the reel will not rotate. 2. Check that the cassette indicator on the unit is unlit. When a cassette is loaded, the cassette indicator will lit up. 3. Load the cassette. • For the standard DV cassette, just align it with the cassette slot and insert. • For the mini DV cassette, load it in between the left and right guides. Set the tape, window face up, and push the cassette in slowly until it is drawn in automatically. ¥ While the cassette is being loaded, the cassette indicator blinks. The indicator lights up when cassette loading is complete. EJECT button Ejecting the cassette Memo • The cassette can be loaded/ ejected even when the unit is in the OPERATE OFF mode. • The loading/ejection process takes about 6 seconds. • Ejection cannot be done with the wireless remote controller. 1. Press the EJECT button on the unit. ¥ Ejection begins. During ejection, the cassette indicator blinks. 2. Eject the cassette. 30 PREPARATION - Setting/displaying date and time - This function sets up the date and time data of the built-in clock. With the built-in chargeable battery, the configured date and time data is maintained even after the main power is turned off. The data will be displayed on the monitor according to the menu setting. During tape recording, the time and date data is registered. 2. - 1 button 1. Menu button DISPLAY STILL BARS MODE BLANK MENU SEARCH+ AUDIO MUTING SET SEARCH- OUT SEL. OUT LEV. 2. - 2 button 2. - 2 SET button 2. - 1 button DVCAM NTSC PAL REC INH. CH-1/3 CH-2/4 BR-DV3000 EJECT MENIU REC PLAY PAUSE SET REW STOP FF 1. Eject button 2. - 2 PAUSE/FF button 2. - 1 PLAY/STOP button TOP MENU Cursor - - -MENU- - - SYSTEM . . REMOT E . . AUD I O / V I DEO . . T I ME CODE . . D I SPLAY SET . . CLOCK AD J UST . . FACTORY SET T I NG DRUM HOUR ME T ER EX I T CANCE L 000000 CLOCK ADJUST menu - - -CLOCK AD J UST - - - D A T E ( DD / MM / Y Y ) 1 0 / 1 0 / 0 2 T I ME 00 : 00 : 00 PAGE BACK Setting the date and time The date and time data is set up via the CLOCK ADJUST menu. Setting can be performed while viewing the monitor screen connected to the VIDEO LINE OUT or Y/C OUT terminal. • The date and time can be set up using either the remote controller or the unit. Ⅵ Press the OPERATE button on the unit or the remote controller to turn on the power and enter the STOP mode. * When setting it using the main unit, eject the loaded cassette, if any. 1. Displaying the TOP MENU. Remote controller Main unit Press the MENU button. Press the EJECT button for at least 2 seconds. 2. Displaying the CLOCK ADJUST menu. Remote controller 1 Press the ᮡ or ᮢ button and bring the cursor to the CLOCK ADJUST item. 2 Press the SET or ᮣ button. Main unit 1 Press the PLAY or STOP button and bring the cursor to the CLOCK ADJUST item. 2 Press the PAUSE or FF button. 31
-
 1
1 -
2
-
3
-
4
-
5
-
6
-
7
-
8
-
9
-
10
-
11
-
 12
12 -
 13
13 -
 14
14 -
 15
15 -
 16
16 -
 17
17 -
 18
18 -
 19
19 -
 20
20 -
 21
21 -
 22
22 -
23
-
24
-
25
-
26
-
27
-
28
-
29
-
30
-
31
-
32
-
33
-
34
-
35
-
36
-
37
 |
 |
