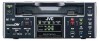
JVC BR-DV3000UB BR-DV3000U Pro-DV recorder 71 page instruction manual - Page 27
Cut-edit system - review
 |
UPC - 046838325595
View all JVC BR-DV3000UB manuals
Add to My Manuals
Save this manual to your list of manuals |
Page 27 highlights
EDIT - Using the unit in an editing system - Cut-edit system This unit can be used as a feeder (player) for an editing system that uses a RS-422A-compatible editing remote controller (RM-G820). Ⅵ Applicable model Editing remote controller : RM-G820 Recorder : VHS/S-VHS ....... BR-S800 (equipped with SA-K26 or SA-R50), BR-S822 * DV signals cannot be input. D9 (digital S) ..... BR-D80, BR-D85, BR-D750 * To input DV signals, please install SA-DV60 to D9VTR. Example of connection Player (BR-DV3000) Audio Video Y/C OUT DV IN/OUT AUDIO CH 1/3 CH 2/4 LINE VIDEO Y/C OUT IN REMOTE DC12V NTSC/PAL 9PIN SERIAL NTSC PAL Recorder Y/C IN VIDEO LINE OUT 9PIN Remote controller REFERENCE IN Memo If editing precision is critical, please input the composite signals of the VIDEO LINE OUT of BR-DV3000 as standard synchronization signals into the editing remote controller. Use the Y/C OUT terminal for video signals. 9PIN LAP HOUR IN OUT SERVO MIN SEC FRAME LAP RESET PLAYER EJECT P AUX REC REW FF STOP STB OFF PLAY PAUSE /STILL SEARCH BUMP ON OFF PREROLL 7 5 3 EVENT No. V.SPEED A.SPLIT DURATION CONTINUE START END V.SPEED EVENT EDITING CONTROL UNIT R M - G 8 2 0 IN OUT IN OUT P VITC LTC CTL R VITC LTC CTL LAP HOUR IN OUT SERVO MIN SEC FRAME LAP RESET TOTAL RECORDER EJECT MENU LEARN MAN.TAKE RIPPLE RENUMBER SPLIT ASSEM VIDEO AUD-1 AUD-2 TC REC REW FF STOP STB OFF SPLIT CANCEL - + LAST REC ED EE PLAY PAUSE /STILL SEARCH STILL X-1 X1 MAX IN OUT ENTRY IN OUT PREVIEW AUTO EDIT GOTO REVIEW STILL MAX X-1 X1 REV PLAYER FWD MIN MONITOR SHIFT ALL STOP MIN MONITOR REV R E C O R D E R FWD Setting the main unit OPERATE Mini A.DUB PROFESSIONAL MIC REMOTE SEL. INPUT SEL. SERIAL LINE 9PIN WIRELESS DV Y/C DVCAM NTSC PAL REC INH. CH-1/3 CH-2/4 BR-DV3000 REMOTE SEL. switch 50 RM-G820 EJE ME REC PLAY PAU S REW STOP F Ⅵ Set the REMOTE SEL. switch of the front panel to 9 PIN. Ⅵ Set the NTSC/PAL switch according to the playback signals. Ⅵ Set the REMOTE menu. • REMOTE : Set it to ON. • PREROLL : Set the pre-roll time (second). The setting is recommended to be at least 7 seconds. Memo The setting will be that which is set (if any) via the editing remote controller. REMOTE (1/2) menu - - - REMOT E [ 1 / 2 ] - - - REMOT E LOCA L FUNCT I ON PREROL L REM F F / REW MOD E REM STOP SEL PB START DELAY SYNCHRON I ZAT I ON NEXT PAGE PAGE BACK ON ALL KEYS 5S F F / REW EE OF ON Memo LOCAL FUNCTION • For controlling with the RE- MOTE terminal, use this menu item to select the buttons on the unit to be rendered operable. REM FF/REM MODE: • Use this menu item to select the action to be executed when an FF or REW command is received during playback. (FF/FEW or search) RM-G820 Settings • REM STOP SEL: Use this menu item to set the operation mode upon reception of a standby-on signal. EE : EE mode (STOP mode) PB : PLAYBACK mode (STILL mode) • PB START DELAY: Use this menu item to set the edit timing. If delay occurs at the start of editing, correct this time discrepancy by adjusting the timing for starting playback. 0F : No compensation. Usually, this option is selected. 1F to 15F : Delay by the number of frames set by the user. In the case that the unit is connected to an editing remote controller with no BUMP function, use this setting to adjust editing precision. • SYNCHRONIZATION Use this menu item to turn on/off the synchronize function (BUMP) to enhance editing precision. OFF : No adjustments to synchronize. ON : Execute adjustments to synchronize.The editing operation may take more time. • CONTROLLER SEL [REMOTE (2/2) menu] Use this menu item to set the type of controller connected. (☞ Page 60) Set it to TYPE 1 when RM-G820 is used. Ⅵ Setting the TC ADJUST item of the TIME CODE menu To edit DV signals, set the timing of the time code output from BRDV3000 to the editing controller. • Usually, it is set to 0F. • To edit DV signal with D9 VTR (equipped with SA-DV60), set it to -2F. PREROLL : At least 7 sec is recommended. BUMP : ON COUNTER : LCT (Player) After setting has been done, activate the LEARN function. MENU NO. 18 BUMP SELECT Select PLAYER if the recorder used is not equipped with the BUMP function. Notes • Please do not use this unit as a recorder. • It does not support AB roll editing. • It does not support the following editing tasks. Variable search Slow-motion edit CTL edit • When performing jog operation using the editing remote controller, do it slowly. Otherwise, the VTR may not be able to keep up. • For certain controllers, the LEARN function will not work normally. SONY : RM-450, PVE-500 Enabling the LEARN function: Insert the tape with time code recorded till 23:59:00:00~00:01:00:00 into the BR-DV3000 before activating the LEARN function. 51
-
 1
1 -
2
-
3
-
4
-
5
-
6
-
7
-
8
-
9
-
10
-
11
-
12
-
13
-
14
-
15
-
16
-
17
-
18
-
19
-
20
-
21
-
 22
22 -
 23
23 -
 24
24 -
 25
25 -
 26
26 -
 27
27 -
 28
28 -
 29
29 -
 30
30 -
 31
31 -
 32
32 -
33
-
34
-
35
-
36
-
37
 |
 |
