JVC BR-DV3000UB BR-DV3000U Pro-DV recorder 71 page instruction manual - Page 20
Time code recor, Preset time codes., Recording time codes of a D, V input terminal
 |
UPC - 046838325595
View all JVC BR-DV3000UB manuals
Add to My Manuals
Save this manual to your list of manuals |
Page 20 highlights
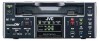
RECORDING - Setting time codes - Time code recording This unit has a built-in time code reader/ generator. It records time codes during recording. It does not record the user's bit. Time codes are recorded according to the recording condition as follows: Time codes are recorded in the REC RUN mode. (REC RUN: time codes run only during recording.) Condition Time code is preset with this unit. Time code recording • Time codes preset in the built-in time code generator are recorded. (First time only) • When recording ends, the set time codes becomes void and regeneration occurs. Memo The framing mode is selected from the NDF/DF item of the TIME CODE menu. (NTSC only) Time code is not preset. • It reads the time codes recorded on the tape and continues recording time codes from these values. (Regeneration) • If no time code is recorded, it starts from "00". * Sometimes, the time codes recorded at the beginning of the tape may not be read. Preset time codes. button MENU button button DISPLAY STILL BARS MODE BLANK MENU SEARCH+ AUDIO MUTING SET SEARCH- OUT SEL. OUT LEV. SET button button button PLAY button B SEL. E Y/C DVCAM NTSC PAL REC INH. CH-1/3 CH-2/4 BR-DV3000 EJECT MENIU REC PLAY PAUSE SET REW STOP FF EJECT button PAUSE button FF button REW button STOP button Memo When the REC button is held down in the STOP mode, the value of the built-in time code generator is displayed. Time codes are preset via the TIME CODE menu. It can be set via either the remote controller or the Main unit. Ⅵ Press the OPERATE button on the Main unit or the remote controller to turn on the power and set the unit to the STOP mode. * To set it with the main unit, first remove the cassette from the unit if it is loaded. 36 TOP MENU - - -MENU- - - SYSTEM . . REMOT E . . AUD I O / V I DEO . . T I ME CODE . . D I SPLAY SET . . CLOCK AD J UST . . FACTORY SET T I NG DRUM HOUR ME T ER EX I T CANCE L 000000 TIME CODE MENU Time Code Minute Frame Hour Second - - - T I ME CODE - - - TC CLEAR 00 : 00 : 00 : 00 CANCE L NDF / DF ( NTSC ) TC DUPL I CATE TC ADJUST ( DV ) PAGE BACK DROP OFF OFF Framing mode (NTSC only) Ⅵ Resetting the time code to zero: 1Select the CLEAR menu item. 2Set the value to EXECUTE and press the SET button (remote controller) or the PAUSE button (Main unit). Memo Framing mode (NTSC only) DROP : Time codes that match the actual time. NON DROP : Use this setting if the number of frames is important. 1. Display the TOP MENU. Remote controller Main unit Press the MENU button. Press the EJECT button for at least 2 seconds. 2. Display the TIME CODE menu. Remote controller Main unit Select the TIME CODE item Select the TIME CODE item with the ᮡ/ᮢ button and with the PLAY/STOP button press the SET or ᮣ button. and press the PAUSE or FF button. 3. Preset the time code (hour, minute, second and frame). Remote controller Main unit 1 Select the TC item with the ᮡ/ᮢ button and press the SET or ᮣ button. ¥ The hour digits blink. 2 Press the ᮣ/ᮤ button to shift to the next digit segment. 3 Press the ᮡ/ᮢ button to change the value of the blinking digits. 4Repeat steps 2 and 3 above and set all the values. Press the SET button. 1 Select the TIME CODE item with the PLAY/STOP button and press the PAUSE or FF button. 2 Press the FF or REW button to shift to the next digit segment 3 Press the PLAY/STOP button to change the value of the blinking digits. 4Repeat 2 and 3 steps above and set all the values. Press the PAUSE button. 4. Set the framing mode (NON DROP / DROP) ... (NTSC only) Remote controller Main unit 1Select the NDF/DF item with the ᮡ/ᮢ button and press the SET or ᮣ button. 2 Press the ᮡ/ᮢ button to select the value. 3 Press the SET button to confirm the setting value. 1 Select the NDF/DF item with the PLAY/STOP button and press the SET or FF button. 2 Press the PLAY/STOP button to select the value. 3 Press the PAUSE button to confirm the setting. 5. Return to the usual screen. Remote controller Main unit Press the MENU button. Press the EJECT button. Recording time codes of a DV input terminal: • Set the TC DUPLICATE item of the TIME CODE menu to AUTO. • To record time codes in the non-drop frame mode from BR-DV600, GY-DV500 or GY-DV700W, set the TC DUPLICATE setting to NON DROP. Memo If the REC button is held down in the STOP mode when the TC DUPLICATE item is set to AUTO or NON DROP, the EE signals of the time codes from the DV input terminal can be checked. 37
-
 1
1 -
2
-
3
-
4
-
5
-
6
-
7
-
8
-
9
-
10
-
11
-
12
-
13
-
14
-
 15
15 -
 16
16 -
 17
17 -
 18
18 -
 19
19 -
 20
20 -
 21
21 -
 22
22 -
 23
23 -
 24
24 -
 25
25 -
26
-
27
-
28
-
29
-
30
-
31
-
32
-
33
-
34
-
35
-
36
-
37
 |
 |
