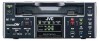
JVC BR-DV3000UB BR-DV3000U Pro-DV recorder 71 page instruction manual - Page 33
TDISPLAY menu FTIME CODE men Du
 |
UPC - 046838325595
View all JVC BR-DV3000UB manuals
Add to My Manuals
Save this manual to your list of manuals |
Page 33 highlights
MENU SCREEN - Contents of the menus - (continued) TIME CODE menu Items Setting Contents TC Presets the time code. For details, please refer to Page 36 "Presetting Time Codes". CLEAR ⅷ CANCEL Use this menu item to choose whether to clear the time code values. EXECUTE CANCEL : Do not clear EXECUTE : clear NDF/DF (NTSC ONLY) NDF ⅷ DF Select the framing mode for the time code generator. NDF : Sets the unit to the non-drop mode. Use this setting when the number of frames of the time code is important. DF : Sets the unit to the drop-frame mode. Use this setting for real-time based time codes. TC DUPLICATE ⅷ OFF AUTO NON DROP Use this menu item to select the type of time code to be recorded for DV signal input. OFF : Records the time codes of the built-in time code generator of the main unit. AUTO : Records the time code input to the DV IN terminal. The framing mode of the time code will be auto- matically set to the framing of the input time code. NON DROP : Records the time code input to the DV IN terminal. The framing mode of the time code will be fixed as non-drop framing. Use this setting when dubbing on tapes recorded with BR-DV600, GY-DV500, GY- DV550, or GY-DV700W in the non-drop frame mode. (NTSC only) TC ADJUST (DV) ⅷ OFF +1F +2F -2F -1F Use this menu item to set the timing to output time codes from the 9PIN REMOTE terminal of the main unit to the editing remote controller. OFF : Usually, this is selected. +1F : Sets the timing to 1 frame faster. +2F : Sets the timing to 2 frames faster. -2F : Sets the timing to 2 frames slower. Use this setting when editing video or audio using DV signals. -1F : Sets the timing to 1 frame slower. PAGE BACK Return to the TOP MENU. 62 DISPLAY menu The DISPLAY menu consists of 2 menus (1/2 and 2/2 menu) Ⅵ DISPLAY (1/2) menu Items Setting Contents DISPLAY OFF ⅷ ON AUTO Use this menu item to choose whether to have the characters of the status screen displayed on the monitor connected to VIDEO LINE OUT or Y/C OUT terminal. OFF : No on-screen display. Video display only. ON : Always provide on-screen display. AUTO : Provide on-screen display for about 4 seconds on switch- ing modes. Memo This setting can also be selected from the DISPLAY button of the wireless remote controller. COUNTER POSI. ⅷ LOWER-R LOWER-L UPPER-R UPPER-L CENTER Use this menu item to select the position on the monitor for time code display. LOWER-R : Lower right LOWER-L : Lower left UPPER-R : Upper right UPPER-L : Upper left CENTER : Center TIME CODE OFF ⅷ ON Use this menu item to turn on/off the display of time codes on the monitor. OFF : No display ON : Display VTR MODE OFF ⅷ ON Use this menu item to turn on/off the display of the VTR mode on the monitor. OFF : No display ON : Display TAPE REMAIN OFF ⅷ ON Use this menu item to turn on/off the display of remaining tape on the monitor. OFF : No display ON : Display TIME/DATE OFF TIME DATE ⅷ DATE +TM Use this menu item to turn on/off the date/time display on the moni- tor and to select the display format. OFF : No display of date/time. TIME : Display the time only. DATE : Display the date only. DATE +TM : Display the date/time. 63
-
 1
1 -
2
-
3
-
4
-
5
-
6
-
7
-
8
-
9
-
10
-
11
-
12
-
13
-
14
-
15
-
16
-
17
-
18
-
19
-
20
-
21
-
22
-
23
-
24
-
25
-
26
-
27
-
 28
28 -
 29
29 -
 30
30 -
 31
31 -
 32
32 -
 33
33 -
 34
34 -
 35
35 -
 36
36 -
 37
37
 |
 |
