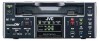
JVC BR-DV3000UB BR-DV3000U Pro-DV recorder 71 page instruction manual - Page 26
PLAYBACK, Repeat playback, Selecting playback audio output
 |
UPC - 046838325595
View all JVC BR-DV3000UB manuals
Add to My Manuals
Save this manual to your list of manuals |
Page 26 highlights
PLAYBACK - Repeat playback - This unit is capable of 3 types of repeat playback. The repeat playback function is set via the REPEAT MODE item of the SYSTEM (1/2) menu. SYSTEM (1/2) menu - - - SYSTEM [ 1 / 2 ] - - - STL / F . ADV BACKUP REC T I ME LONG PAUSE T I ME L ONG P AUS E MODE I NDEX WR I T E RE P E A T MODE NEXT PAGE PAGE BACK 2ND OFF 5M I N F . ADV ON BLANK Setting Ⅵ REPEAT MODE item of the SYSTEM (1/2) menu OFF :No repeat playback INDEX :Repeat playback between positions where index sig- nals are recorded. VIDEO END :Repeat playback from the beginning of the tape to the position where video signal recording ends. TAPE END :Repeat playback from the beginning to the end of the tape. INDEX repeat playback • If no index signal is detected during playback, the tape will run till the end. If no index signal is detected during rewind, the tape will rewind till the beginning. • If the interval between index signals is less than 1 minute, the function may not work well. Memo If there is dust adhered to the head, repeat playback may not work well. Operation 1. Press the REW button and rewind the tape to the beginning. 2. Press the PLAY button to begin replay. ¥ When it reaches the position set at the REPEAT MODE menu item, the tape rewinds and plays back again. Ⅵ To abort the repeat playback function, press the STOP button. Repeat operation TAPE END VIDEO END INDEX Playback Rewind Index signal Index signal Beginning of tape End of tape PLAYBACK - Selecting playback audio output - The output mode for audio playback can be selected with the remote controller. DISPLAY STILL BARS MODE BLANK MENU SEARCH+ AUDIO MUTING SET SEARCH- OUT SEL. OUT LEV. A.DUB PAUSE F.REV PLAY REC F.ADV REW FF STOP INDEX- INDEX+ REMOTE CONTROL UNIT RM-G3000 AUDIO MUTING button OUT SEL button OUT LEV button Memo • The output channel for playback audio of tapes recorded in the 32kHz mode can also be set via the AUDIO OUT SEL item of the AUDIO/ VIDEO menu of the main unit. • The audio output level can be set via the AUDIO OUT LEVEL item of the AUDIO/VIDEO menu. ☞ Page 61 "AUDIO/VIDEO menu" Ⅵ To turn the audio muting function ON/ OFF or to mute the EE audio, press the AUDIO MUTING button. To resume the audio output, press the button again. Ⅵ Selecting the audio output channel for playback of tapes recorded in the 32kHz mode. Each time the OUT SEL. button is pressed, the channel changes in the following sequence: CH1/CH2 CH3/CH4 MIX • CH3/CH4: CH3 audio is output via the CH1/3 AUDIO OUT terminal whereas CH4 audio is output via the CH2/4 AUDIO OUT terminal. • MIX: Sounds mixed from CH1 and CH3 are output via the CH1/3 AUDIO OUT terminal whereas Sounds mixed from CH2 and CH4 are output via the CH2/4 AUDIO OUT terminal. Note Depending on the sound source, noise may occur in the MIX mode. In this case, please use CH1/CH2 or CH3/CH4. Ⅵ Select the output level for audio playback Each time the OUT LEV button is pressed, the standard level for the output audio level changes. (NORMAL or ATT) • To play back tapes recorded at a standard level of -12dB (using a consumer DV device), set the output level to ATT. In so doing, the audio output level decreases. • To play back tapes recorded on this unit, set the output level to NORMAL. 48 49
-
 1
1 -
2
-
3
-
4
-
5
-
6
-
7
-
8
-
9
-
10
-
11
-
12
-
13
-
14
-
15
-
16
-
17
-
18
-
19
-
20
-
 21
21 -
 22
22 -
 23
23 -
 24
24 -
 25
25 -
 26
26 -
 27
27 -
 28
28 -
 29
29 -
 30
30 -
 31
31 -
32
-
33
-
34
-
35
-
36
-
37
 |
 |
