KitchenAid KDRP462LSS Use and Care Guide - Page 8
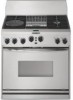
Single Oven Range
 |
View all KitchenAid KDRP462LSS manuals
Add to My Manuals
Save this manual to your list of manuals |
Page 8 highlights
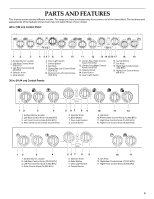
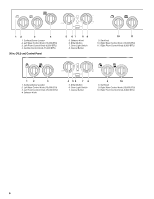
Single Oven Range 9 10 1 11 2 12 3 4 13 5 14 6 15 7 8 1. Surface Burner 2. Surface Burner Grate 3. Control Panel 4. Oven Vent 5. Gas Regulator (rear of unit) 6. Door Gasket 7. Bake Element (not visible) 8. Model and Serial Number Plate (located on center front frame, below oven cavity) 9. 2-Pin Connector (not shown; rear of unit not for consumer use - for factory test only) 10. Stainless Steel Backguard (Island Trim not shown) 11. Grille, Griddle, Center Burners or Filler Grate 12. Electronic Oven Control Display 13. Self-Cleaning Latch 14. Broil Element (not shown) 15. Oven Rack 8
-
 1
1 -
2
-
 3
3 -
 4
4 -
 5
5 -
 6
6 -
 7
7 -
 8
8 -
 9
9 -
 10
10 -
 11
11 -
 12
12 -
 13
13 -
14
-
15
-
16
-
17
-
18
-
19
-
20
-
21
-
22
-
23
-
24
-
25
-
26
-
27
-
28
-
29
-
30
-
31
-
32
-
33
-
34
-
35
-
36
-
37
-
38
-
39
-
40
-
41
-
42
-
43
-
44
-
45
-
46
-
47
-
48
-
49
-
50
-
51
-
52
 |
 |

8
Single Oven Range
1. Surface Burner
2. Surface Burner Grate
3. Control Panel
4. Oven Vent
5. Gas Regulator (rear of unit)
6. Door Gasket
7. Bake Element (not visible)
8. Model and Serial Number Plate (located on
center front frame, below oven cavity)
9. 2-Pin Connector (not shown; rear of unit -
not for consumer use - for factory test only)
10. Stainless Steel Backguard (Island Trim not
shown)
11. Grille, Griddle, Center Burners or Filler Grate
12. Electronic Oven Control Display
13. Self-Cleaning Latch
14. Broil Element (not shown)
15. Oven Rack
2
3
4
7
1
11
12
13
14
15
10
8
5
6
9