Konica Minolta bizhub PRO 1100 bizhub PRO 1100 Daily Maintenance Guide - Page 27
Both Sides Adjustment
 |
View all Konica Minolta bizhub PRO 1100 manuals
Add to My Manuals
Save this manual to your list of manuals |
Page 27 highlights
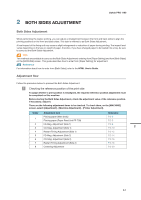
bizhub PRO 1100 2 BOTH SIDES ADJUSTMENT Both Sides Adjustment When performing the duplex printing, you can adjust a misalignment between the front and back sides to align the printing positions on the front and back sides. This task is referred to as Both Sides Adjustment. A heat impact of the fixing unit may cause a slight enlargement or reduction of paper during printing. The impact level varies depending on the type or weight of paper, therefore, if you have changed paper to be loaded into a tray, be sure to carry out the Both Sides Adjustment. Tips Two methods are available to carry out the Both Sides Adjustment: entering from [Paper Setting] and from [Both Sides] on the [MACHINE] screen. This guide describes how to enter from [Paper Setting] for adjustment. Reference For information about how to enter from [Both Sides], refer to the HTML User's Guide. Adjustment flow Follow the procedure below to proceed the Both Sides Adjustment. 1 Checking the reference position of the print side To judge whether a print position is misaligned, the required reference position adjustment must be completed on this machine. Before starting the Both Sides Adjustment, check the adjustment value of the reference position. If necessary, adjust it. There are the following adjustment items to be checked. To check them, on the [MACHINE] screen, select [Adjustment] - [Machine Adjustment] - [Printer Adjustment]. Order 1 2 3 4 5 6 7 8 Adjustment item Placing paper (Main body) Placing paper (Paper Feed Unit PF-709) FD-Mag. Adjustment (Side 1) CD-Mag. Adjustment (Side 1) Restart Timing Adjustment (Side 1) FD-Mag. Adjustment (Side 2) CD-Mag. Adjustment (Side 2) Restart Timing Adjustment (Side 2) Centering Adjustment Reference P.2-3 P.2-5 P.2-8 2 P.2-10 P.2-12 P.2-14 P.2-16 P.2-18 P.2-20 2-1
-
 1
1 -
2
-
3
-
4
-
5
-
6
-
7
-
8
-
9
-
10
-
11
-
12
-
13
-
14
-
15
-
16
-
17
-
18
-
19
-
20
-
21
-
 22
22 -
 23
23 -
 24
24 -
 25
25 -
 26
26 -
 27
27 -
 28
28 -
 29
29 -
 30
30 -
 31
31 -
 32
32 -
33
-
34
-
35
-
36
-
37
-
38
-
39
-
40
-
41
-
42
-
43
-
44
-
45
-
46
-
47
-
48
-
49
-
50
-
51
-
52
-
53
-
54
-
55
-
56
-
57
-
58
-
59
-
60
-
61
-
62
-
63
-
64
-
65
-
66
-
67
-
68
-
69
-
70
-
71
 |
 |
