Kyocera TASKalfa 3501i TASKalfa MFP Network Fax Driver Operation Guide Rev.201 - Page 33
FAX Number Internet FAX Address, Attach Cover
 |
View all Kyocera TASKalfa 3501i manuals
Add to My Manuals
Save this manual to your list of manuals |
Page 33 highlights
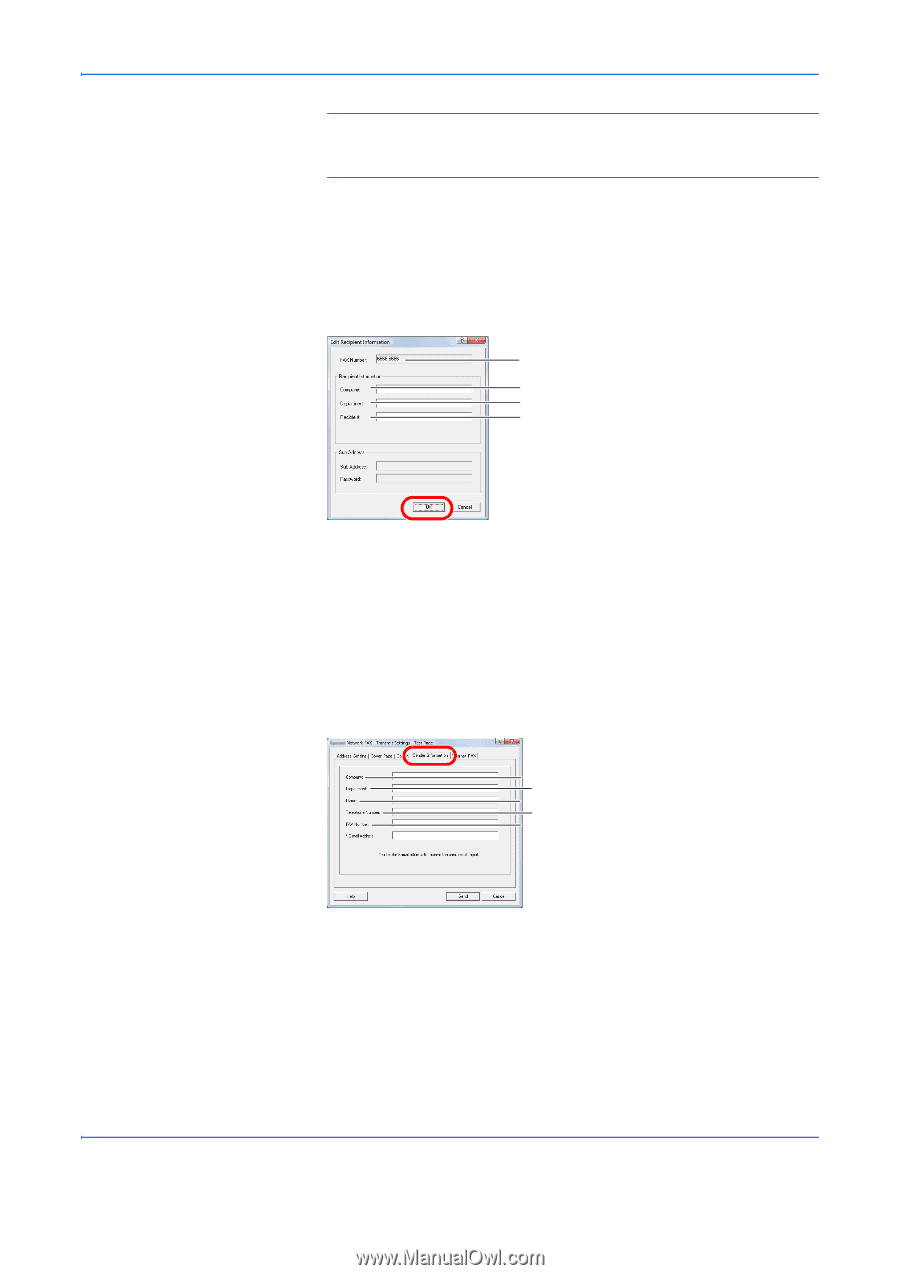
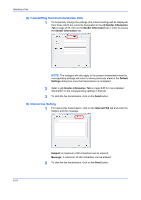
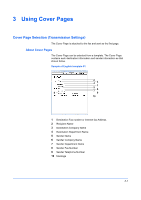
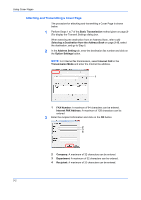
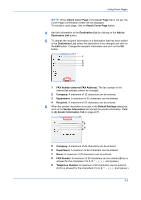
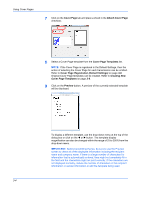
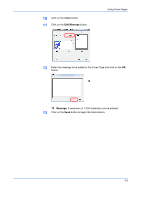
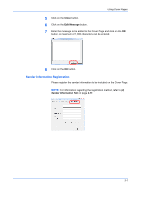
Using Cover Pages NOTE: When Attach Cover Page of the Cover Page Tab is not set, the Cover Page Confirmation screen will be displayed. To include a cover page, click on Attach Cover Page button. 4 Add this information to the Destination List by clicking on the Add to Destination List button. 5 To change the recipient information of a destination that has been added to the Destination List, select the destination to be changed and click on the Edit button. Change the recipient information and click on the OK button. 1 2 3 4 1 FAX Number (Internet FAX Address): The fax number or the Internet fax address cannot be changed. 2 Company: A maximum of 32 characters can be entered. 3 Department: A maximum of 32 characters can be entered. 4 Recipient: A maximum of 32 characters can be entered. 6 When the sender information is not set in the Default Settings dialog box, click on the Sender Information tab and set the sender information. Refer to (4) Sender Information Tab on page 2-11. 56 7 89 5 Company: A maximum of 64 characters can be entered. 6 Department: A maximum of 64 characters can be entered. 7 Name: A maximum of 32 characters can be entered. 8 FAX Number: A maximum of 20 characters can be entered (Entry is allowed for the characters 0 to 9 and spaces.) 9 Telephone Number: A maximum of 20 characters can be entered (Entry is allowed for the characters 0 to 9 and spaces.) 3-3
-
 1
1 -
2
-
3
-
4
-
5
-
6
-
7
-
8
-
9
-
10
-
11
-
12
-
13
-
14
-
15
-
16
-
17
-
18
-
19
-
20
-
21
-
22
-
23
-
24
-
25
-
26
-
27
-
 28
28 -
 29
29 -
 30
30 -
 31
31 -
 32
32 -
 33
33 -
 34
34 -
 35
35 -
 36
36 -
 37
37 -
 38
38 -
39
-
40
-
41
-
42
-
43
-
44
 |
 |