Lexmark 7675 User's Guide - Page 100
Printing photos from a digital camera using DPOF, Memory Card Detected, Print Photos
 |
UPC - 734646081443
View all Lexmark 7675 manuals
Add to My Manuals
Save this manual to your list of manuals |
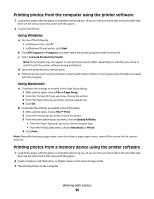
Page 100 highlights
12 Press or to set a color or black-and-white print. When you select color or black-only printing, the light nearest your choice comes on. 13 Press to print the photos. Note: To prevent smudging or scratching, avoid touching the printed surface with your fingers or sharp objects. For best results, remove each printed sheet individually from the paper exit tray, and then allow the prints to dry at least 24 hours before stacking, displaying, or storing. Printing photos from a digital camera using DPOF Digital Print Order Format (DPOF) is a feature available on some digital cameras. If your camera supports DPOF, then you can specify which photos to print, how many of each, and the print settings while the memory card is still in the camera. The printer recognizes these settings when you insert the memory card into the printer or connect the camera to the printer. Note: If you specify a photo size while the memory card is still in the camera, then make sure that the size of the paper loaded in the printer is not smaller than the size you specify in the DPOF selection. 1 Load photo paper with the glossy or printable side facing you. (If you are not sure which side is the printable side, then see the instructions that came with the paper.) 2 Insert a memory card. When the printer detects the memory card, the message Memory Card Detected appears on the printer control panel display. 3 Press the up or down arrow button until Print Photos is highlighted, and then press OK. 4 Press the up or down arrow button until Print Camera Selections (DPOF) is highlighted, and then press to print the photos. Note: To prevent smudging or scratching, avoid touching the printed surface with your fingers or sharp objects. For best results, remove each printed sheet individually from the paper exit tray, and allow the prints to dry at least 24 hours before stacking, displaying, or storing. Working with photos 100
-
 1
1 -
2
-
3
-
4
-
5
-
6
-
7
-
8
-
9
-
10
-
11
-
12
-
13
-
14
-
15
-
16
-
17
-
18
-
19
-
20
-
21
-
22
-
23
-
24
-
25
-
26
-
27
-
28
-
29
-
30
-
31
-
32
-
33
-
34
-
35
-
36
-
37
-
38
-
39
-
40
-
41
-
42
-
43
-
44
-
45
-
46
-
47
-
48
-
49
-
50
-
51
-
52
-
53
-
54
-
55
-
56
-
57
-
58
-
59
-
60
-
61
-
62
-
63
-
64
-
65
-
66
-
67
-
68
-
69
-
70
-
71
-
72
-
73
-
74
-
75
-
76
-
77
-
78
-
79
-
80
-
81
-
82
-
83
-
84
-
85
-
86
-
87
-
88
-
89
-
90
-
91
-
92
-
93
-
94
-
 95
95 -
 96
96 -
 97
97 -
 98
98 -
 99
99 -
 100
100 -
 101
101 -
 102
102 -
 103
103 -
 104
104 -
 105
105 -
106
-
107
-
108
-
109
-
110
-
111
-
112
-
113
-
114
-
115
-
116
-
117
-
118
-
119
-
120
-
121
-
122
-
123
-
124
-
125
-
126
-
127
-
128
-
129
-
130
-
131
-
132
-
133
-
134
-
135
-
136
-
137
-
138
-
139
-
140
-
141
-
142
-
143
-
144
-
145
-
146
-
147
-
148
-
149
-
150
-
151
-
152
-
153
-
154
-
155
-
156
-
157
-
158
-
159
-
160
-
161
-
162
-
163
-
164
-
165
-
166
-
167
-
168
-
169
-
170
-
171
-
172
-
173
-
174
-
175
-
176
-
177
-
178
-
179
-
180
-
181
 |
 |