Lexmark C524 Menus and Messages Guide - Page 50
<color> Cartridge low, Replace <color> cartridge - pc unit
 |
View all Lexmark C524 manuals
Add to My Manuals
Save this manual to your list of manuals |
Page 50 highlights
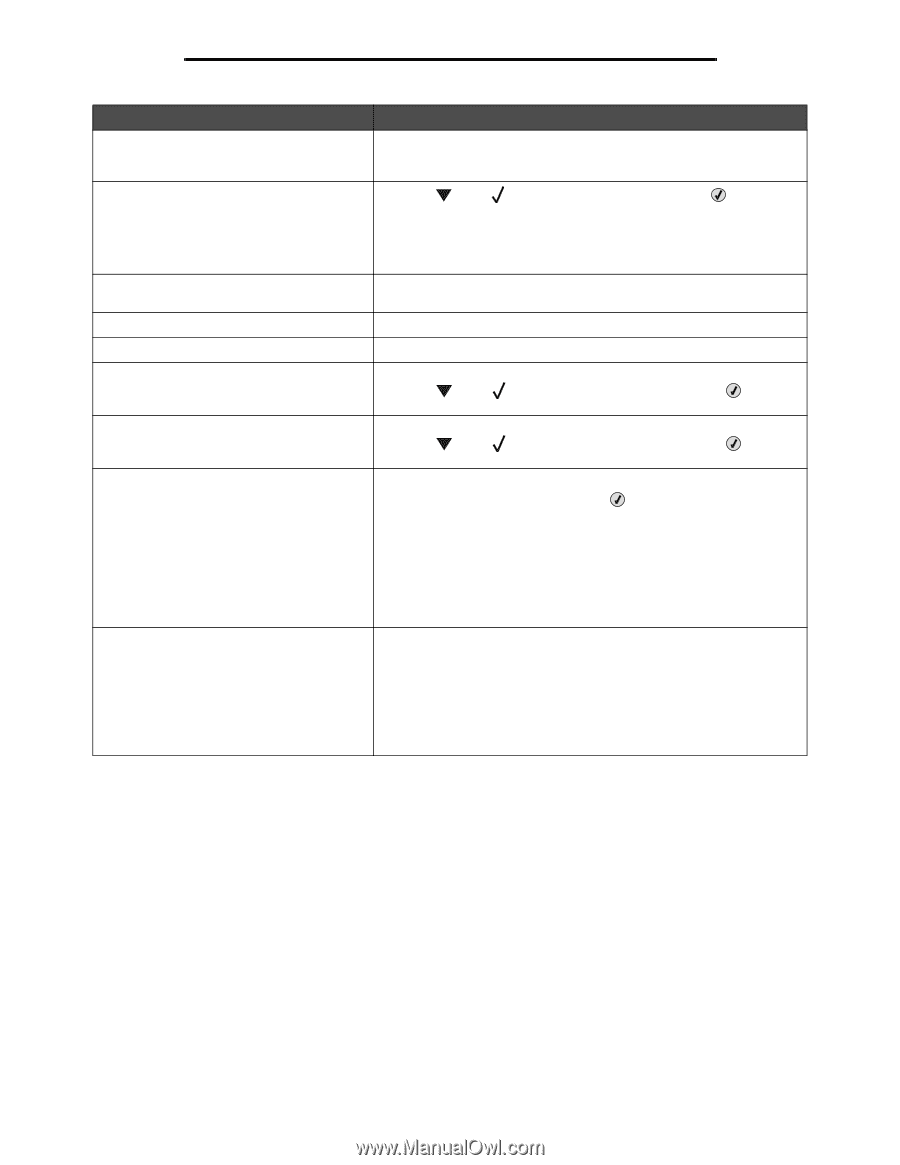
Understanding printer messages Message 83 Replace transfer belt 84 PC Unit life warning 84 Replace PC Unit 84 PC Unit missing 87 Fuser missing 88 Cartridge low 88 Replace cartridge 200.yy Paper jam 201.yy Paper jam 202.yy Paper jam 203.yy Paper jam 230.yy Paper jam 241.yy Paper jam 242.yy Paper jam 250.yy Paper jam 900-999 Service Action Replace the transfer belt using the instruction sheet that comes with the replacement transfer belt. Reset the printer internal counter for the transfer belt. • Press until Ignore appears, and then press to clear the message and continue printing. • Order the specified photoconductor unit. When print quality is reduced, install the new specified photoconductor unit using the instruction sheet that comes with the replacement specified photoconductor unit. Replace the specified photoconductor unit using the instruction sheet that comes with the replacement photoconductor unit. Insert the specified photoconductor unit. Insert the fuser. • Replace the specified toner cartridge. • Press until Continue appears, and then press the message and continue printing. to clear • Replace the specified toner cartridge. • Press until Continue appears, and then press the message and continue printing. to clear 1 Clear the paper path. 2 After clearing the paper path, press to resume printing. 1 Turn the printer off. 2 Unplug the power cord from the wall outlet. 3 Check all cable connections. 4 Connect the power cord to a properly grounded outlet. 5 Turn the printer back on. If the service message recurs, call for service, and report the message number and description of the problem. Understanding printer messages 50
-
 1
1 -
2
-
3
-
4
-
5
-
6
-
7
-
8
-
9
-
10
-
11
-
12
-
13
-
14
-
15
-
16
-
17
-
18
-
19
-
20
-
21
-
22
-
23
-
24
-
25
-
26
-
27
-
28
-
29
-
30
-
31
-
32
-
33
-
34
-
35
-
36
-
37
-
38
-
39
-
40
-
41
-
42
-
43
-
44
-
 45
45 -
 46
46 -
 47
47 -
 48
48 -
 49
49 -
 50
50 -
 51
51 -
 52
52 -
 53
53 -
 54
54 -
 55
55
 |
 |