Lexmark Multifunction Laser C78x - Setup Guide - Page 18
Removing the scanner top, User's Guide, MFP Software and Documentation
 |
View all Lexmark Multifunction Laser manuals
Add to My Manuals
Save this manual to your list of manuals |
Page 18 highlights
Step 8: Installing the scanner on a scanner shelf 3 Align the hinges on the scanner top with the slots in the scanner, and then lower the scanner top onto the scanner. For information on removing the scanner top, see "Removing the scanner top" in the User's Guide located on the4600 MFP Software and Documentation CD. 4 Connect the two scanner cables. Note: To prevent errors and scanner malfunction, make sure the scanner cable thumbscrews are tightened securely. Step 8: Installing the scanner on a scanner shelf 18
-
 1
1 -
2
-
3
-
4
-
5
-
6
-
7
-
8
-
9
-
10
-
11
-
12
-
 13
13 -
 14
14 -
 15
15 -
 16
16 -
 17
17 -
 18
18 -
 19
19 -
 20
20 -
 21
21 -
 22
22 -
 23
23 -
24
-
25
-
26
-
27
-
28
-
29
-
30
-
31
-
32
-
33
-
34
-
35
-
36
-
37
 |
 |
Step 8: Installing the scanner on a scanner shelf
18
Step 8: Installing the scanner on a scanner shelf
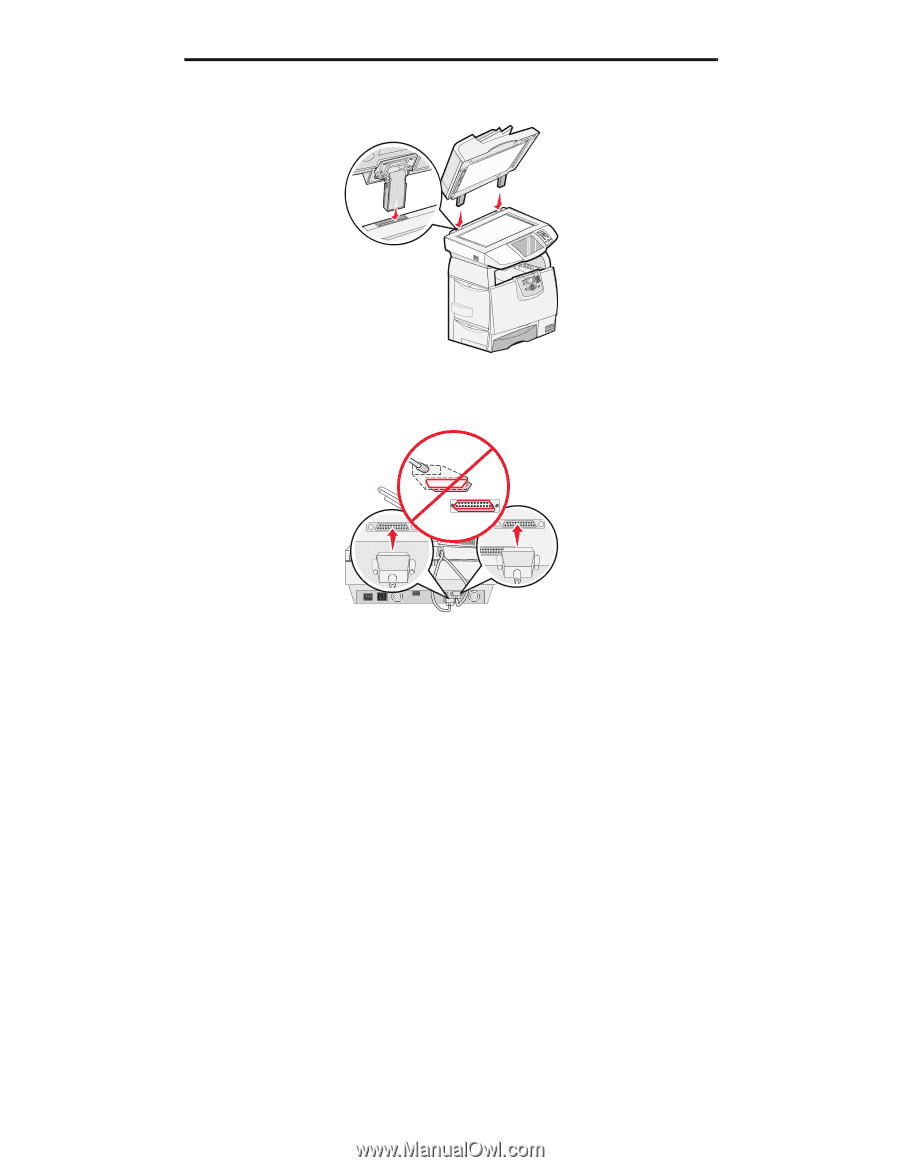
3
Align the hinges on the scanner top with the slots in the scanner, and then lower the scanner top onto the scanner.
For information on removing the scanner top, see “
Removing the scanner top
” in the
User’s Guide
located on
the
4600
MFP Software and Documentation
CD.
4
Connect the two scanner cables.
Note:
To prevent errors and scanner malfunction, make sure the scanner cable thumbscrews are tightened
securely.