Lexmark Multifunction Laser C78x - Setup Guide - Page 32
Step 15: Setting up fax and IP addresses, Fax setup, Performing manual fax setup - printer for business
 |
View all Lexmark Multifunction Laser manuals
Add to My Manuals
Save this manual to your list of manuals |
Page 32 highlights
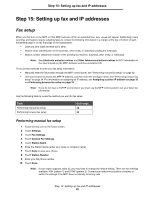
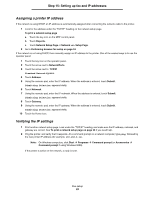
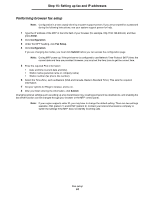
Step 15: Setting up fax and IP addresses Step 15: Setting up fax and IP addresses Fax setup When you first turn on the MFP or if the MFP has been off for an extended time, Set clock will appear. Additionally, many countries and regions require outgoing faxes to contain the following information in a margin at the top or bottom of each transmitted page or on the first page of the transmission: • Date and time (date and time fax is sent) • Station name (identification of the business, other entity, or individual sending the message) • Station number (telephone number of the sending fax machine, business, other entity, or individual) Note: See Electronic emission notices and Other telecommunications notices for FCC information in the User's Guide on the MFP Software and Documentation CD. There are two methods to enter your fax setup information: • Manually enter the information through the MFP control panel; see "Performing manual fax setup" on page 32. • Use your browser to access the MFP IP address, and then enter the Configure menu; see "Performing browser fax setup" on page 34. For information on assigning an IP address, see Assigning a printer IP address on page 33 and Performing browser fax setup on page 34. Note: If you do not have a TCP/IP environment, you must use the MFP control panel to set your basic fax information. Use the following table to locate the method you want for fax setup. Topic Performing manual fax setup Performing browser fax setup Go to page... 32 34 Performing manual fax setup 1 Touch the key icon on the home screen. 2 Touch Settings. 3 Touch Fax Settings. 4 Touch General Fax Settings. 5 Touch Station Name. 6 Enter the Station Name (enter your name or company name). 7 Touch Done to save your choice. 8 Touch Station Number. 9 Enter your fax phone number. 10 Touch Done. Note: If your region supports caller ID, you may have to change the default setting. There are two settings available; FSK (pattern 1) and DTMF (pattern 2). Contact your telecommunications company or switch the settings if the MFP does not identify incoming calls. Step 15: Setting up fax and IP addresses 32
-
 1
1 -
2
-
3
-
4
-
5
-
6
-
7
-
8
-
9
-
10
-
11
-
12
-
13
-
14
-
15
-
16
-
17
-
18
-
19
-
20
-
21
-
22
-
23
-
24
-
25
-
26
-
 27
27 -
 28
28 -
 29
29 -
 30
30 -
 31
31 -
 32
32 -
 33
33 -
 34
34 -
 35
35 -
 36
36 -
 37
37
 |
 |
