Lexmark T614 Setup Guide (1.4 MB) - Page 14
Installing a 5-Bin Mailbox
 |
UPC - 734646289009
View all Lexmark T614 manuals
Add to My Manuals
Save this manual to your list of manuals |
Page 14 highlights
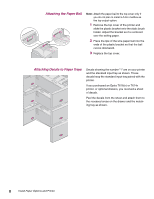
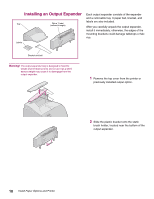
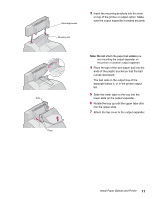
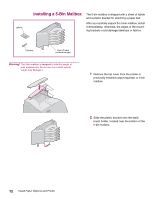
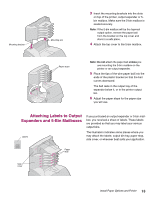
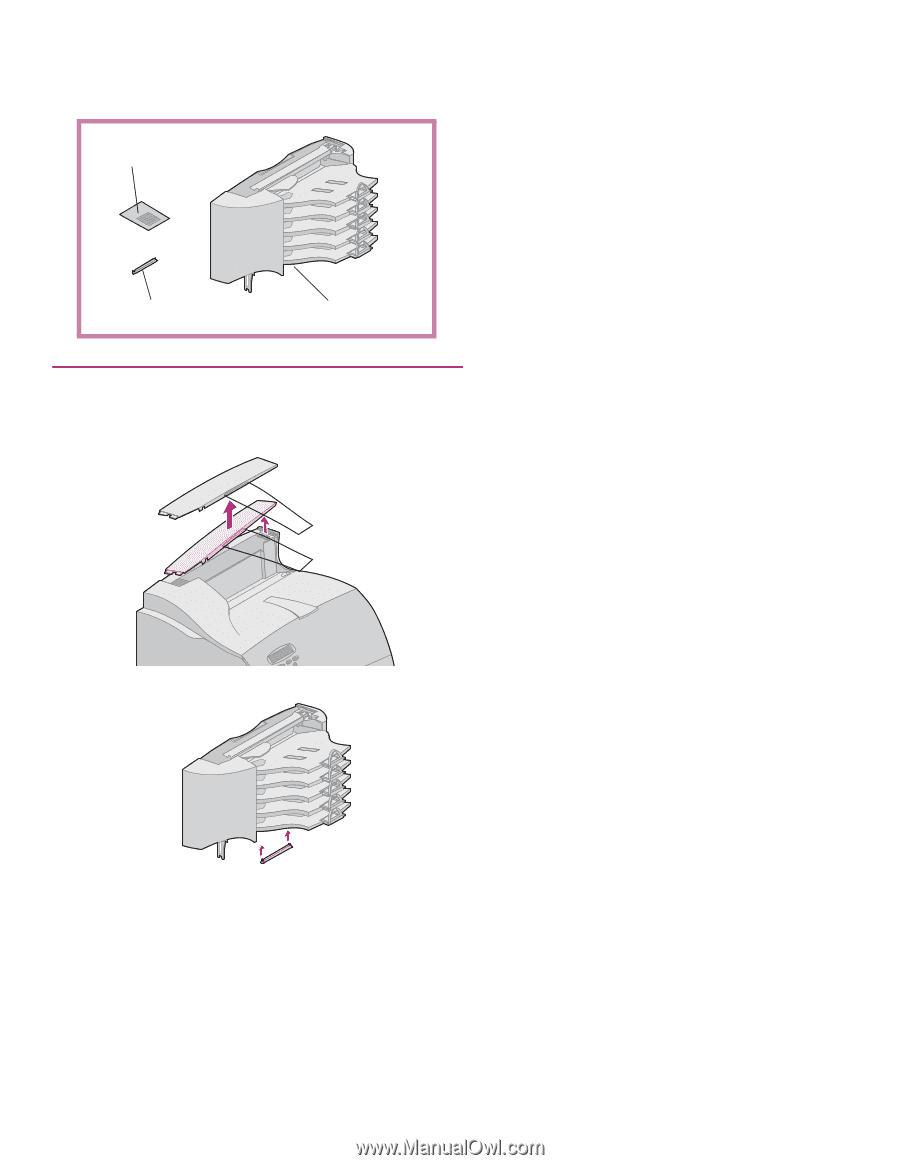
Labels Installing a 5-Bin Mailbox The 5-bin mailbox is shipped with a sheet of labels and a plastic bracket for attaching a paper bail. After you carefully unpack the 5-bin mailbox, install it immediately; otherwise, the edges of the mounting brackets could damage tabletops or fabrics. Bracket Optra T label (colored triangle) Warning! The 5-bin mailbox is designed to hold the weight of print material only. Do not use it as a shelf; excess weight may damage it. 1 Remove the top cover from the printer or previously installed output expander or 5-bin mailbox. 2 Slide the plastic bracket onto the static brush holder, located near the bottom of the 5-bin mailbox. 12 Install Paper Options and Printer
-
 1
1 -
2
-
3
-
4
-
5
-
6
-
7
-
8
-
 9
9 -
 10
10 -
 11
11 -
 12
12 -
 13
13 -
 14
14 -
 15
15 -
 16
16 -
 17
17 -
 18
18 -
 19
19 -
20
-
21
-
22
-
23
-
24
-
25
-
26
-
27
-
28
-
29
-
30
-
31
-
32
-
33
-
34
-
35
-
36
-
37
 |
 |
12
Install Paper Options and Printer
Installing a 5-Bin Mailbox
The 5-bin mailbox is shipped with a sheet of labels
and a plastic bracket for attaching a paper bail.
After you carefully unpack the 5-bin mailbox, install
it immediately; otherwise, the edges of the mount-
ing brackets could damage tabletops or fabrics.
Warning!
The 5-bin mailbox is designed to hold the weight of
print material only. Do not use it as a shelf; excess
weight may damage it.
1
Remove the top cover from the printer or
previously installed output expander or 5-bin
mailbox.
2
Slide the plastic bracket onto the static
brush holder, located near the bottom of the
5-bin mailbox.
Optra T label
(colored triangle)
Labels
Bracket