Lexmark T614 Setup Guide (1.4 MB) - Page 16
Installing a High-Capacity, Output Stacker, Installing the Envelope Feeder
 |
UPC - 734646289009
View all Lexmark T614 manuals
Add to My Manuals
Save this manual to your list of manuals |
Page 16 highlights
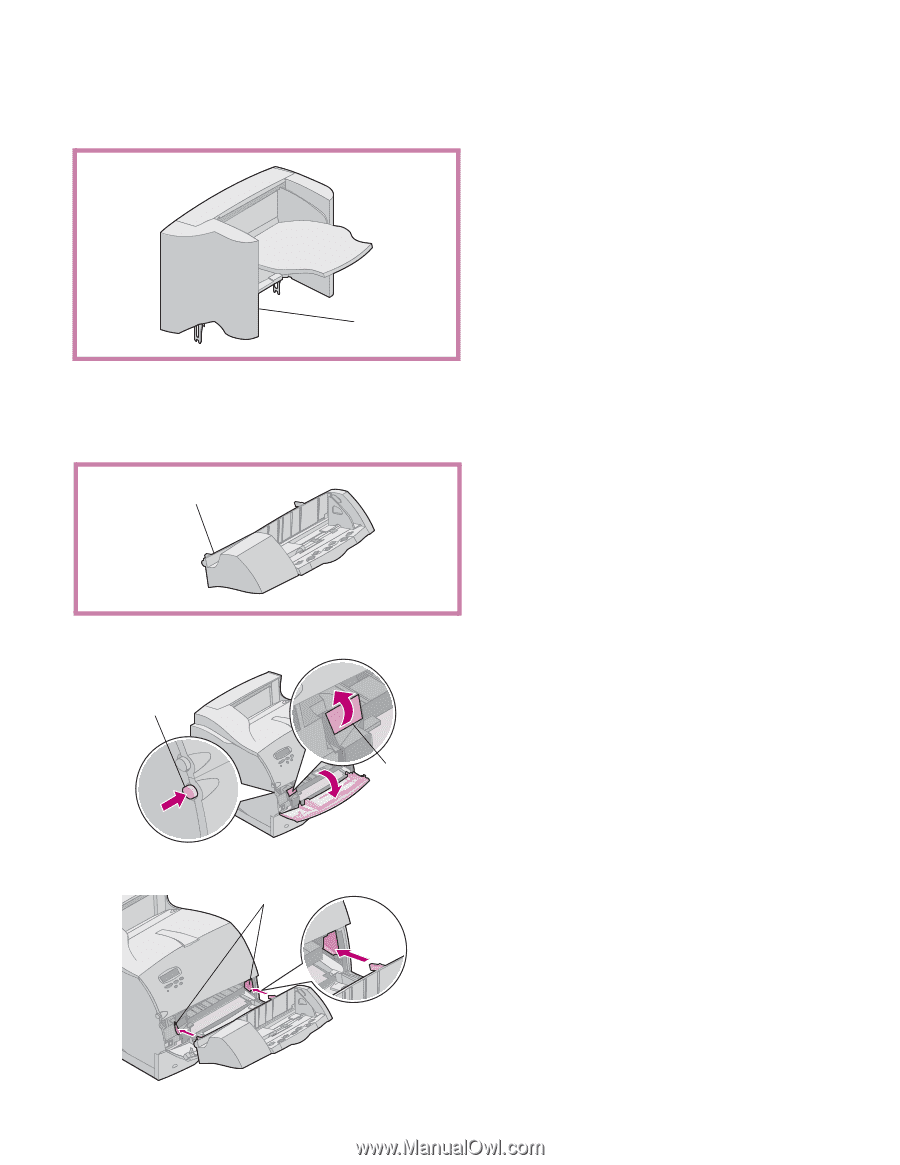
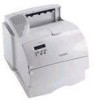
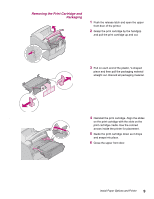
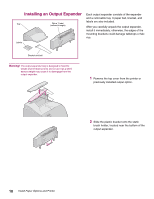
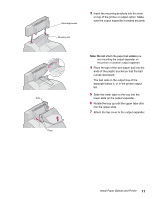
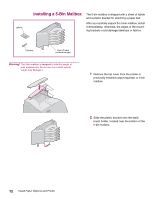
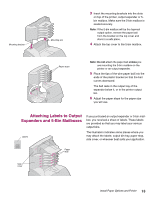
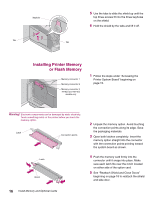
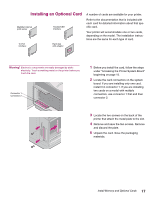
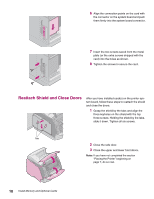
Installing a High-Capacity Output Stacker Optra T printer models T616(n), T614(n) and T612(n) support one high-capacity output stacker. The high-capacity output stacker is packaged with installation instructions. Optra T label (colored triangle) Installing the Envelope Feeder Optra T label (colored triangle) The envelope feeder attaches to the front of your printer behind the lower front door. It can be removed when you are not using it, making the printer more compact. Refer to the User's Guide, available on the Optra T Publications CD, for information on using the envelope feeder. Release latch Envelope feeder connector door 1 Push the release latch and open the lower front door of the printer. 2 Lift open the envelope feeder connector door. 3 Align the tabs on the envelope feeder with the slots on both sides of the printer and Slots gently push the envelope feeder into the opening until it snaps into place. The envelope feeder tilts downward at a slight angle when it is installed properly. 14 Install Paper Options and Printer
-
 1
1 -
2
-
3
-
4
-
5
-
6
-
7
-
8
-
9
-
10
-
 11
11 -
 12
12 -
 13
13 -
 14
14 -
 15
15 -
 16
16 -
 17
17 -
 18
18 -
 19
19 -
 20
20 -
 21
21 -
22
-
23
-
24
-
25
-
26
-
27
-
28
-
29
-
30
-
31
-
32
-
33
-
34
-
35
-
36
-
37
 |
 |