Lexmark T614 Setup Guide (1.4 MB) - Page 19
Installing an Optional Card - specifications
 |
UPC - 734646289009
View all Lexmark T614 manuals
Add to My Manuals
Save this manual to your list of manuals |
Page 19 highlights
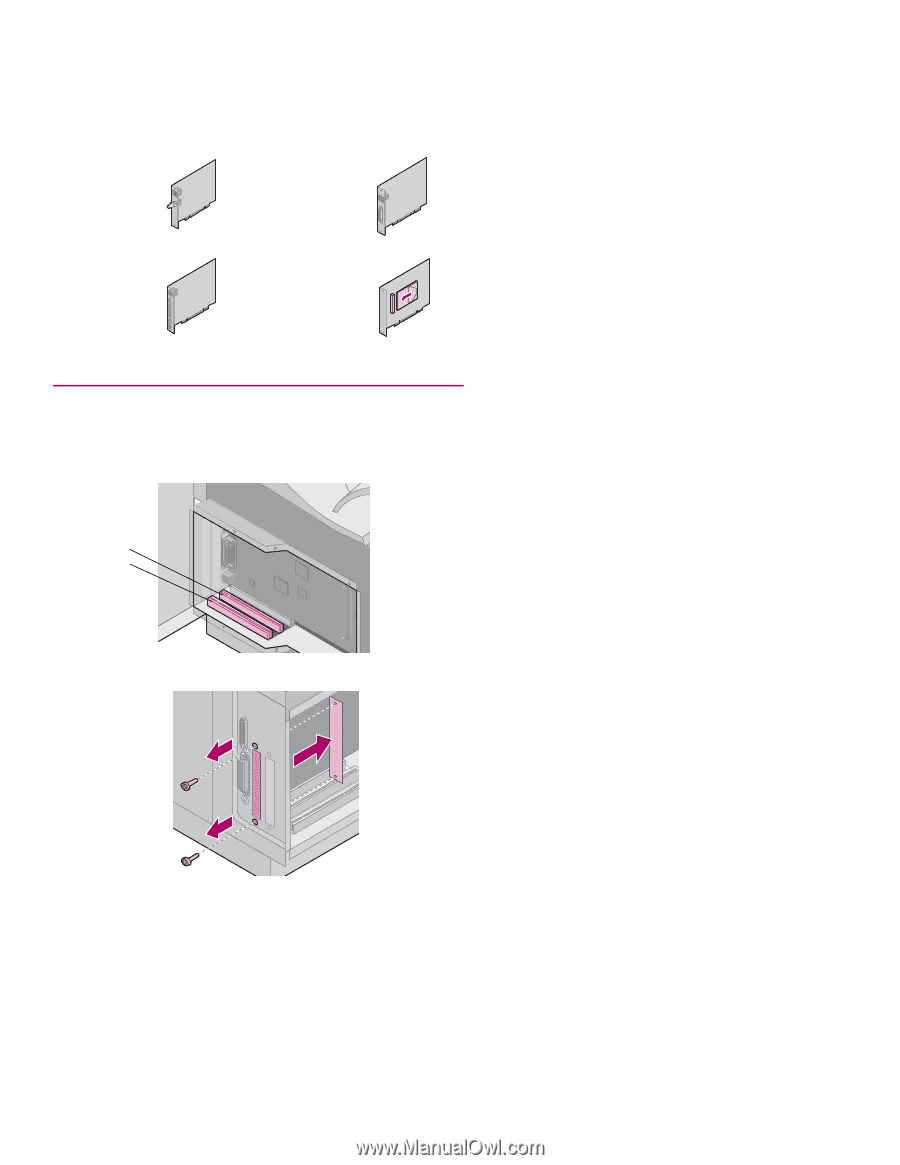
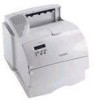
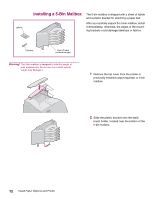
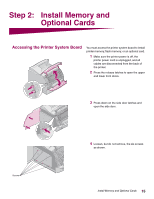
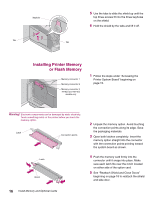
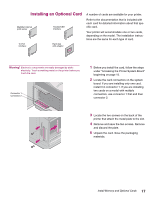
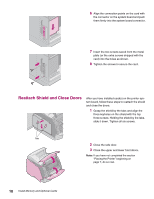
Installing an Optional Card MarkNet internal print server Parallel/USB interface Tri-Port interface Hard disk with adapter A number of cards are available for your printer. Refer to the documentation that is included with each card for detailed information about that specific card. Your printer will accommodate one or two cards, depending on the model. The installation instructions are the same for each type of card. Warning! Electronic components are easily damaged by static electricity. Touch something metal on the printer before you touch the card. Connector 1 Connector 2 1 Before you install the card, follow the steps under "Accessing the Printer System Board" beginning on page 15. 2 Locate the card connectors on the system board. If you are installing only one card, install it in connector 1. If you are installing two cards on a model with multiple connectors, use connector 1 first and then connector 2. 3 Locate the two screws on the back of the printer that attach the metal plate to the slot. 4 Remove and save the two screws. Remove and discard the plate. 5 Unpack the card. Save the packaging materials. Install Memory and Optional Cards 17
-
 1
1 -
2
-
3
-
4
-
5
-
6
-
7
-
8
-
9
-
10
-
11
-
12
-
13
-
 14
14 -
 15
15 -
 16
16 -
 17
17 -
 18
18 -
 19
19 -
 20
20 -
 21
21 -
 22
22 -
 23
23 -
 24
24 -
25
-
26
-
27
-
28
-
29
-
30
-
31
-
32
-
33
-
34
-
35
-
36
-
37
 |
 |