Lexmark T614 Setup Guide (1.4 MB) - Page 9
Placing the Printer
 |
UPC - 734646289009
View all Lexmark T614 manuals
Add to My Manuals
Save this manual to your list of manuals |
Page 9 highlights
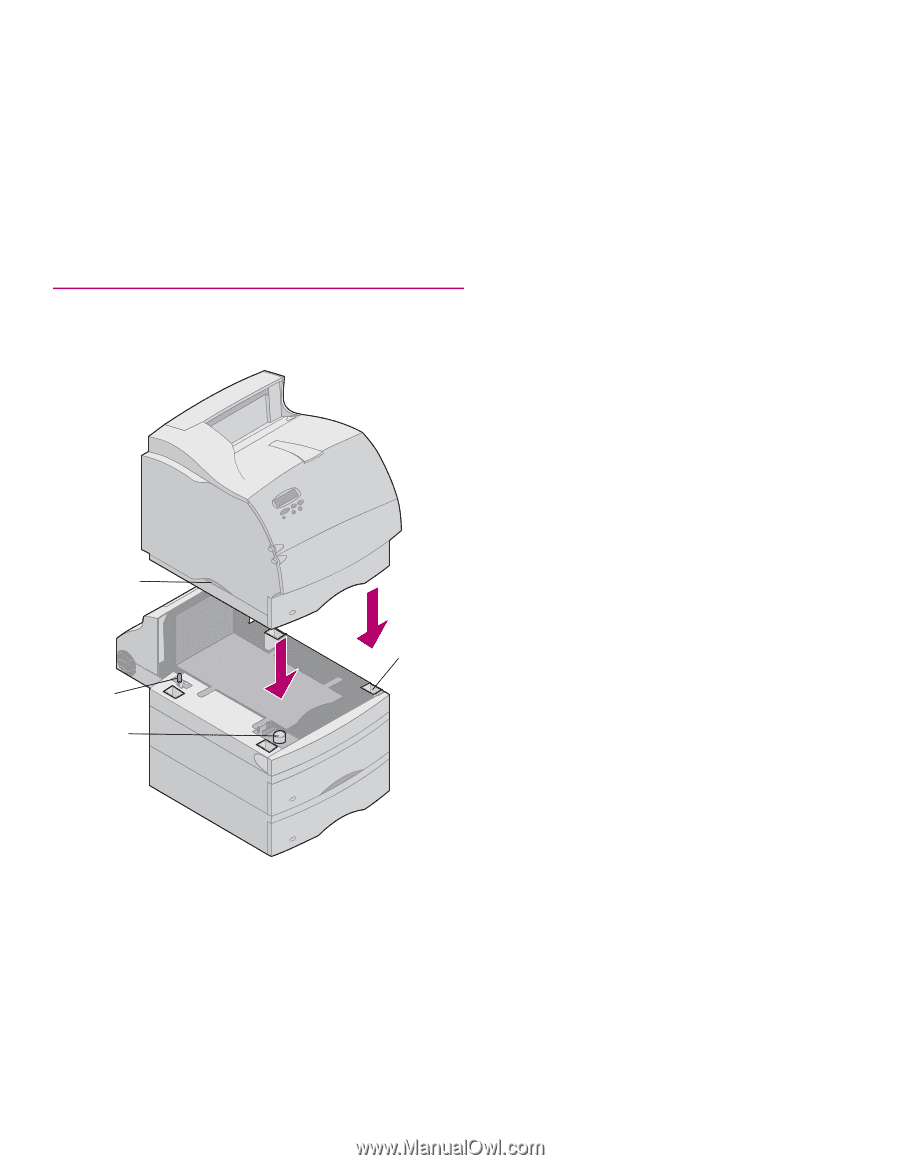
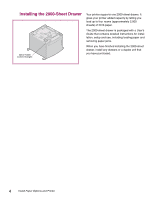
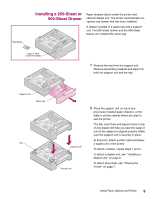
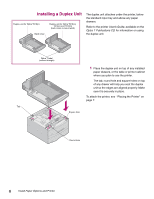
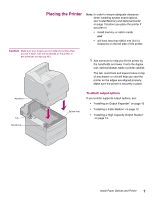
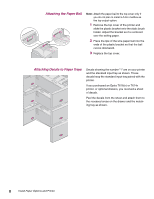
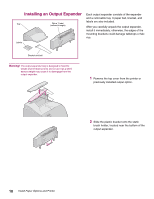
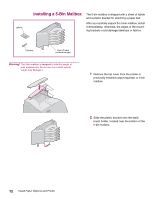
Placing the Printer Note: In order to ensure adequate clearance when installing system board options, see "Install Memory and Optional Cards" on page 15 before you place the printer if you plan to: • install memory or option cards and • will have less than 605.6 mm (24 in.) clearance on the left side of the printer. Caution! Make sure your fingers are not under the printer when you set it down. Use the handholds on the printer or ask someone to help you lift it. 1 Ask someone to help you lift the printer by the handholds and lower it onto the duplex unit, optional drawer, table or printer cabinet. The tab, round hole and square holes on top of any drawer or unit will help you seat the printer so the edges are aligned properly. Make sure the printer is securely in place. Handhold Tab Round hole Square hole To attach output options If your printer supports output options, see: • "Installing an Output Expander" on page 10 • "Installing a 5-Bin Mailbox" on page 12 • "Installing a High-Capacity Output Stacker" on page 14. Install Paper Options and Printer 7
-
 1
1 -
2
-
3
-
 4
4 -
 5
5 -
 6
6 -
 7
7 -
 8
8 -
 9
9 -
 10
10 -
 11
11 -
 12
12 -
 13
13 -
 14
14 -
15
-
16
-
17
-
18
-
19
-
20
-
21
-
22
-
23
-
24
-
25
-
26
-
27
-
28
-
29
-
30
-
31
-
32
-
33
-
34
-
35
-
36
-
37
 |
 |