Lexmark T620 Setup Guide - Page 10
are on your, Decals showing the number - printer drawers
 |
View all Lexmark T620 manuals
Add to My Manuals
Save this manual to your list of manuals |
Page 10 highlights
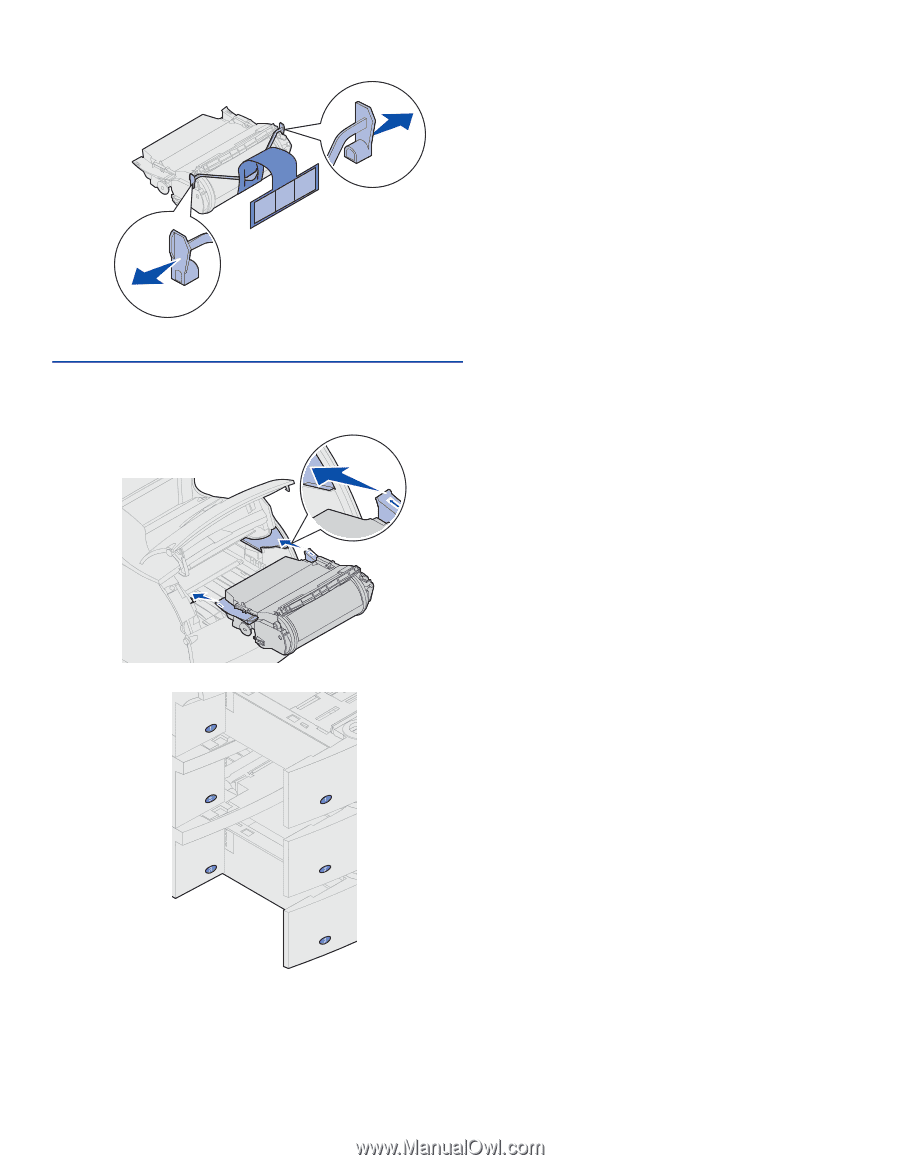
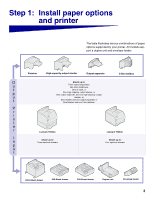
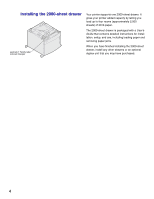
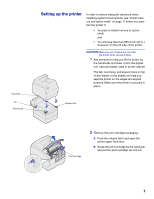
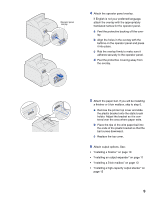
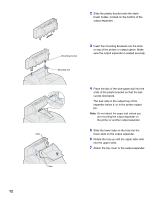
c Pull on each end of the plastic, V-shaped piece and then pull the packaging material straight out. Discard all packaging material. Warning! Never touch the photoconductor drum on the underside of the print cartridge. d Align the slides on the print cartridge with the slots on the print cartridge cradle. Use the colored arrows inside the printer for placement. e Guide the print cartridge down as it drops and snaps into place. f Close the upper front door. 3 Attach decals to the paper trays. Decals showing the number "1" are on your printer and the standard input tray. These decals keep the standard input tray paired with the printer. Peel the decals from the sheet and attach them to the recessed areas on the drawer and the matching tray. 8
-
 1
1 -
2
-
3
-
4
-
 5
5 -
 6
6 -
 7
7 -
 8
8 -
 9
9 -
 10
10 -
 11
11 -
 12
12 -
 13
13 -
 14
14 -
 15
15 -
16
-
17
-
18
-
19
-
20
-
21
-
22
-
23
-
24
-
25
-
26
-
27
-
28
-
29
-
30
-
31
-
32
-
33
-
34
-
35
-
36
-
37
-
38
 |
 |