Lexmark X5495 Fax Guide
Lexmark X5495 - Clr Inkjet P/s/c/f Adf USB 4800X1200 3.5PPM Manual
 |
UPC - 734646058568
View all Lexmark X5495 manuals
Add to My Manuals
Save this manual to your list of manuals |
Lexmark X5495 manual content summary:
- Lexmark X5495 | Fax Guide - Page 1
X5400 Series Fax Guide January 2008 www.lexmark.com - Lexmark X5495 | Fax Guide - Page 2
printer...5 Understanding the parts of the printer 7 Understanding the parts of the printer...7 Fax Setup 9 Getting the printer a digital phone service ...18 Using Fax manually...25 Setting a fax manual answer code...25 Using Caller ID from the control panel ...25 Using Caller ID from the software - Lexmark X5495 | Fax Guide - Page 3
reports...38 Ordering Cartridges 39 Ordering print cartridges...39 Troubleshooting 40 Setup Troubleshooting...40 Incorrect language appears on the display...40 Power button is not lit ...40 Software does not install...41 Removing and reinstalling the software ...42 Fax troubleshooting...43 Cannot - Lexmark X5495 | Fax Guide - Page 4
4 - Lexmark X5495 | Fax Guide - Page 5
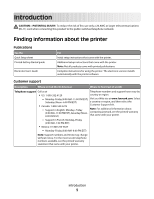
that came with the printer. Additional setup instructions that came with the printer. Note: Not all products come with printed publications. Complete instructions for using the printer. The electronic version installs automatically with the printer software. Customer support Description Where to - Lexmark X5495 | Fax Guide - Page 6
be free of defects in materials and or set forth at www.lexmark.com. printer. workmanship for a period of 12 1 Click CUSTOMER SUPPORT. months after the original date of purchase. 2 Click Warranty Information. 3 From the Statement of Limited Warranty section, click Inkjet & All-In-One Printers - Lexmark X5495 | Fax Guide - Page 7
Document Feeder (ADF) exit tray Hold paper as it exits the ADF. 8 Paper guide Keep paper straight when feeding. 9 Paper support Load paper. 10 Automatic Document Feeder (ADF) paper stop • Stop paper as it exits the ADF. • Support A4- and legal-size paper as it exits the ADF. 11 Scanner glass - Lexmark X5495 | Fax Guide - Page 8
unit Access the print cartridges. 2 Print cartridge carrier Install, replace, or remove a print cartridge. 3 USB port Connect the printer to a computer ), ISDN (integrated services digital network), or cable modem to the printer. 6 Power supply with port Connect the printer to a power source - Lexmark X5495 | Fax Guide - Page 9
equipment, use the telephone line adapter included in the box with the printer. 1 Connect one end of the telephone cord into the Line port of the printer. 2 Connect the adapter to the telephone line that came with the printer. Note: The UK adapter is shown. Your adapter may look different, but - Lexmark X5495 | Fax Guide - Page 10
the printer in the area shown while actively sending or receiving a fax. Country/region • Saudi Arabia • United Arab Emirates • Egypt • Bulgaria • Czech Republic • Belgium • Australia • South Africa • Greece • Israel • Hungary • Poland • Romania • Russia • Slovenia • Spain • Turkey Fax Setup 10 - Lexmark X5495 | Fax Guide - Page 11
not function properly. 2 Connect your telecommunications equipment directly to the EXT port on the back of the printer. Warning-Potential Damage: Do not touch cables or the printer in the area shown while actively sending or receiving a fax. Country/region • Germany • Austria • Switzerland Fax Setup - Lexmark X5495 | Fax Guide - Page 12
There is a plug installed in the EXT port of the printer. This plug is necessary for the proper functioning of the printer. Note: Do not printer with equipment such as a telephone, an answering machine, or a computer modem. If problems occur, see "Setup Troubleshooting" on page 40. Note: The printer - Lexmark X5495 | Fax Guide - Page 13
adapter." 1 Make sure you have the following: • A telephone • An answering machine • Three telephone cords • A telephone wall jack 2 Connect one telephone cord into the LINE port of the printer, and then plug it into an active telephone wall jack. 3 Remove the protective plug from the EXT port of - Lexmark X5495 | Fax Guide - Page 14
and receive faxes without using a computer. 1 Make sure you have a telephone cord and a telephone wall jack. 2 Connect one end of the telephone cord into the LINE port of the printer. 3 Connect the other end of the telephone cord into an active telephone wall jack. Connecting directly to a telephone - Lexmark X5495 | Fax Guide - Page 15
3 Connect the other end of the telephone cord into the N slot of an active telephone wall jack. 4 If you would like to use the same line for both fax and telephone communication, connect a second telephone line (not provided) between the telephone and the F slot of an active telephone wall jack. 5 - Lexmark X5495 | Fax Guide - Page 16
Connecting to a computer with a modem Connect the printer to a computer with a modem to send faxes from the software application. Note: Setup steps may vary depending on your country or region. For more information on connecting the printer to telecommunications equipment, see the related topic, " - Lexmark X5495 | Fax Guide - Page 17
topic, "Using an RJ11 adapter." 1 Make sure you have the following: • A telephone • Two telephone cords • A telephone wall jack 2 Connect one telephone cord to the LINE port of the printer, and then plug it into an active telephone wall jack. 3 Remove the protective plug from the EXT port of the - Lexmark X5495 | Fax Guide - Page 18
to a DSL filter or router that will support analog use. For more information, contact your DSL provider. • If you are using a PBX telephone service, make sure you are connecting to an analog connection on the PBX. If none exists, consider installing an analog telephone line for the fax machine - Lexmark X5495 | Fax Guide - Page 19
scan and then print photos, text documents, magazine articles, newspapers, and other publications. You can scan a document for faxing. 1 Make sure the computer and the printer are on. 2 Open the top cover. Using Fax 19 - Lexmark X5495 | Fax Guide - Page 20
the scanner glass. 1 If you are using A4- or letter-size paper, then pull up the Automatic Document Feeder (ADF) paper stop. 2 Adjust the paper guide on the Automatic Document Feeder (ADF) tray to the width of the original document. Using Fax 20 - Lexmark X5495 | Fax Guide - Page 21
(ADF) until you hear a beep. Document Loaded appears on the display, and the document feeds into the Automatic Document Feeder (ADF). Note: Preview is not supported when using the Automatic Document Feeder (ADF). You can preview one page at a time when using the scanner. Using Fax 21 - Lexmark X5495 | Fax Guide - Page 22
paper Make sure • You adjust the paper guide on the Automatic Document Feeder (ADF) not use media printed with metallic ink particles. • You avoid embossed of the fax number. • Enter a maximum of 64 digits in a fax number. • Press Pause / 99). Notes: • For instructions on how to add Speed Dial or Group - Lexmark X5495 | Fax Guide - Page 23
software You can scan a document to the computer and then fax it to someone using the software include up to 64 numbers, commas, . b Set a time and date. 10 If you want a paper copy of panel 1 Make sure the printer is on. 2 Load the Speed Dial or Group Dial list. For more information, see "Entering - Lexmark X5495 | Fax Guide - Page 24
manual dialing feature lets you dial a telephone number while listening to the call through a speaker on the printer. the time you want to send the fax. 9 Press . 10 If the printer is not set to the 24 hour mode, press or repeatedly list, the unsuccessful numbers will be dialed again. Using Fax 24 - Lexmark X5495 | Fax Guide - Page 25
printer receives the fax. Setting a fax manual answer code 1 From the desktop, double-click the Productivity Studio icon. 2 From the Settings area in the left pane of the Welcome screen, click Setup and manage faxes. 3 From the "I Want To" menu, click Adjust speed dial list service printer supports - Lexmark X5495 | Fax Guide - Page 26
. Using Caller ID from the software Caller ID is a service provided by some telephone companies that country or region is shown. The printer supports two distinct Caller ID patterns: Pattern the "I Want To" menu, click Adjust speed dial list and other fax settings. 4 Click the Ringing and Answering - Lexmark X5495 | Fax Guide - Page 27
printer detects a fax, it receives the fax and disconnects the answering machine. • If the printer printer does. For example, if you set the answering machine to answer calls after three rings, set the printer printer sends the fax to the designated fax number. • Print & forward-The printer list list. - Lexmark X5495 | Fax Guide - Page 28
or repeatedly until the setting you want appears. 6 Press , and follow the instructions on the display. Use this View Add Remove Modify Print To View Phone Book Speed Dial and Group Dial entries in the Phone Book. Note: For instructions on how to add Speed Dial or Group Dial entries to the Phone - Lexmark X5495 | Fax Guide - Page 29
Delete a Phone Book entry. Add a Phone Book entry to your Speed Dial or Group Dial list. Note: For more information on how to set up multiple Speed Dial and/or Group Dial and Settings. The Fax Solutions Software screen appears. 3 Click Adjust speed dial list and other fax settings. Using Fax 29 - Lexmark X5495 | Fax Guide - Page 30
. • Select a dialing volume. • Enter your name and fax number. Notes: - You can include a calling card number as part of the fax number. - Enter a maximum of 64 digits in a fax number. • Select the number of times you want the machine to redial and the time between those attempts if the fax cannot - Lexmark X5495 | Fax Guide - Page 31
Create, add to, edit, or delete entries from the Speed Dial list, including Group Dial entries. Choose and customize your fax cover page press repeatedly to return to the previous menus and make other setting selections. 10 Press Start Color or Start Black. Use this Quality* Phone Book To Adjust - Lexmark X5495 | Fax Guide - Page 32
ink levels. - Clean cartridges. - Align cartridges. - Print a test page. • Device Setup-Customize printer setup settings. • Defaults-Customize printer click Adjust speed dial list and other fax settings. 4 Click the Ringing and Answering tab. 5 From the Auto Answer drop-down list, select On. 6 Click - Lexmark X5495 | Fax Guide - Page 33
your name using the keypad. Note: You can enter a maximum of 20 characters. 10 Press to save the setting. 11 Press or repeatedly until Your Fax Number appears. 12 your fax number using the keypad. Note: You can enter a maximum of 64 numbers. 14 Press to save the setting. 15 Press twice. 16 Press or - Lexmark X5495 | Fax Guide - Page 34
On appears. 10 Press . 11 During the initial setup of your printer, you were screen, click Fax. The Fax Solution Software appears. 3 Click Tools Œ Preferences phone numbers: a Click Manage Block List. b Click New. c Enter a • A fax number can include up to 64 numbers, commas, periods, and/or these - Lexmark X5495 | Fax Guide - Page 35
this software to create and edit the Speed Dial list. 1 Open the program through one of these methods: Method 1 Method 2 a Do one of the following: a Do one of the following: • In Windows Vista, click . • In Windows Vista, click . • In Windows XP and earlier, click Start. • In Windows XP and - Lexmark X5495 | Fax Guide - Page 36
pages you can choose from. • View a fax history. • Change software preferences for fax lists. • Adjust fax settings. Help Locate information on faxing, fax settings single telephone line. If you subscribe to this service, you can program your printer to have a distinctive ring pattern and phone - Lexmark X5495 | Fax Guide - Page 37
, select the setting you want. 6 From the Auto Answer drop-down list, select On. 7 Click OK to save the setting. The Auto Answer light on the control panel comes on. When the number of rings you set is detected, the printer automatically receives the incoming fax. Setting up Speed Dial 1 From the - Lexmark X5495 | Fax Guide - Page 38
part of the fax number. • A fax number can include up to 64 numbers, commas, periods, spaces, and/or these symbols Printing fax activity screen, click Fax. The Fax Solution Software appears. 3 Click Tools Œ Create Report. 4 From the Display drop-down list, select Sent and Outgoing Faxes, Received, - Lexmark X5495 | Fax Guide - Page 39
28A 175 Black cartridge2 28 175 High yield black cartridge 34 500 Color cartridge 29A 150 Color cartridge2 29 150 High yield color cartridge 35 475 Photo cartridge 31 Not applicable 1 Values obtained by continuous printing. Declared yield value in accordance with ISO/IEC - Lexmark X5495 | Fax Guide - Page 40
until Language appears. 8 Press . 9 Press or repeatedly until the language you want appears on the display. 10 Press to save. Power button is not lit These are possible solutions. Try one or more of the following: PRESS POWER BUTTON Make sure the printer is on by pressing . Troubleshooting 40 - Lexmark X5495 | Fax Guide - Page 41
is not on, press . Software does not install These are possible solutions. Try one or more of the following: CHECK YOUR OPERATING SYSTEM The following operating systems are supported: Windows Vista, Windows XP, Windows 2000, and Mac OS X. Note: Windows 2000 users should use Service Pack 3 or later - Lexmark X5495 | Fax Guide - Page 42
Computer icon. In Windows XP, click Start to access the My Computer icon. 4 Double-click the CD-ROM drive icon. 5 If necessary, double-click setup.exe. 6 Follow the instructions on the computer screen to install the software. UNINSTALL AND REINSTALL SOFTWARE Uninstall the printer software, and then - Lexmark X5495 | Fax Guide - Page 43
Fax troubleshooting Cannot send or receive a fax These are possible solutions. Try one or more of the following: CHECK MESSAGES If an error message is displayed, follow the instructions on the display. MAKE SURE THE PRINTER IS ON If the light is not on, see "Power button is not lit" on page 40. - Lexmark X5495 | Fax Guide - Page 44
HAVE VOICE MAIL SERVICE? Voice mail offered through your local telephone company may disrupt fax transmissions. To enable both voice mail and the printer to answer calls: until the country or region where you are operating the printer appears. 10 Press to save the setting. Troubleshooting 44 - Lexmark X5495 | Fax Guide - Page 45
the Auto Answer light is on: • The printer will answer after the preset number of telephone rings. • If you are using a distinctive ring, see "Setting the distinctive ring" on page 36. CHECK INK Check the ink levels, and install a new cartridge if necessary. CHECK WHETHER FAX FORWARDING IS SELECTED - Lexmark X5495 | Fax Guide - Page 46
Dial" on page 37. • As an alternative, dial the telephone number manually. Be sure that printer is detecting a dial tone • See "Sending a fax while listening to Dial Method appears. 9 Press . 10 Press or repeatedly until Dial Behind PBX appears. 11 Press to save this setting. Troubleshooting 46 - Lexmark X5495 | Fax Guide - Page 47
been a problem with the quality of the telephone line connection. • Increase the fax scan resolution. CHECK INK Check the ink levels, and install a new print cartridge if necessary. Caller ID information is not displayed CALLER ID PATTERN MAY NOT BE SET CORRECTLY The printer supports two distinct - Lexmark X5495 | Fax Guide - Page 48
Error These are possible causes and solutions. Try one or more of the following: CHECK PHONE LINE Resend the fax. There may have been a problem Speed appears. 8 Press . 9 Press or repeatedly until a lower speed appears. 10 Press . Notes: • The lower the transmission speed, the longer it will take - Lexmark X5495 | Fax Guide - Page 49
problem persists, repeat the previous steps to send the fax at successively lower transmission speeds. Note: 2400 bps is the lowest transmission speed. Phone Line Busy These are possible causes and solutions. Try one or more of the following: CHANGE REDIAL SETTINGS The printer 24. Troubleshooting 49 - Lexmark X5495 | Fax Guide - Page 50
Line Error These are possible causes and solutions. Try one or more of the following: REVIEW DIGITAL PHONE SERVICE CHECKLIST The fax modem is an analog device. Certain devices can be connected to the printer so that digital telephone services can be used. • If you are using an ISDN telephone service - Lexmark X5495 | Fax Guide - Page 51
include technical inaccuracies or typographical errors. Changes are periodically made services, except those expressly designated by the manufacturer, are the user's responsibility. For Lexmark technical support, visit support.lexmark.com. For information on supplies and downloads, visit www.lexmark - Lexmark X5495 | Fax Guide - Page 52
and any accompanying documentation provided under this agreement are commercial computer software and documentation developed exclusively at private expense. Trademarks Lexmark and Lexmark with diamond design are trademarks of Lexmark International, Inc., registered in the United States and/or other
-
 1
1 -
 2
2 -
 3
3 -
 4
4 -
 5
5 -
 6
6 -
 7
7 -
8
-
9
-
10
-
11
-
12
-
13
-
14
-
15
-
16
-
17
-
18
-
19
-
20
-
21
-
22
-
23
-
24
-
25
-
26
-
27
-
28
-
29
-
30
-
31
-
32
-
33
-
34
-
35
-
36
-
37
-
38
-
39
-
40
-
41
-
42
-
43
-
44
-
45
-
46
-
47
-
48
-
49
-
50
-
51
-
52
 |
 |

X5400 Series Fax Guide
January 2008
www.lexmark.com