Lexmark X5495 Fax Guide - Page 28
Using the Phone Book, Using the control panel Phone Book
 |
UPC - 734646058568
View all Lexmark X5495 manuals
Add to My Manuals
Save this manual to your list of manuals |
Page 28 highlights
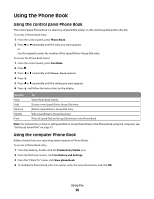
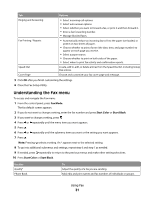
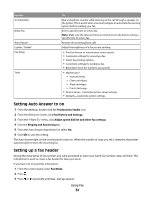
Using the Phone Book Using the control panel Phone Book The control panel Phone Book is a directory of Speed Dial entries (1-89) and Group Dial entries (90-99). To access a Phone Book entry: 1 From the control panel, press Phone Book. 2 Press or repeatedly until the entry you want appears. or Use the keypad to enter the number of the Speed Dial or Group Dial entry. To access the Phone Book menu: 1 From the control panel, press Fax Mode. 2 Press . 3 Press or repeatedly until Phone Book appears. 4 Press . 5 Press or repeatedly until the setting you want appears. 6 Press , and follow the instructions on the display. Use this View Add Remove Modify Print To View Phone Book entries. Create a new Speed Dial or Group Dial entry. Delete a Speed Dial or Group Dial entry. Edit a Speed Dial or Group Dial entry. Print all Speed Dial and Group Dial entries in the Phone Book. Note: For instructions on how to add Speed Dial or Group Dial entries to the Phone Book using the computer, see "Setting up Speed Dial" on page 37. Using the computer Phone Book Address books from your operating system appear as Phone Books. To access a Phone Book entry: 1 From the desktop, double-click the Productivity Studio icon. 2 From the Welcome Screen, click Fax History and Settings. 3 From the "I Want To" menu, click View phonebook. 4 To modify the Phone Book, select an option, enter the new information, and click OK. Using Fax 28
-
 1
1 -
2
-
3
-
4
-
5
-
6
-
7
-
8
-
9
-
10
-
11
-
12
-
13
-
14
-
15
-
16
-
17
-
18
-
19
-
20
-
21
-
22
-
 23
23 -
 24
24 -
 25
25 -
 26
26 -
 27
27 -
 28
28 -
 29
29 -
 30
30 -
 31
31 -
 32
32 -
 33
33 -
34
-
35
-
36
-
37
-
38
-
39
-
40
-
41
-
42
-
43
-
44
-
45
-
46
-
47
-
48
-
49
-
50
-
51
-
52
 |
 |