Lexmark X5495 Fax Guide - Page 13
Connecting to an answering machine, Connect one telephone cord into the LINE port
 |
UPC - 734646058568
View all Lexmark X5495 manuals
Add to My Manuals
Save this manual to your list of manuals |
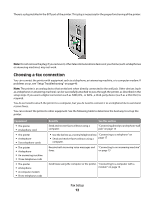
Page 13 highlights
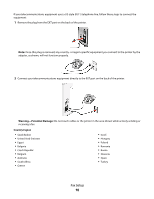
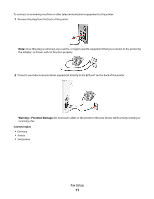
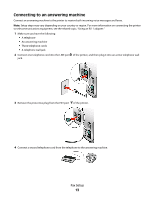
Connecting to an answering machine Connect an answering machine to the printer to receive both incoming voice messages and faxes. Note: Setup steps may vary depending on your country or region. For more information on connecting the printer to telecommunications equipment, see the related topic, "Using an RJ11 adapter." 1 Make sure you have the following: • A telephone • An answering machine • Three telephone cords • A telephone wall jack 2 Connect one telephone cord into the LINE port of the printer, and then plug it into an active telephone wall jack. 3 Remove the protective plug from the EXT port of the printer. 4 Connect a second telephone cord from the telephone to the answering machine. Fax Setup 13
-
 1
1 -
2
-
3
-
4
-
5
-
6
-
7
-
 8
8 -
 9
9 -
 10
10 -
 11
11 -
 12
12 -
 13
13 -
 14
14 -
 15
15 -
 16
16 -
 17
17 -
 18
18 -
19
-
20
-
21
-
22
-
23
-
24
-
25
-
26
-
27
-
28
-
29
-
30
-
31
-
32
-
33
-
34
-
35
-
36
-
37
-
38
-
39
-
40
-
41
-
42
-
43
-
44
-
45
-
46
-
47
-
48
-
49
-
50
-
51
-
52
 |
 |
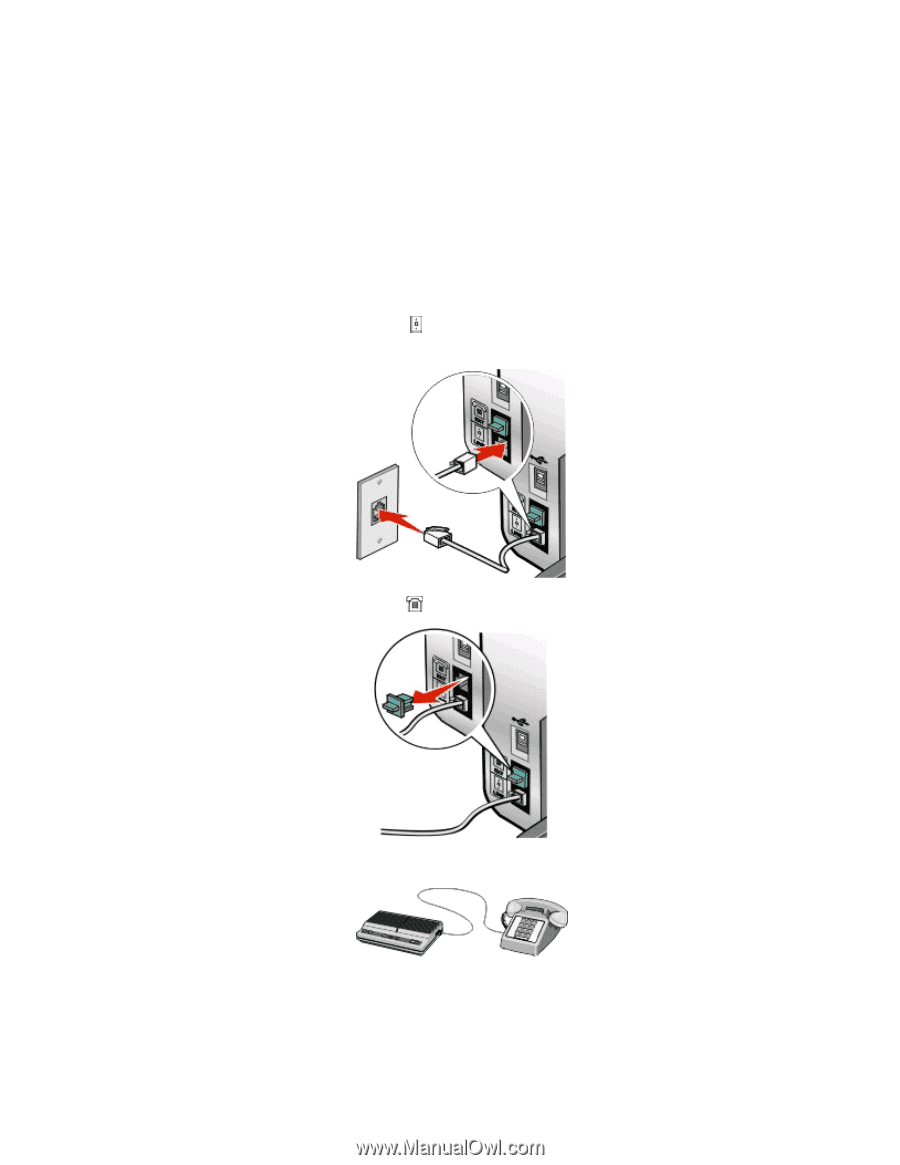
Connecting to an answering machine
Connect an answering machine to the printer to receive both incoming voice messages and faxes.
Note:
Setup steps may vary depending on your country or region. For more information on connecting the printer
to telecommunications equipment, see the related topic, “Using an RJ11 adapter.”
1
Make sure you have the following:
•
A telephone
•
An answering machine
•
Three telephone cords
•
A telephone wall jack
2
Connect one telephone cord into the LINE port
of the printer, and then plug it into an active telephone wall
jack.
3
Remove the protective plug from the EXT port
of the printer.
4
Connect a second telephone cord from the telephone to the answering machine.
Fax Setup
13