Linksys EFG250 /en/US/docs/storage/nass/csbcdp/efg250/user/guide/EFG250_V2_use
Linksys EFG250 - EtherFast NAS Server Manual
 |
UPC - 745883559220
View all Linksys EFG250 manuals
Add to My Manuals
Save this manual to your list of manuals |
Linksys EFG250 manual content summary:
- Linksys EFG250 | /en/US/docs/storage/nass/csbcdp/efg250/user/guide/EFG250_V2_use - Page 1
® A Division of Cisco Systems, Inc. EtherFast® Network Attached Storage 250GB with PrintServer User Guide WIRED Model No. EFG250 - Linksys EFG250 | /en/US/docs/storage/nass/csbcdp/efg250/user/guide/EFG250_V2_use - Page 2
Linksys is a registered trademark or trademark of Cisco Systems, Inc. and/or its affiliates in the U.S. and certain other countries. Copyright © 2005 Cisco reproductive harm. Wash hands after handling. How to Use this Guide Your guide to the Network Attached Storage has been designed to make - Linksys EFG250 | /en/US/docs/storage/nass/csbcdp/efg250/user/guide/EFG250_V2_use - Page 3
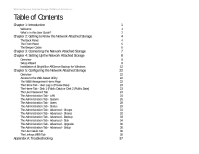
The Home Tab - User Log in (Private Data) 23 The Home Tab - Disk 1 (Public Data) or Disk 2 (Public Data) 23 The User Password Tab 24 The - Advanced - Upgrade 36 The Administration Tab - Advanced - Setup 36 The User Guide Tab 36 The Linksys WEB Tab 36 Appendix A: Troubleshooting 37 - Linksys EFG250 | /en/US/docs/storage/nass/csbcdp/efg250/user/guide/EFG250_V2_use - Page 4
EtherFast Network Attached Storage (250GB with PrintServer) Appendix B: Installing a Second Hard Drive 39 Appendix C: Setting Up the Built-in PrintServer 43 Appendix D: Windows Help 48 Appendix E: Glossary 49 Appendix F: Specifications 51 Appendix G: Warranty Information 52 Appendix H: - Linksys EFG250 | /en/US/docs/storage/nass/csbcdp/efg250/user/guide/EFG250_V2_use - Page 5
Power Adapter 7 Figure 4-1: Setup Wizard's Welcome Screen 8 Figure 4-2: Select the Network Attached Storage 8 Figure 4-3: IP Settings Screen 9 Figure 4-4: Fixed IP Address Figure 4-15: License Key Entry Screen 14 Figure Screen 15 Figure 4-19: Set Password Screen 16 Figure 4-20: System - Linksys EFG250 | /en/US/docs/storage/nass/csbcdp/efg250/user/guide/EFG250_V2_use - Page 6
User Password Tab 24 Figure 5-6: Login Screen 24 Figure 5-7: Administration Tab - LAN 25 Figure 5-8: Administration Tab - System 26 Figure 5-9: Secure IP Address Administration Tab - Advanced - Upgrade 36 Figure B-1: Attach IDE Cable 39 Figure B-2: Attach Power Cable 39 Figure B-3: Make - Linksys EFG250 | /en/US/docs/storage/nass/csbcdp/efg250/user/guide/EFG250_V2_use - Page 7
Double-Click Add Printer Icon 44 Figure C-4: Welcome to the Add Printer Wizard Screen 44 Figure C-5: Local or Network Printer Screen 45 Figure C-6: Locate Your Printer Screen 45 Figure C-7: Need Printer Driver Installed 45 Figure C-8: Select Your Printer 46 Figure C-9: Completing the Add - Linksys EFG250 | /en/US/docs/storage/nass/csbcdp/efg250/user/guide/EFG250_V2_use - Page 8
and downloading files either via a web browser or by FTP. Files can be available publicly, or create password-protected accounts for your authorized users. The Network Attached Storage is a fast, powerful, flexible and economical addition to your network. Use the instructions in this User Guide to - Linksys EFG250 | /en/US/docs/storage/nass/csbcdp/efg250/user/guide/EFG250_V2_use - Page 9
its Web-based Utility. • Appendix A: Troubleshooting This appendix describes some potential problems and solutions, as well as frequently asked questions, regarding installation and use of the Network Attached Storage. • Appendix B: Installing a Second Hard Drive This appendix helps you install - Linksys EFG250 | /en/US/docs/storage/nass/csbcdp/efg250/user/guide/EFG250_V2_use - Page 10
Regulatory Information This appendix supplies the Network Attached Storage's regulatory information. • Appendix I: Contact Information This appendix provides contact information for a variety of Linksys resources, including Technical Support. Chapter 1: Introduction 3 What's in this User Guide? - Linksys EFG250 | /en/US/docs/storage/nass/csbcdp/efg250/user/guide/EFG250_V2_use - Page 11
for three seconds. The IP address will be reset to the default value of 192.168.1.77, with a subnet mask of 255.255.255.0, and the password will be reset to its default, admin. After the reset has occurred, the Network Attached Storage will beep once. Connect the power adapter here. IMPORTANT: Never - Linksys EFG250 | /en/US/docs/storage/nass/csbcdp/efg250/user/guide/EFG250_V2_use - Page 12
information about network activity, and power button are located on the front panel. Ready/Status Green or Orange. This LED is solidly lit green when the Network Attached Storage is working properly. It flashes during start-up, shutdown, any self-test, or a firmware upgrade. If the LED is orange - Linksys EFG250 | /en/US/docs/storage/nass/csbcdp/efg250/user/guide/EFG250_V2_use - Page 13
server has responded to the DHCP client's request for an IP address. 3 Beeps When this is repeated every 15 seconds for three minutes, it signals that the Network Attached Storage's hard drive usage exceeds 98% of total capacity. 5 Beeps When this is repeated every 15 seconds for three minutes - Linksys EFG250 | /en/US/docs/storage/nass/csbcdp/efg250/user/guide/EFG250_V2_use - Page 14
supplied power adapter into the Network Attached Storage's power port. Then plug the power adapter into an electrical outlet, preferably a surge protector. 4. Press the power the Network Attached Storage repeatedly beeps, then there is a hardware problem. Review the descriptions of the beeper codes - Linksys EFG250 | /en/US/docs/storage/nass/csbcdp/efg250/user/guide/EFG250_V2_use - Page 15
is the letter of your CD-ROM drive) in the field that appears. Then press the Enter key. 3. The Welcome screen provides you with these options: Setup. Click the Setup button to continue with the setup procedure. User Guide. Clicking on this opened this User Guide. LINKSYS Web. Click this to visit - Linksys EFG250 | /en/US/docs/storage/nass/csbcdp/efg250/user/guide/EFG250_V2_use - Page 16
the same LAN segment as the PC running the Setup Wizard. • Subnet Mask. Enter the Subnet Mask in the fields. It must match the Subnet Mask of the other devices on your network. It is set by default to 255.255.255.0. • Gateway. Enter the IP address of your network gateway, which is usually your - Linksys EFG250 | /en/US/docs/storage/nass/csbcdp/efg250/user/guide/EFG250_V2_use - Page 17
router or gateway assigning IP addresses. • Start IP Address. Enter the starting IP address of the range you want to assign. • Finish IP Address. Enter the last IP address of the range you Chapter 4: Setting Up the Network Attached Storage Setup Wizard Figure 4-6: Time and Date Settings Screen 10 - Linksys EFG250 | /en/US/docs/storage/nass/csbcdp/efg250/user/guide/EFG250_V2_use - Page 18
data. If you want to install the BrightStor ARCserve Backup for Windows software, proceed to the next section. Figure 4-7: Review Settings Screen Figure 4-8: Confirm New Settings will be Saved Chapter 4: Setting Up the Network Attached Storage Setup Wizard Figure 4-9: Congratulations Screen 11 - Linksys EFG250 | /en/US/docs/storage/nass/csbcdp/efg250/user/guide/EFG250_V2_use - Page 19
EtherFast Network Attached Storage (250GB with PrintServer) Installation of BrightStor ARCserve Backup for Windows 1. You will see the InstallAnywhere screen while the installation is being prepared. 2. When you see the screen for the Network Attached Storage and BrightStor ARCserve Backup for - Linksys EFG250 | /en/US/docs/storage/nass/csbcdp/efg250/user/guide/EFG250_V2_use - Page 20
the I Disagree button to end the installation. To return to the previous screen, click the Back button. 5. On the Customer Information screen, complete the User Name and Organization fields. Click the Next button to proceed or the Back button to return to the previous screen. Figure 4-13: License - Linksys EFG250 | /en/US/docs/storage/nass/csbcdp/efg250/user/guide/EFG250_V2_use - Page 21
, select Local Install. Click the Next button to proceed or the Back button to return to the previous screen. Figure 4-15: License Key Entry Screen Chapter 4: Setting Up the Network Attached Storage Installation of BrightStor ARCserve Backup for Windows Figure 4-16: Select Install Type Screen 14 - Linksys EFG250 | /en/US/docs/storage/nass/csbcdp/efg250/user/guide/EFG250_V2_use - Page 22
EtherFast Network Attached Storage (250GB with PrintServer) 8. On the Select Products screen, make sure that Brightstor ARCserve Backup is selected. Click the Next button to proceed or the Back button to return to the previous screen. 9. On the Select Database screen, select Standard Database. - Linksys EFG250 | /en/US/docs/storage/nass/csbcdp/efg250/user/guide/EFG250_V2_use - Page 23
the previous screen. 11. On the System Account screen, you will need to specify a user who will have administrator and backup operator rights. Complete the User Name, NT Domain/Computer Name, Password, and Confirm Password fields. Click the Next button to proceed or the Back button to return to the - Linksys EFG250 | /en/US/docs/storage/nass/csbcdp/efg250/user/guide/EFG250_V2_use - Page 24
EtherFast Network Attached Storage (250GB with PrintServer) 12. On the Product List screen, click the Install button to proceed or the Back button to return to the previous screen. 13. The Copy Files screen will appear while licensing files are being copied to your computer. Figure 4-21: Product - Linksys EFG250 | /en/US/docs/storage/nass/csbcdp/efg250/user/guide/EFG250_V2_use - Page 25
EtherFast Network Attached Storage (250GB with PrintServer) 14. On the Licensing Information screen, click the Continue button to proceed. 15. On the License Verification screen, make sure that Use Trial Version is selected. Then click the Continue button to proceed. Figure 4-23: Licensing - Linksys EFG250 | /en/US/docs/storage/nass/csbcdp/efg250/user/guide/EFG250_V2_use - Page 26
EtherFast Network Attached Storage (250GB with PrintServer) 16. The Copy Files screen will appear while the software is being copied to your computer. 17. On the Install Summary screen, click the Finish button. Figure 4-25: Copy Files Screen Chapter 4: Setting Up the - Linksys EFG250 | /en/US/docs/storage/nass/csbcdp/efg250/user/guide/EFG250_V2_use - Page 27
your desktop after you register the Network Attached Storage. Double-click the icon. 21. You will be offered a special offer on purchasing the software after the free 30-day trial. Click the OK button. Figure 4-27: Registration Screen Figure 4-28: Registration Completed Screen Figure 4-29: Desktop - Linksys EFG250 | /en/US/docs/storage/nass/csbcdp/efg250/user/guide/EFG250_V2_use - Page 28
Attached Storage (250GB with PrintServer) 22. Read the information, and click the Continue button. 23. If you want to purchase the software, enter your information, and click the Checkout button. Figure 4-31: Information Screen Chapter 4: Setting Up the Network Attached Storage Installation of - Linksys EFG250 | /en/US/docs/storage/nass/csbcdp/efg250/user/guide/EFG250_V2_use - Page 29
to the Web-based Utility Open the web browser on any networked PC. Enter http://192.168.1.77 in the Address field. Press the Enter key, and the WEB Management Home Page will appear. NOTE: The Network Attached Storage is designed to function properly after using the Setup Wizard. This chapter is - Linksys EFG250 | /en/US/docs/storage/nass/csbcdp/efg250/user/guide/EFG250_V2_use - Page 30
that shows the data available to everyone. The data will be listed with the following information: Name, Size, and Modified Date. Figure 5-3: Home Tab - User Log in (Private Data) Figure 5-4: Home Tab - Disk 1 (Public Data) Chapter 5: Configuring the Network Attached Storage 23 The Home Tab - Linksys EFG250 | /en/US/docs/storage/nass/csbcdp/efg250/user/guide/EFG250_V2_use - Page 31
. There is no password by default. Then you can set the Administrator's user name and password through the Administration tab's Users screen. LAN Settings You will be able to configure some of the settings you saved from the Setup Wizard. IP Address Select the Obtain IP Address automatically (DHCP - Linksys EFG250 | /en/US/docs/storage/nass/csbcdp/efg250/user/guide/EFG250_V2_use - Page 32
set by default to 255.255.255.0. Gateway. This value is left blank by default. If you have a router on your network, however, enter its IP address here. addresses into IP addresses. Enter the same DNS IP addresses that were set on your network router or gateway or provided by your Internet Service - Linksys EFG250 | /en/US/docs/storage/nass/csbcdp/efg250/user/guide/EFG250_V2_use - Page 33
it can be identified on your network. Location Language Support. Select the appropriate language for users on your network. If multiple languages are used, select is more convenient than having to enter the device's IP address. If your network has a WINS server, select Enable WINS. WINS Server. If - Linksys EFG250 | /en/US/docs/storage/nass/csbcdp/efg250/user/guide/EFG250_V2_use - Page 34
, or Cancel to clear all changes. To reset the Network Attached Storage to its default settings, click the Restore Default Config button. To get further information about any setting on this screen, click the Help button. Figure 5-9: Secure IP Address Figure 5-10: Security Alert Screen Chapter - Linksys EFG250 | /en/US/docs/storage/nass/csbcdp/efg250/user/guide/EFG250_V2_use - Page 35
to open the User Membership screen, which allows you to view and/or modify the group that the selected user is in. (Refer to the "User Membership" can enter a comment if you wish. Password. Enter the user's password here. Verify Password. Re-enter the password here. Create matching Group and Share ( - Linksys EFG250 | /en/US/docs/storage/nass/csbcdp/efg250/user/guide/EFG250_V2_use - Page 36
Storage's current name, which will be used to identify it in Network Neighborhood or My Network Places. IP Address. This displays the Network Attached Storage's current IP Address. Current Status. This indicates the Network Attached Storage's current status, which will usually say, "Ready". If the - Linksys EFG250 | /en/US/docs/storage/nass/csbcdp/efg250/user/guide/EFG250_V2_use - Page 37
Disk 2. This shows the type of hard drive located in the second bay of the Network Attached Storage (the description is provided by the manufacturer). The amount of free disk space available to users is also shown. E-Mail Alerts Send E-Mail alerts when problems are detected. If you want the Network - Linksys EFG250 | /en/US/docs/storage/nass/csbcdp/efg250/user/guide/EFG250_V2_use - Page 38
Administration, several other tabs will appear. The Groups, Shares, Backup, Disk, Upgrade, and Setup tabs are displayed and intended for advanced users, except for the Setup tab. When you click the Setup tab, the LAN, System, Users, and Status tabs will re-appear. Group Information The Groups screen - Linksys EFG250 | /en/US/docs/storage/nass/csbcdp/efg250/user/guide/EFG250_V2_use - Page 39
to network users. Shares Information Existing Shares A list of existing shares are displayed here. To view and manage the users who are allowed of this new share, Disk 1 or Disk 2. Then select Default folder if you want to use the default folder, or select Specify and enter the folder name in the - Linksys EFG250 | /en/US/docs/storage/nass/csbcdp/efg250/user/guide/EFG250_V2_use - Page 40
two disk drives, then User, Group, and Share information. It does NOT include any information about the files stored on the Network Attached Storage. Click the Download button to back up the configuration file of the Network Attached Storage on a computer. Click the Upload button to restore - Linksys EFG250 | /en/US/docs/storage/nass/csbcdp/efg250/user/guide/EFG250_V2_use - Page 41
Format Disk 2 button. Self-test (S.M.A.R.T.) This test tells you about the condition of your hard drive, which must support S.M.A.R.T. in order for you to run the test. (Check the documentation for your hard drive for more information.) Disk 1 and 2 Status. The self-test status information of Disk - Linksys EFG250 | /en/US/docs/storage/nass/csbcdp/efg250/user/guide/EFG250_V2_use - Page 42
to scan Disk 2 or stop the defrag. (The hard drive cannot be accessed during a defrag.) Standby To save power, you can configure the Network Attached Storage to put the hard drive(s) in standby mode after a certain length of time. Set Hard Drive to standby mode after. Select the amount of time you - Linksys EFG250 | /en/US/docs/storage/nass/csbcdp/efg250/user/guide/EFG250_V2_use - Page 43
Tab - Advanced - Setup Click the Setup tab to open the Administration tab's LAN screen. The User Guide Tab Click this tab to open this User Guide online. The Linksys WEB Tab Click this tab to visit the Linksys website at www.linksys.com. Figure 5-19: Administration Tab - Advanced - Upgrade Chapter - Linksys EFG250 | /en/US/docs/storage/nass/csbcdp/efg250/user/guide/EFG250_V2_use - Page 44
Mask (e.g. 255.255.255.0). • If you do have a router, check that your Gateway IP Address is set correctly. Ask your LAN administrator for the correct value. • If you have changed the name of the Network Attached Storage, change the name back to the default name. Appendix A: Troubleshooting 37 - Linksys EFG250 | /en/US/docs/storage/nass/csbcdp/efg250/user/guide/EFG250_V2_use - Page 45
the same as the Network Attached Storage's password. • Your Windows login name is not recognized by the Network Attached Storage, so by default you are given guest access rights. If you are not the Network Administrator, ask your Administrator to create a user name for you. (Use the same name - Linksys EFG250 | /en/US/docs/storage/nass/csbcdp/efg250/user/guide/EFG250_V2_use - Page 46
Network Attached Storage support IDE Ultra DMA (or UDMA) hard drives with a throughput of 33-66Mbps (ATA/33, ATA/66) and a rotation speed of 5400 or 7200 rpms. When you are ready to install a second hard drive into the Network Attached Storage, follow these instructions: 1. Power down the Network - Linksys EFG250 | /en/US/docs/storage/nass/csbcdp/efg250/user/guide/EFG250_V2_use - Page 47
) 6. Check the connections. Make sure these connections are tight before securing the drive to the tray. 7. Insert a screw through the tray's left side and into your hard drive. Tighten it to secure the drive to the tray. Figure B-3: Make Sure Connections are Tight Figure B-4: Insert Screw - Linksys EFG250 | /en/US/docs/storage/nass/csbcdp/efg250/user/guide/EFG250_V2_use - Page 48
Storage. Then power it back on. 12. Open your networked computer's web browser. 13. Enter http://192.168.1.77 in the Address field and press the Enter key. Figure B-5: Insert Screw through Right Side of Tray Figure B-6: Access the Web-based Utility Appendix B: Installing a Second Hard Drive 41 - Linksys EFG250 | /en/US/docs/storage/nass/csbcdp/efg250/user/guide/EFG250_V2_use - Page 49
as "Not Formatted." To format your new hard drive, click the Format Disk 2 button. IMPORTANT: Formatting a hard drive will delete all data on that drive. Always verify that you do not wish to save any data on a drive before formatting it. 17. After the hard drive has been formatted, it will be ready - Linksys EFG250 | /en/US/docs/storage/nass/csbcdp/efg250/user/guide/EFG250_V2_use - Page 50
, are still applicable. When you are ready to use the Network Attached Storage's built-in PrintServer, follow these instructions: 1. Power down the Network Attached Storage by pressing the power button on the front panel. 2. Connect your printer's parallel cable to the PRINTER port on the back panel - Linksys EFG250 | /en/US/docs/storage/nass/csbcdp/efg250/user/guide/EFG250_V2_use - Page 51
EtherFast Network Attached Storage (250GB with PrintServer) 7. Double-click the Add Printer icon to begin the Add Printer Wizard. 8. On the Welcome to the Add Printer Wizard screen, click the Next button. Figure C-3: Double-Click Add Printer Icon Appendix C: Setting Up the Built-in PrintServer - Linksys EFG250 | /en/US/docs/storage/nass/csbcdp/efg250/user/guide/EFG250_V2_use - Page 52
name located on the back of the Network Attached Storage)_p1. This is the default format used to locate the printer. For example, if the last six digits of , click the Next button. 11. You will be asked to install a printer driver. Click the OK button to do so now. Appendix C: Setting Up the Built - Linksys EFG250 | /en/US/docs/storage/nass/csbcdp/efg250/user/guide/EFG250_V2_use - Page 53
from the list on the right. Then click the OK button. 13. Review your printer's settings. If the settings are correct, click the Finish button. If you need to make any changes, click the Back button. To exit the Wizard without saving any settings, click the Cancel button. Figure C-8: Select Your - Linksys EFG250 | /en/US/docs/storage/nass/csbcdp/efg250/user/guide/EFG250_V2_use - Page 54
the printer's icon and select Properties. You will be asked if you want to install the driver, but since you have already installed it, click the No button. The Properties window will then open, and you can change the printer's settings. Congratulations! You have added a printer to your network - Linksys EFG250 | /en/US/docs/storage/nass/csbcdp/efg250/user/guide/EFG250_V2_use - Page 55
for wireless networks as well. Your PCs will not be able to utilize wireless networking without having TCP/IP enabled. Windows Help provides complete instructions on enabling TCP/IP. Shared Resources If you wish to share printers, folder, or files over your network, Windows Help provides complete - Linksys EFG250 | /en/US/docs/storage/nass/csbcdp/efg250/user/guide/EFG250_V2_use - Page 56
instructions. IP address to a user for a limited amount of time, instead of assigning permanent IP addresses. DNS (Domain Name Server) - The IP address of your ISP's server, which translates the names of websites into IP addresses. Domain - A specific name for a network of computers. Download - Linksys EFG250 | /en/US/docs/storage/nass/csbcdp/efg250/user/guide/EFG250_V2_use - Page 57
sent. TCP/IP (Transmission Control Protocol/Internet Protocol) - A set of instructions PCs use to communicate over a network. Upgrade - To replace existing software or firmware with a newer version. Upload - To transmit a file over a network. URL (Uniform Resource Locator) - The address of a file - Linksys EFG250 | /en/US/docs/storage/nass/csbcdp/efg250/user/guide/EFG250_V2_use - Page 58
EtherFast Network Attached Storage (250GB with PrintServer) Appendix F: Specifications Model EFG250 Standards IEEE 802.3, IEEE 802.3u, IEEE 802.3ab Ports 1 10/100/1000 Mbps RJ-45, 1 DB-25 Parallel Port Button 1 Power Button Cabling Type Category 5e or better LED Indicators Ready, Gigabit - Linksys EFG250 | /en/US/docs/storage/nass/csbcdp/efg250/user/guide/EFG250_V2_use - Page 59
price less any rebates. This limited warranty extends only to the original purchaser. If the Product proves defective during the Warranty Period call Linksys Technical Support Linksys, (b) has not been installed, operated, repaired, or maintained in accordance with instructions supplied by Linksys, - Linksys EFG250 | /en/US/docs/storage/nass/csbcdp/efg250/user/guide/EFG250_V2_use - Page 60
energy and, if not installed and used according to the instructions, may cause harmful interference to radio communications. However, there is television reception, which is found by turning the equipment off and on, the user is encouraged to try to correct the interference by one or more of the - Linksys EFG250 | /en/US/docs/storage/nass/csbcdp/efg250/user/guide/EFG250_V2_use - Page 61
buy on the web? Do you want to know more about networking with Linksys products? Give our advice line a call at: Or fax your request in to: If you experience problems with any Linksys Guide.) http://www.linksys.com or ftp.linksys.com 800-546-5797 (LINKSYS) 949-823-3002 800-326-7114 support@linksys.
-
 1
1 -
 2
2 -
 3
3 -
 4
4 -
 5
5 -
 6
6 -
 7
7 -
8
-
9
-
10
-
11
-
12
-
13
-
14
-
15
-
16
-
17
-
18
-
19
-
20
-
21
-
22
-
23
-
24
-
25
-
26
-
27
-
28
-
29
-
30
-
31
-
32
-
33
-
34
-
35
-
36
-
37
-
38
-
39
-
40
-
41
-
42
-
43
-
44
-
45
-
46
-
47
-
48
-
49
-
50
-
51
-
52
-
53
-
54
-
55
-
56
-
57
-
58
-
59
-
60
-
61
 |
 |
A Division of Cisco Systems, Inc.
®
Model No.
WIRED
EFG250
User Guide
250GB with PrintServer
Network Attached Storage
EtherFast
®