Linksys EFG250 /en/US/docs/storage/nass/csbcdp/efg250/user/guide/EFG250_V2_use - Page 5
List of s - review
 |
UPC - 745883559220
View all Linksys EFG250 manuals
Add to My Manuals
Save this manual to your list of manuals |
Page 5 highlights
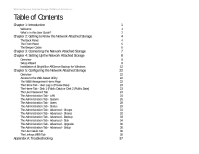
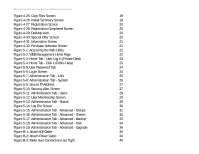
EtherFast Network Attached Storage (250GB with PrintServer) List of Figures Figure 2-1: Back Panel 4 Figure 2-2: Front Panel 5 Figure 3-1: Connect the Ethernet Network Cable 7 Figure 3-2: Connect the Power Adapter 7 Figure 4-1: Setup Wizard's Welcome Screen 8 Figure 4-2: Select the Network Attached Storage 8 Figure 4-3: IP Settings Screen 9 Figure 4-4: Fixed IP Address Screen 9 Figure 4-5: DHCP Server Settings Screen 10 Figure 4-6: Time and Date Settings Screen 10 Figure 4-7: Review Settings Screen 11 Figure 4-8: Confirm New Settings will be Saved 11 Figure 4-9: Congratulations Screen 11 Figure 4-10: InstallAnywhere Screen 12 Figure 4-11: Start of Installation Screen 12 Figure 4-12: BrightStor ARCserve Backup Welcome Screen 12 Figure 4-13: License Agreement Screen 13 Figure 4-14: Customer Information Screen 13 Figure 4-15: License Key Entry Screen 14 Figure 4-16: Select Install Type Screen 14 Figure 4-17: Select Products Screen 15 Figure 4-18: Select Database Screen 15 Figure 4-19: Set Password Screen 16 Figure 4-20: System Account Screen 16 Figure 4-21: Product List Screen 17 Figure 4-22: Copy Files Screen 17 Figure 4-23: Licensing Information Screen 18 Figure 4-24: License Verification Screen 18
-
 1
1 -
 2
2 -
 3
3 -
 4
4 -
 5
5 -
 6
6 -
 7
7 -
 8
8 -
 9
9 -
 10
10 -
 11
11 -
12
-
13
-
14
-
15
-
16
-
17
-
18
-
19
-
20
-
21
-
22
-
23
-
24
-
25
-
26
-
27
-
28
-
29
-
30
-
31
-
32
-
33
-
34
-
35
-
36
-
37
-
38
-
39
-
40
-
41
-
42
-
43
-
44
-
45
-
46
-
47
-
48
-
49
-
50
-
51
-
52
-
53
-
54
-
55
-
56
-
57
-
58
-
59
-
60
-
61
 |
 |
