Marantz SR4600 SR4600 User Manual - Page 31
Ch Input, Ht-eq, Recording An Analog Source
 |
View all Marantz SR4600 manuals
Add to My Manuals
Save this manual to your list of manuals |
Page 31 highlights
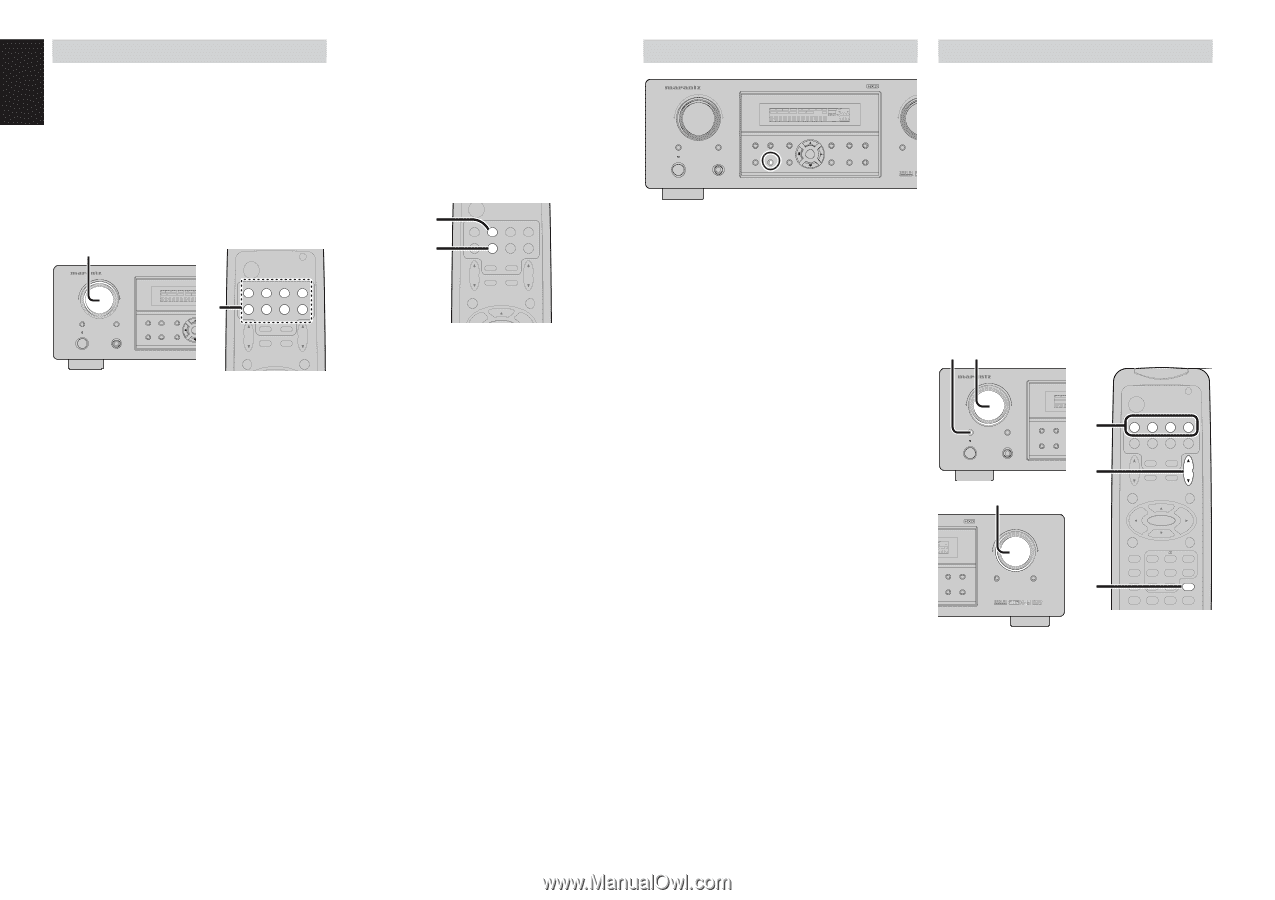
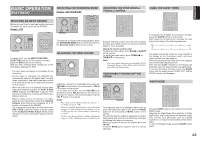
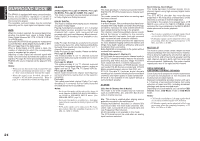
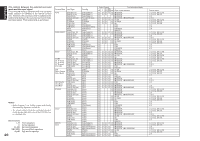
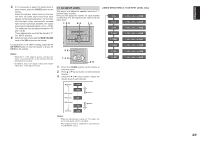
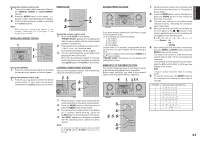
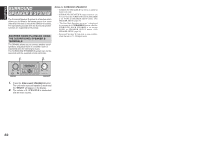
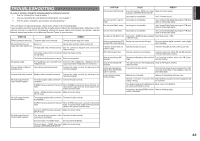
ENGLISH RECORDING AN ANALOG SOURCE In normal operation, the audio or video source selected for listening through the SR4600 is sent to the record outputs. This means that any program you are watching or listening to may be recorded simply by placing machines connected to the outputs for TAPE OUT, CD-R/MD OUT, VCR1 OUT, and DSS/VCR2 OUT in the record mode. To record the input source signal you are currently watching or listening to 1. AV SURROUND RECEIVER SR4600 INPUT SELECTOR 7.1CH INPUT STANDBY POWER ON/STANDBY S. SPEAKER B PHONES SURROUND MODE DISP MULTI AUTO TUNED SLEEP AUTO SURR DIRECT ST V - OFF NI DISC 6.1 MTX 6. PURE DIRECT SIMPLE SETUP 1. AUTO HT-EQ MENU ENTE POWER TV VCR1 DSS/VCR2 DVD TUNER CD TAPE CDR/MD AUX1 TV VOL. SLEEP AMP MUTE MAINN VOL. OSD MENU 1. Select the input source to record by turning the INPUT FUNCTION SELECTOR knob on the front panel or simply press the input selector buttons on the remote. The input source is now selected and you may watch or listen to it as desired. 2. The currently selected input source signal is output to the TAPE OUT, CD-R/MD OUT, VCR1 OUT, and DSS/VCR2 OUT outputs for recording. 3. Start recording to the recording component as desired. Recording the video from one source and the audio from another You can add the sound from one source to the video of another source to make your own video recordings. Below is an example of recording the sound from a compact disc player connected to CD IN and the video from a video camera connected to VCR1 to video cassette recorder connected to the DSS/ VCR2 OUT jack. 1. 2. TV VCR1 DSS/VCR2 DVD TUNER CD TAPE CDR/MD AUX1 TV VOL. SLEEP AMP MUTE MAIN VOL. OSD MENU 1. Switch the video output source to VCR1 by simply pressing the input selector buttons on the remote. 2. Switch the audio input source to CD by simply pressing the input selector buttons on the remote. 3. Now "CD" has been selected as the audio input source and "VCR1" as the video input source. Notes: • If you change the input source during recording, you will record the signals from the newly selected input source. • You cannot record the surround effects. • Digital input signals are only output to the digital outputs. There is no conversion from digital to analog . When connecting CD players and other digital components, do not connect only the digital terminals, but the analog ones as well. HT-EQ AV SURROUND RECEIVER SR4600 INPUT SELECTOR DISP MULTI AUTO TUNED SLEEP AUTO SURR DIRECT ST V - OFF NIGHT PEAK ATT DISC 6.1 MTX 6.1 EQ ANALOG DIGITAL AAC PCM SURROUND DIGITAL LCR LFE SL S SR 7.1CH INPUT STANDBY POWER ON/STANDBY S. SPEAKER B PHONES SURROUND MODE PURE DIRECT SIMPLE SETUP AUTO HT-EQ MENU ENTER DISPLAY MEMORY CLEAR EXIT BAND T-MODE DOWN MUTE Press the HT-EQ button on the front panel to turn on the HT-EQ mode. The tonal balance of a film soundtrack will be excessively bright and harsh when played back over audio equipment in the home. This is because film soundtracks were designed to be played back in large movie theater environments. Activating the HT-EQ feature when watching a film made for movie theaters corrects this and restores the correct tonal balance. The HT-EQ feature is available except in the following modes. • 7.1 CH INPUT • PURE-DIRECT • When VIRTUAL is set for the surround mode 7.1 CH INPUT The SR4600 is equipped for future expansion through the use of Multi channel SACD multichannel player or DVD-Audio player. When this is selected, the input signals connected to the L(front left), R (front right), CENTER, SL (surround left), SR (surround right) and SBL (surround back left) and SBR (surround back right) channels of the 7.1 CH. IN jacks are output directly to the front (left and right), center, surround (left and right) and surround back speaker systems as well as the pre-out jacks without passing through the surround circuitry. In addition, the signal input to the SW (subwoofer) jack is output to the PRE OUT SW (subwoofer) jack. When 7.1 CH. INPUT is selected, the last video input used remains routed to the Monitor Outputs. This permits simultaneous viewing with video sources 2. 1. AV SURROUND RECEIVER SR4600 INPUT SELECTOR DISP MULTI SLEEP AUTO 7.1CH INPUT STANDBY POWER ON/STANDBY S. SPEAKER B PHONES SURROUND MODE PURE DIRECT AUTO HT-EQ 1. 4. 4. SURROUND DIGITAL LCR LFE SL S SR MEMORY CLEAR BAND T-MODE VOLUME DOWN MUTE UP ATT 2. POWER TV VCR1 DSS/VCR2 DVD TUNER CD TAPE CDR/MD AUX1 TV VOL. SLEEP AMP MUTE MAIN VOL. OSD MENU ENTER SET UP/ T.TONE PURE DIRECT AUTO 1 NIGHT CSII 4 DISPLAY MCH-ST 7 CLEAR MEMO MENU OFF DTS 23 EX/ES 5 VIRTUAL 6 STEREO 8 7.1CH IN 9 A/D P.SCAN/V-OFF 0 CHANNEL/SKIP 1. Select a desired Video source to decide the routed video signal to the Monitor Outputs . 2. Press the 7.1 CH INPUT button on the front panel or press 7.1 CH IN on the remote to switch the 7.1 channel input. 28
-
 1
1 -
2
-
3
-
4
-
5
-
6
-
7
-
8
-
9
-
10
-
11
-
12
-
13
-
14
-
15
-
16
-
17
-
18
-
19
-
20
-
21
-
22
-
23
-
24
-
25
-
 26
26 -
 27
27 -
 28
28 -
 29
29 -
 30
30 -
 31
31 -
 32
32 -
 33
33 -
 34
34 -
 35
35 -
 36
36 -
37
-
38
-
39
-
40
-
41
 |
 |