Maytag MGR6775BDW Use and Care Guide
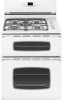
Maytag MGR6775BDW - Gas Double Oven Range Manual
 |
UPC - 719881178691
View all Maytag MGR6775BDW manuals
Add to My Manuals
Save this manual to your list of manuals |
Maytag MGR6775BDW manual content summary:
- Maytag MGR6775BDW | Use and Care Guide - Page 1
Part No. 8113P707-60 Care & Cleaning 15=18 Self-Clean Oven Cleaning Procedures Maintenance 19=20 Oven Doors. Windows & Lights Removal of Gas Appliance Troubleshooting 21 =22 Warranty & Service 23 Guide d'utilisation et d'entretien 24 Guia de uso y cuidado 50 @2006 Maytag Appliances - Maytag MGR6775BDW | Use and Care Guide - Page 2
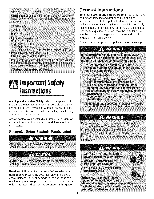
. Have the installer show you the location of the gas shut off valve and how to shut it off in an emergency. Always disconnect power to appliance before servicing. Impomnt Sefety Warning and Important Safety Instructions appearing in this guide are not meant to cover all possible conditions and - Maytag MGR6775BDW | Use and Care Guide - Page 3
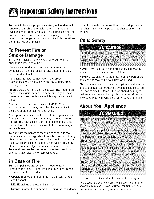
engaged. You should check this anytime the range has been moved. Do not use Ovens: Smother fire or flame by closing the oven doors. 2 The oven vent is located at the base of the backguard. Avoid touching oven vent area while oven is on and for several minutes after oven is turned off. Some parts - Maytag MGR6775BDW | Use and Care Guide - Page 4
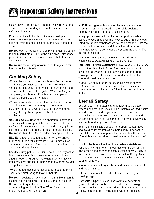
ovens as a storage area for PREPARED FOOD WARNING: Follow food manufacturer's food or cooking utensils. instructions oven bottoms. This could result in risk of electric shock, fire, or damage to the appliance. Use foil only as directed in this guide children. on appliance parts. Never let a pan - Maytag MGR6775BDW | Use and Care Guide - Page 5
guide. Do not use element covers, stovetop grills, or add-on oven convection systems. The use of devices or accessories that are not expressly recommended in this manual can create serious safety hazards, result in performance problems that the burning of gas can result in low-level exposure to some - Maytag MGR6775BDW | Use and Care Guide - Page 6
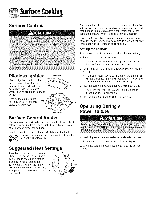
to turn on the surface burners. An infinite choice of heat settings is available from Low to High. The knobs can be set on or between any of the settings. Graphics When the burner lights, adjust the flame to the desired level. Low: Food maintains a temperature above 140° F without continuing to - Maytag MGR6775BDW | Use and Care Guide - Page 7
,000 BTU_ high speed burner on your range, located in the left front position. or melting chocolate. BTU ratings will vary when using LP gas. Do not operate the burners gas mixture may be incorrect. Contact a service technician to adjust. (Adjustments are not covered by the warranty.) With LP gas - Maytag MGR6775BDW | Use and Care Guide - Page 8
panel isdesigned for ease in programming. The displaywindow on the control shows time of day, timer and oven functions. Control panel shown includes model specific features. (Styling may vary depending on model.] A Bake Use for baking and roasting. Keep Warm Use to keep cooked food warm in - Maytag MGR6775BDW | Use and Care Guide - Page 9
the Sound Level Tile factory default setting for sound is medium (MEd), but it can be changed to low (Lo) or high (HI). To change the settin g: 1. Press and hold More+ and upper oven CANCEL pads for three seconds. A beep will sound and the current sound level ("Lo', "MEd" or "HI") will - Maytag MGR6775BDW | Use and Care Guide - Page 10
. Return To Factory Default Settings Tile control car/be reset to tile factory default settings. To return to the default settings: 1. Press and hold upper oven Keep Warm and CANCEL pads for three seconds. A single beep will sound and "dEF' Cdefaul0 will appear in the display. 2. Press the More+ pad - Maytag MGR6775BDW | Use and Care Guide - Page 11
is still flashing: 3. Press the Cook & Hold pad. ° %00°" flashes in the display. ° "Bake" and "Hold" flash. 4. Press More+ or Less= pad to enter oven temperature. • "Bake" flashes. ° After several seconds, "0:00" and "Time" flash. ° "Bake" and "Hold" remain steady. 5. Press More+ or Less= pad to set - Maytag MGR6775BDW | Use and Care Guide - Page 12
the factory. It is normal to notice some baking or browning differences between a new oven and an old one. As ranges get older, the oven temperature can shift. You may adjust the oven temperature if you think the oven is not baking or browning correctly. To decide how much to change the temperature - Maytag MGR6775BDW | Use and Care Guide - Page 13
Select LO broil (450° F) for low-temperature broiling of longer cooking foods such as poultry. 3. After four seconds, the oven will start. • "Broil" and Remove food and broiler pan from the oven. • The time of day will reappear in the display. Notes: For best results when broiling, use a two-piece - Maytag MGR6775BDW | Use and Care Guide - Page 14
also be displayed if a bake setting is in use while the oven is in Sabbath Mode. Pilotless ignition Your range is equipped with pilotless ignition.With this type of ignitionsystem, the gas automatically shuts off and the oven will not operate during a power failure. A lighted match will not light - Maytag MGR6775BDW | Use and Care Guide - Page 15
base out together. To replace oven racks: ° Place rack on the rack support in tile oven; tilt tile front end up oven and provides space for a vegetable dish when a large roaster is on the lower rack. Contact your Maytag dealer for the "HALFRACK" Accessory Kit or call 1-877-232-6771 USA and Canada - Maytag MGR6775BDW | Use and Care Guide - Page 16
not allow a heavy build-up of soil to accumulate in the oven. During the cleaning process, the kitchen should be well ventilated to . To Delay a Self=Clean Cycle: 1. Press the Delay pad once for upper oven and twice for lower oven. • "dLY" flashes. • %:00" flashes in the display. Press the More - Maytag MGR6775BDW | Use and Care Guide - Page 17
clean cycle was not long enough. The soil will be removed during the next clean cycle. If oven racks were left in the oven and do not slide smoothly after a clean cycle, wipe racks and rack supports with a small amount of vegetable oil to make them easier to move. Fine lines may appear - Maytag MGR6775BDW | Use and Care Guide - Page 18
-6771 USA or 1-808-888-8408 Canada. Broiler Pan and Insert Never cover Part #2OOOOOO_l} and a sponge. • Do not clean in the dishwasher or self-cleaning oven. Sealed Gas chipping. • Never use oven cleaners, abrasive or caustic cleaning agents on exterior finish of range. Side Panels, and Door - Maytag MGR6775BDW | Use and Care Guide - Page 19
Oven Interior • Follow instructions on pages 15-16 to set a self-clean cycle. Oven supports with a small amount of vegetable oil to restore ease of movement, then wipe off excess oil. Stainless Steel (select models with Stainless Steel Magic Spray* (Part No. 20000008__*. , Moderate/Heavy Canada. 18 - Maytag MGR6775BDW | Use and Care Guide - Page 20
To assure the proper replacement bulb is used, order bulb from Maytag. Call 1-877-232-6771 USA and 1-800-688-8408 Canada, ask for part number 74009925 - halogen bulb. To replace oven light bulbs: 1. Disconnect power to the range. 2. When oven is cool, use fingertips to grasp edge of bulb cover. Pull - Maytag MGR6775BDW | Use and Care Guide - Page 21
this gas appliance for cleaning or to relocate. If this appliance has to be moved and/or removed for servicing, follow the procedure described in the installation instructions. For information, contact Maytag Customer Assistance at 1-800-688-9900 USA or 1-800-688-2002 Canada. To prevent range from - Maytag MGR6775BDW | Use and Care Guide - Page 22
• Check power or gas supply. Surface burner fails to light. Oven light and/or clock does range is level. • Temperatures often vary between a new oven and an old one. As ovens age, the oven temperature often "drifts" and may become hotter or cooler. See page 11 for instructions on adjusting the oven - Maytag MGR6775BDW | Use and Care Guide - Page 23
when oven is turned on. This is normal for a new range servicer. Noises may be heard. There are no beeps and no display. • The oven makes several low-level noises.You may hear the oven relays as they go on and off. This is normal. • As the oven heats and cools, you may hear sounds of metal parts - Maytag MGR6775BDW | Use and Care Guide - Page 24
PROVINCE. If outside the 50 United States and Canada, contact your authorized Maytag dealer to determine if another warranty applies. If you need service, first see the "Troubleshooting" section of the Use & Care Guide. After checking "Troubleshooting," you may find additional help by checking the - Maytag MGR6775BDW | Use and Care Guide - Page 25
MA AG Cuisini_re _ gaz deux fours Precision Touch Maytag S_rie 750 Table d, instructions de s6curit_ importantes 25=28 Cuisson sur la surface Commandes Brt_Jleur8s gaz four D6placement d'un appareil _tgaz Recherche des pannes ....... 46=47 Garantie et service 49 Guia de use y cuidado 50 - Maytag MGR6775BDW | Use and Care Guide - Page 26
et les paragraphes e ce guide ne sont pas destines _ couvrir toutes service apres-vente ou le fabficant dans le cas de problemes ou de conditions qui ne seraient pas comprises. Reconnaissez los briquettes, paragraphes et symboles sur la s6curit6 Lisez routes les instructions - Maytag MGR6775BDW | Use and Care Guide - Page 27
cuisine. NE saisissez ou deplacez JAMAIS un ustensiie de cuisine enflamme. NE laissez JAMAIS des enfants seuls ou sans supervision Iorsque rappareil est en service ou encore chaud. NE laissez JAMAIS un enfant s'asseoir ouse tenir sur une partie quelconque de rappareil. II pourrait se blesser ou se - Maytag MGR6775BDW | Use and Care Guide - Page 28
de choc electrique ou d'incendie, ou une autre deterioration de I'appareil. Utilisez de la feuille d'aluminium uniquement seion les instructions de ce guide. NE laissez JAMAIS un brQieur de surface aliume sans surveillance, particuiierement avec une puissance de chauffage elevee ou Iors d'une - Maytag MGR6775BDW | Use and Care Guide - Page 29
four sans risque de bris sous I'effet du choc thermique. Observez les instructions du fabricant lots de I'utilisation d'un ustensile de verre. La securite de dispositif ou accessoire qui n'est pas expressement recommande dans ce guide peut degrader la securite de I'appareil ousa performance, ou - Maytag MGR6775BDW | Use and Care Guide - Page 30
pusplus rapidementsi on utilise une puissancede chauffage plus 61ev6eque n6cessairepour le Low maintien d'une douce _bullition. L'eau bout toujours a la le brQleuravant!gauche. Reglages sugger6s de la puissance de chauffage Low : Lesalimentsrestent _ une temp6raturesupdrieurea 60° C 0400 F)sans - Maytag MGR6775BDW | Use and Care Guide - Page 31
/orsde I'alimentationau gaz de p4trole Iiqu4fi4. Si on fait passer rapidementle bouton de commandede la position High [Elevde)_ la position Low (Basse),lesflammes peuvents'dteindre,particuli_rementsi le brt31euerst froid. Si ceci se produit, placez le bouton de commande_ la position OFF (Arr_t - Maytag MGR6775BDW | Use and Care Guide - Page 32
S'utilise pour maintenir au chaud dans le four los aliments cults oven. S'utilise pour la cuisson au gril et le rissolagesur la le format de 12 h ou celui de 24 h. 3. ProgrammezI'heureen suivant les instructions ci-dessous. Programmation de I'horloge : 1. Appuyezsur la touche Clock. • Deuxpoints - Maytag MGR6775BDW | Use and Care Guide - Page 33
Culssoenufour Annulation de I'affichage de I'heure : Si vous ne d6sirezpas I'affichagede I'heure: Appuyezet maintenezlestouches CANCEL (Annulet)du four sup6rieuret Clock (Horloge) pendant plusieurssecondes.L'heure du jour disparait de I'afficheur. LorsqueI'affichagede I'heureest annul6, appuyezsur - Maytag MGR6775BDW | Use and Care Guide - Page 34
¢"iss°ne. four 2. Appuyezsur la touche Mere+ (Plus+) ou la touche Less(Moins-) pour passerde °F au °Cet vice versa. 3. Attendezquatre secondespour I'acceptationdu nouveaurc!glage. 4. Si vous n'appuyezpas sur la touche More+ ou la touche Less- duns los 30 secondes,la commandoreviendraaux r6glages - Maytag MGR6775BDW | Use and Care Guide - Page 35
Culssoen. four Caisson et maintien Cook & Hold (Cuissonet maintien) vouspermet de cuire pendant une duree pre-etablie,suivie d'un cyclede Maintien au chaud d'une heure. Programmation de Cook & Hold : 1. Appuyezsur la touche Cook & Hold une fois pour le four sup6rieurou deuxfois pour le four - Maytag MGR6775BDW | Use and Care Guide - Page 36
Culssoenufour Lorsque le four se met en marohe : • Le decomptede la duree de cuissoncommence. • Le mot - Maytag MGR6775BDW | Use and Care Guide - Page 37
C.issoneufour R glage de la temp6rature des fours La prc!cisiondes rc!glagesde temp6raturea 6t6 soigneusement v_rifi6e _ I'usine. II est normalde remarquerquelquesdiff6rences dans la durc!ede cuissonentre un four neuf et un four ancien. La temp6raturedes fours peut 6ventuellementse d_caler. Vous - Maytag MGR6775BDW | Use and Care Guide - Page 38
¢ulss°neufour Ouissorl aU griJ (four sup rieur seulement) Programmation du gril : 1. Appuyezsur la touche Broil (Cuissonau gril). Broil • Lesroots Broil et Set (Valide0 clignotent b I'afficheur. 2. Appuyezsur la touche More+ (Plus+) pour une cuissonau gril temp6rature_lev_e.Appuyezsur la touche - Maytag MGR6775BDW | Use and Care Guide - Page 39
ddormer ou le faire fondre. Lampes de four Loslampes de four s'allumentautornatiquementIorsqu'uneporte est ouverte.Lorsquela porte est ferm_e,appuyezsur Oven Light [Lampe du four) pour allumer ou dteindrelea lampes. Le four dmet un signal sonorechaquefois que vous appuyezsur OvenLight. * Important - Maytag MGR6775BDW | Use and Care Guide - Page 40
• Pour la grille RollerGlideMc,tirez ensemblela glissi_reet la basede la grille. Pour remettre los grilles en place : . Mettez la grille sur le support de grille du four; relevez16g_rement le rebord avant; poussezla grille jusqu'a ce qu'elle arrive a la butde d'arr6t; abaissezravant et pousseza fond - Maytag MGR6775BDW | Use and Care Guide - Page 41
nettoyege Four autonettoyant poss_de une certaine r6sistance aux compos_s acides, mais qui n'est pas limit6e. Elle peut se d6colorer si los r6sidus acides ne sont pas enlev6s avant de commencer I'autonettoyage. Important : • Latemp6raturedu four dolt 6tre inf_rieure_ 204° C (400° F)pour pouvoir - Maytag MGR6775BDW | Use and Care Guide - Page 42
. Si les grilles du four ont _t_ laiss_es _ rint_rieur pendant le cycle d'autonettoyage et qu'elles glissent real sur leurs supports, enduisez-les,ainsi que les supports,d'une fine couche d'huile v_!gCtale. De fines Iignes peuvent apparaitre dans la porcelaine parce qu'elle a subi chaleur et - Maytag MGR6775BDW | Use and Care Guide - Page 43
Leshemsde marquesent des marquesd@os6esdes diff_rents fabricants. ** Pour commanderdirectement,composezle 1-877-2326771aux E.-U.ou le 1-800-688-8408au Canada. L_chefrite et sa griJJe Chapeaux de brQleuretbr_Jeurs gaz GriJJesdes br_leurs - enfonte porcelanis_e Horlege et zone des touches de commando - Maytag MGR6775BDW | Use and Care Guide - Page 44
curer,laine d'acier ou nettoyantsen poudre qui risqueraientde rayerle verre. • Ex6cutezles instructions pr6sent6esaux pages40-41 pour I'autonettoyagedu four. Grilles du four Nettoyezavec de . ** Pour commander directement, composer le 1-877-232-6771aux E.-U.ou le 1-800-688-8408au Canada. 43 - Maytag MGR6775BDW | Use and Care Guide - Page 45
r6siliente. Ceci est normal et diminuera avec le temps. Pours'assurerle remplacementde I'ampoulepar une ampoule appropric!ec, ommandez-laaupr_sdu service-clientsde Maytag. Appelez le 1-877-232-6771aux E.-U.et le 1-800-688-8408au Canadaet commandezI'article rc!fc!rencen° 74009925a, mpoule halog_ne - Maytag MGR6775BDW | Use and Care Guide - Page 46
dc!mc!nag6et/ou enlev6 pour 6tre r6parc!s, uivezla m6thoded6crite dartslos instructions d'installation.Pourtoute information, prenezcontact avec le service la clientele de Maytag au 1-800-688-9900auxE.-U.ou au 1-800-688-2002au Canada. II faut que le pied arri_re de la cuisini_resoit engag_ darts - Maytag MGR6775BDW | Use and Care Guide - Page 47
Becherchdes Pour la plupart des problbmes observbs, essayez d'abord ce qui suit. Un brSleur de surface ne s'allume pas. La lampe de four et/ou rhorloge ne fonctionnent pas. Rammes non uniformes. La flamme du br_leur s'_loigne des orifices. Les r_sultatsde la cuisson different de ceu× du four - Maytag MGR6775BDW | Use and Care Guide - Page 48
la sole. Exc!cutezune opc!rationd'autonettoyage. • _ Bake_ (Cuissoncourante) ou _ Lock_ pout clignoter rapidementpour vous avertir d'une erreur ou d'un probleme. Si tel est le cas,appuyezsur la touche CANCEL (Annuler). Si los mots_ Bake_ ou _ Lock _ continuent _ clignoter,d_branchezI'appareil - Maytag MGR6775BDW | Use and Care Guide - Page 49
BemNues 48 - Maytag MGR6775BDW | Use and Care Guide - Page 50
la section "Depannage" du Guide d'utilisation et d'entretien. Apres avoir verifie la section ".D_pannage", de I'aide supplementaire peut _tre trouvee en v@ifiant la section "Assistance ou service" ou en appelant Maytag. Aux E.-U., composer le 1-800-688-9900. Au Canada, composer le 1-800-807-6777 - Maytag MGR6775BDW | Use and Care Guide - Page 51
MAYI?A(] ® Estufa a gas con homo doble Maytag serie 'Precision Touch' 750 Tabla de lnstrucciones importantes sobre seguridad 51 =54 Cocci6n en la cubierta ........ 55=56 Controles Quemadores Sellados a Gas Cocci6n en el homo 57=65 Panel de control Horneado 'Cook& Hold' (Cocinar y mantener - Maytag MGR6775BDW | Use and Care Guide - Page 52
deben ser hechas por un t6cnico ealificado. Haga que el instalador le muestre la ubicaci6n de la v_lvula de cierre del gas y c6mo cerrafla en caso de emergencia. Siempre desenchufe el electrodom6stico antes de realizar reparaciones. Instrucciones Las advertencias e instrucciones importantes sobre - Maytag MGR6775BDW | Use and Care Guide - Page 53
o sin supervisi6n cerca del electrodomestico cuando est8 en usa o este caliente. NUNCA permita que los ni_os se sienten o se paten en ninguna parte del electrodom_stico pues se pueden lesionar o quemar. Sele debe ense_ar a los ni_os que el electrodom6stico y los utensilios que est_n en el pueden - Maytag MGR6775BDW | Use and Care Guide - Page 54
la cocci6n, elimine el alimento y el envase. El alimento puede estar contaminado. la llama. NUNCA use papel de aluminio para cubrir las parrillas o la parte Siempre ajuste la llama del quemador superior para que la misma no se extienda m_s all_ del borde inferior del utensilio. Una llama excesiva - Maytag MGR6775BDW | Use and Care Guide - Page 55
superiores adyacentes. Siempre gire las manijas hacia un lado o hacia la parte trasera del electrodom6stico, y no hacia la habitaci6n donde puedan set . Los usuarios de este electrodom6stico quedan advertidos que la combusti6n de gas puede resultar en una exposici6n de bajo nivel a algunas de las - Maytag MGR6775BDW | Use and Care Guide - Page 56
Una selecciOninfinita de ajustesde calor est,1disponible entre 'Low' [Bajo)y 'High' [Alto). Estasperillas pueden ejemplo,el gr_ificoa la derechamuestrael quemadordelanteroizquierdo. OO ®% Ajustes de taler sugeridos 'Low': Losalimentos mantienenuna • temperaturasobre los 60° C [140° F] sin que - Maytag MGR6775BDW | Use and Care Guide - Page 57
descolorarla porcelana. A diferencia de lasestufas con quemadores normalesde gas,esta cubierta no se levantani se puede remover. No intente quemador. Si la perilla se gira rdpidamentede 'High' (Alto) a 'Low' (Bajo), es posible que la llamase apague,especialmentesi el quemadorest_ fr[o. Si - Maytag MGR6775BDW | Use and Care Guide - Page 58
mantieneel alimento calienteper 1 Mantener Caliente) hera. 'Timer' Programael temporizador. Ci-emporizador) 'Clock' [Reloj) Use para programar la hera del dfa. 'Oven Light' (Luz del Homo) Use para encendero apagar la luz del homo. 'Less-' (Menos-] o Programao cambia el tiempo o la 'More - Maytag MGR6775BDW | Use and Care Guide - Page 59
Cocd6nenel homo La hera del dfa no puede ser cambiadacuando el homo hayaside programadopara hornear,para un ciclo de autolimpieza,para una funciOndiferida o para la funci0n de Cocinary Mantener Caliente. Para anular el despliegue de la hera del dia: Si usted deseaque la hera del dfa no se muestre: - Maytag MGR6775BDW | Use and Care Guide - Page 60
¢occiCennel horno 3. Esperequatrosegundos para guardar el nuevoajuste. 4. Si no se opri[ne la tecla 'More+' [M_s+) o 'Less=' (Menos-) dentro de los siguientes30 segundos,el control regresar_ai l ajuste existente. Cambio de la temperatura entre °F y °C El ajuste de f_brica de la [nedidade te[ - Maytag MGR6775BDW | Use and Care Guide - Page 61
Cocd6nen el homo Notas: • Deje un espacio de per Io menos 1,3 crn (112pulgada) entre el utensilio o cacerola y el elemento superior del homo superior. No se recomiendael usede utensilios para pan,torta de _ngel o flanes en el homo superior. No usetemperaturasinferioresa los 80° C (140° F)para - Maytag MGR6775BDW | Use and Care Guide - Page 62
Cocci6n#nel homo 2. Oprimala tecla 'Mere+' [M_s+) o 'Less-' (Menos-) para ajustar la cantidad de tiempo que desea diferir el ciclo de Cocinary mantener caliente. Mientras'dLY' est6 destellando: 3. Oprimala tecla 'Ceek & Held' (Cocinary mantener caliente). • '000°' destellar_en el indicadorvisual. • - Maytag MGR6775BDW | Use and Care Guide - Page 63
(t_rmino medic) 15 - 19 (bien cocido) 12 - 15 (bien cocido} 25 - 35 8-11 10- 15 18 - 25 Pan COn ajo 2,54em (1")de grueso parte inferior del homo 'LO' 1-4 Cuandoase pescado,rode el inserto de la asaderacon aceite de cocina. No voltee los filetesde pescado. ** Lostiempos de asadosonaproximadosy - Maytag MGR6775BDW | Use and Care Guide - Page 64
Cocd6nen el horno Apagado autom tico/Modo sab tico 2. Despuc!sde 72 horas,el Modo Sab_ticohabr4terminado. • 'SAbbAth' destellar_durante 5 segundos. Loshornosse apagar_nautom_iticamentedespuOsde 12 horassi los deja encendidosaccidentalmente. El homo debe set programado para hornear antes de - Maytag MGR6775BDW | Use and Care Guide - Page 65
la puertade un homo. Cuandola puertaestd cerrada, oprimala tecla 'Oven Light' [Luz del homo] para encendero apagar Ins luces Tire de la parrilla derechohacia afuerahasta que se detengaen el tope de bloqueo,levantela parte delanterade la parrilla y tire de ella para sacarla. • Pararetirar la parrilla - Maytag MGR6775BDW | Use and Care Guide - Page 66
¢occi6nenelhomo Posiciones de las parrillas (homo inferior) COCCi0N CON VARIAS PARRILLAS. Dos parrillas: Uselas posiciones2 y 4 para tortas y galletas de capaso las posiciones2 y 5 para bizcochosy galletas. PARRILLA 5: Use para hornear bizcochos y galletas con dos parrillas. PARRIL[A 4: Use para - Maytag MGR6775BDW | Use and Care Guide - Page 67
Lajunta esta dise_adapara sellar el calor dentro del homo durante el ciclo de autolimpieza. 5. Limpieel excesode grasa o los derramesde la parte inferior del homo. Esto evita el humo excesivo,las llamasy las Ilamaradas durante el ciclo de autolimpieza. 6. Limpie losderramesazucaradosy acidostales - Maytag MGR6775BDW | Use and Care Guide - Page 68
Culdedo Iimpleze 2. Optima la tecla 'Mere+' (M_is+)e 'Less-' (Menos-) paraprogramarel tiempo que deseadiferir el ciclo. Se puede programarun tiempo diferido entre 10 minutes (00:10)y 11 horasy 59 minutes (11:59). 3. Optima la tecla 'Clean' (Limpieza)adecuada mientras'dLY' est6 destellandoen el - Maytag MGR6775BDW | Use and Care Guide - Page 69
Parahacerun pedido,Ilameal 1-877-232-6771en EE.UU. o al 1-800-688-8408en Canad& Asadera e Inserto Tapas de los quernadoresy quemadores sellados a gas Nunca cubra el iuserto con papel de aluminio ya clueel mismo evita que la grasa se dronehasta la asadera. , Coloqueun patio jabonososobre el inserto - Maytag MGR6775BDW | Use and Care Guide - Page 70
Culdadollm)lem Ventanilla y puerla del homo =Vidrio Evite usarcantidadesexcesivasde agua,ya que puede escurrirsedebajo o detr_s del vidrio y mancharlo. Lavecon agua y jab6n. Enjuaguecon agua limpiay seque. Se pueden usar limpiadoresde vidrio si se roc[aen un patio primero. Ne - Maytag MGR6775BDW | Use and Care Guide - Page 71
nuevapuede sentirse"esponjosa"cuandose cierra. Esto esnormal y se reducir4 CO['l el use. Paraasegurarsede instalarel foco de repuestocorrecto,pida un foco de Maytag.Dame al 1-877-232-6771en EE.UUy. al 1-800-888-8408en Canaday1 pida la piezan_mero74009925- foco de hal6geno. Para reemplazar los - Maytag MGR6775BDW | Use and Care Guide - Page 72
de un electrodom stico a gas Losconectoresque se usanpara conectar los electrodom6sticosa gas al suministro de gas no est_indise_adospara ser movidos constantemente. p6ngaseen contacto con Maytag CustomerAssistanceIlamandoal 1-800-688-9900en EE.UU. o al 1-880-688-2002en Canada. Paraevitar que la - Maytag MGR6775BDW | Use and Care Guide - Page 73
est6 bien conectadoen el tomacorriente. o Verifique o restablezcael disyuntor. Verifique o reemplaceel fusible. o Verifique el suministro elc!ctricoo de gas. o Asegt]resede que el electrodomc!sticoest6 debidamenteconectadoal suministro de energfa. o Verifique si hayun fusible del circuito fundido - Maytag MGR6775BDW | Use and Care Guide - Page 74
solucl6ndeavedas El homo no se limpi6 adecuadamente. , Esposibleque se requiera un ciclo de autolimpiezam_s largo. , Losderramesexcesivos,en especiallosderramesazucaradosy/o _cidos,nose limpiaronantes del ciclo de autolimpieza. La puerta del homo no se desbloquea despu_s del ciclo de autolimpieza - Maytag MGR6775BDW | Use and Care Guide - Page 75
74 - Maytag MGR6775BDW | Use and Care Guide - Page 76
" del Manual de uso y cuidado. Despues de consultar la secci6n "Soluci6n de problemas", puede encontrar ayuda adicional en la secci6n "Ayuda o servicio tecnico," o Ilamando a Maytag. En EE.UU,, Ilame al 1-800-688-9900, En CanadA, Ilame al 1-800-807-6777. 9/07 Form No. A/01/08 Part No. 8113P707
-
 1
1 -
 2
2 -
 3
3 -
 4
4 -
 5
5 -
 6
6 -
 7
7 -
8
-
9
-
10
-
11
-
12
-
13
-
14
-
15
-
16
-
17
-
18
-
19
-
20
-
21
-
22
-
23
-
24
-
25
-
26
-
27
-
28
-
29
-
30
-
31
-
32
-
33
-
34
-
35
-
36
-
37
-
38
-
39
-
40
-
41
-
42
-
43
-
44
-
45
-
46
-
47
-
48
-
49
-
50
-
51
-
52
-
53
-
54
-
55
-
56
-
57
-
58
-
59
-
60
-
61
-
62
-
63
-
64
-
65
-
66
-
67
-
68
-
69
-
70
-
71
-
72
-
73
-
74
-
75
-
76
 |
 |

MA A(]
Nlaytag
Gas
Double Oven Range
Precision Touch 750 Series
important
Safety
Instructions
...............................
1=4
Surface
Cooking
......................
5=6
Controls
Sealed Gas Burners
Oven
Cooking
.........................
7-14
Control Panel
Baking
Cook & Hold
Delay
Keep Warm
Broiling
Oven Racks
Care & Cleaning
...................
15=18
Self-Clean Oven
Cleaning Procedures
Maintenance
.........................
19=20
Oven Doors. Windows &
Lights
Removal of Gas Appliance
Troubleshooting
...................
21
=22
Warranty
& Service
....................
23
Guide
d'utilisation
et
d'entretien
...................................
24
Guia
de
uso
y cuidado
..............
50
Form
No. A/01/08
Part No. 8113P707-60
@2006 Maytag Appliances
Sales Co
All rights
reserved.
Litho USA