Netgear RND4000 RND4000 User Manual - Page 25
Setting Up User and Group Accounts, Display users from, Apply, Display, users from trusted domains
 |
UPC - 606449053272
View all Netgear RND4000 manuals
Add to My Manuals
Save this manual to your list of manuals |
Page 25 highlights
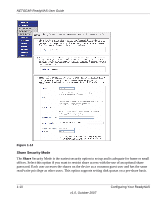
NETGEAR ReadyNAS User Guide If you have a large number of users in your domain, you may want to clear the Display users from trusted domains... check box. The FrontView management system might slow down to an unusable state. Note: NETGEAR does not recommend the use of the ReadyNAS in a domain environment with more than 1000 users at this time. Click Apply to join the domain. If Auto-detection is successful, users and groups from the domain now have login access to the shares on this device. Accounts are managed on the domain controller. The ReadyNAS simply pulls the account information from the controller and displays it in the Accounts tab screen if you have the Display users from trusted domains... option enabled. If you wish, you can assign a disk quota to the domain users and groups. If e-mail addresses are specified, users are automatically notified when approaching and reaching their quotas. Setting Up User and Group Accounts In the User & Group Accounts security mode, the Accounts tab screen allows you to manage user and group accounts on the ReadyNAS. Managing Groups To add a new group: 1. Select Manage Groups from the drop-down menu in the upper right corner. 2. Select the Add Group tab if it is not already selected. You can add up to five groups at a time. If you expect to have just one big set of users for one group, you can forego adding a new group and accept the default users group. 3. Click Apply to save your settings. If you want, a user can belong to multiple groups. Once you have created user accounts, you can specify secondary groups that the user can belong to. This allows for finer-grain settings for share access. For instance, you can have user Joe in the Marketing group also belong to the Sales group so Joe can access shares restricted to only the Marketing and Sales groups. While adding a new group, you can specify the amount of disk space you wish to allocate that group by setting a disk quota. A value of 0 denotes no limit. You can also set the Group ID, or GID, of the group that you are adding. You can leave this field blank and let the system automatically assign this value unless you wish to match your GID to your NFS clients. Configuring Your ReadyNAS v1.0, October 2007 1-13
-
 1
1 -
2
-
3
-
4
-
5
-
6
-
7
-
8
-
9
-
10
-
11
-
12
-
13
-
14
-
15
-
16
-
17
-
18
-
19
-
 20
20 -
 21
21 -
 22
22 -
 23
23 -
 24
24 -
 25
25 -
 26
26 -
 27
27 -
 28
28 -
 29
29 -
 30
30 -
31
-
32
-
33
-
34
-
35
-
36
-
37
-
38
-
39
-
40
-
41
-
42
-
43
-
44
-
45
-
46
-
47
-
48
-
49
-
50
-
51
-
52
-
53
-
54
-
55
-
56
-
57
-
58
-
59
-
60
-
61
-
62
-
63
-
64
-
65
-
66
-
67
-
68
-
69
-
70
-
71
-
72
-
73
-
74
-
75
-
76
-
77
-
78
-
79
-
80
-
81
-
82
-
83
-
84
-
85
-
86
-
87
-
88
-
89
-
90
-
91
-
92
-
93
-
94
-
95
-
96
-
97
-
98
-
99
-
100
-
101
-
102
-
103
-
104
-
105
-
106
-
107
-
108
-
109
-
110
-
111
-
112
-
113
-
114
-
115
-
116
-
117
-
118
-
119
-
120
 |
 |
