Netgear RNR4410 Software Manual - Page 101
Set Network Settings, Set TCP/IP Address Information
 |
UPC - 606449056853
View all Netgear RNR4410 manuals
Add to My Manuals
Save this manual to your list of manuals |
Page 101 highlights
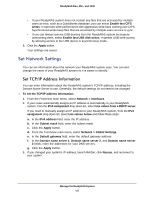
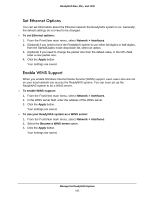
ReadyNAS Duo, NV+, and 1100 • If your ReadyNAS system does not contain any files that are accessed by multiple users at once, such as a QuickBooks database, you can select Enable fast CIFS writes. It improves write performance with aggressive write-back caching over CIFS. Synchronized writes keep files that are accessed by multiple users at once in sync. • If you can always remove USB devices from the ReadyNAS system by properly unmounting them, select Enable fast USB disk writes. It speeds USB write access by allowing access to the USB device in asynchronous mode. 3. Click the Apply button. Your settings are saved. Set Network Settings You can set information about the network your ReadyNAS system uses. You can also change the name of your ReadyNAS system so it is easier to identify. Set TCP/IP Address Information You can enter information about the ReadyNAS system's TCP/IP address, including the Domain Name Server to use. Generally, the default settings do not need to be changed. To set the TCP/IP address information: 1. From the FrontView main menu, select Network > Interfaces. 2. If your router automatically assigns an IP address is automatically to your ReadyNAS system, from the IPv4 assignment drop-down list, select Use values from a DHCP server. If you need to manually assign an IP address to your ReadyNAS system, from the IPv4 assignment drop-down list, select Use values below and follow these steps: a. In the IPv4 address field. enter the IP address. b. In the Subnet mask field, enter the subnet mask. c. Click the Apply button. d. From the FrontView main menu, select Network > Global Settings. e. In the Default gateway field, enter the default gateway address f. In the Domain name server 1, Domain name server 2, and Domain name server 3 fields, enter the addresses for your DNS servers. g. Click the Apply button. 3. If you changed your system's IP address, launch RAIDar, click Rescan, and reconnect to your system. Manage the ReadyNAS System 101
-
 1
1 -
2
-
3
-
4
-
5
-
6
-
7
-
8
-
9
-
10
-
11
-
12
-
13
-
14
-
15
-
16
-
17
-
18
-
19
-
20
-
21
-
22
-
23
-
24
-
25
-
26
-
27
-
28
-
29
-
30
-
31
-
32
-
33
-
34
-
35
-
36
-
37
-
38
-
39
-
40
-
41
-
42
-
43
-
44
-
45
-
46
-
47
-
48
-
49
-
50
-
51
-
52
-
53
-
54
-
55
-
56
-
57
-
58
-
59
-
60
-
61
-
62
-
63
-
64
-
65
-
66
-
67
-
68
-
69
-
70
-
71
-
72
-
73
-
74
-
75
-
76
-
77
-
78
-
79
-
80
-
81
-
82
-
83
-
84
-
85
-
86
-
87
-
88
-
89
-
90
-
91
-
92
-
93
-
94
-
95
-
 96
96 -
 97
97 -
 98
98 -
 99
99 -
 100
100 -
 101
101 -
 102
102 -
 103
103 -
 104
104 -
 105
105 -
 106
106 -
107
-
108
-
109
-
110
-
111
 |
 |