Nikon P80 P80 User's Manual - Page 46
Shooting When Lighting is Poor and the Flash is Disabled, Note on Using the Flash
 |
View all Nikon P80 manuals
Add to My Manuals
Save this manual to your list of manuals |
Page 46 highlights
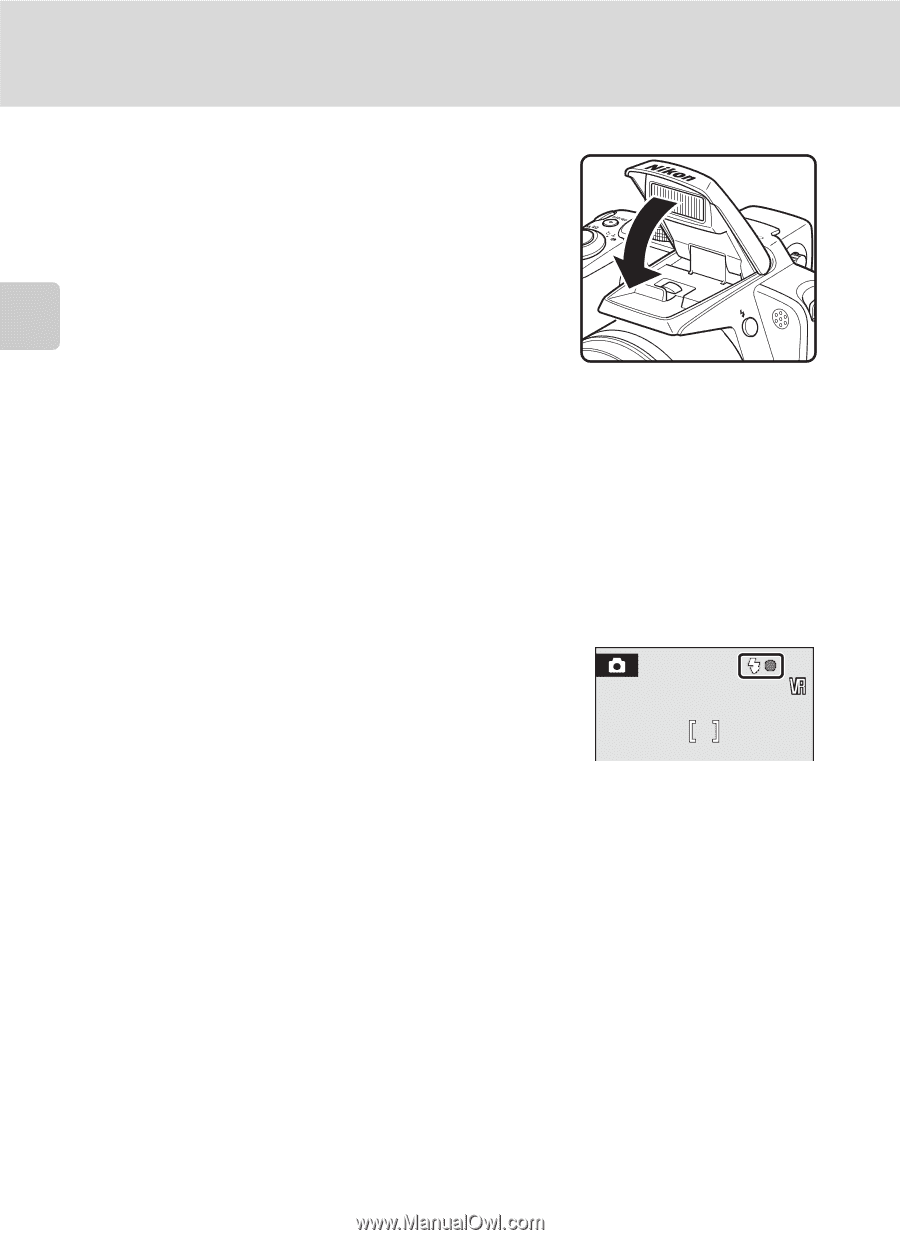
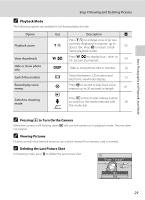
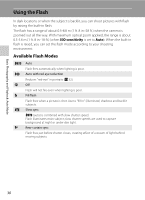
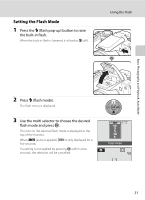
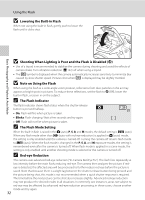
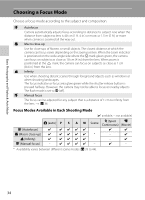
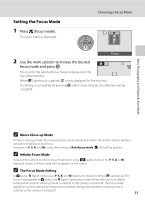
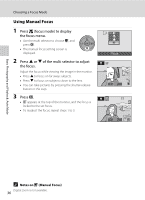
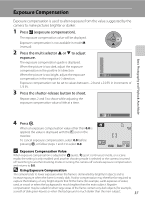
Basic Photography and Playback: Auto Mode Using the Flash B Lowering the Built-in Flash When not using the built-in flash, gently push to lower the flash until it clicks shut. B Shooting When Lighting is Poor and the Flash is Disabled (W) • Use of a tripod is recommended to stabilize the camera during shooting and avoid the effects of camera shake. Turn vibration reduction (A 122) off when using a tripod. • The E symbol is displayed when the camera automatically increases sensitivity to minimize blur caused by slow shutter speed. Pictures shot when E is displayed may be slightly mottled. B Note on Using the Flash When using the flash at a wide-angle zoom position, reflections from dust particles in the air may appear as bright spots in pictures. To reduce these reflections, set the flash to W (Off), lower the built-in flash, or zoom in on the subject. C The Flash Indicator The flash indicator shows flash status when the shutter-release button is pressed halfway. • On: Flash will fire when picture is taken. • Blinks: Flash charging. Wait a few seconds and try again. • Off: Flash will not fire when picture is taken. C The Flash Mode Setting When the built-in flash is raised in the A (auto), P, S, A, and M modes, the default setting is U (auto). When any flash mode other than V (auto with red-eye reduction) is applied in A (auto) mode, the setting is only enabled until the camera is turned off. Turning the camera off returns flash mode to U (auto). When the flash mode is changed in the P, S, A, and M exposure modes, the setting is remembered even after the camera is turned off. When flash mode is applied in a scene mode, the setting is only enabled until another shooting mode is selected or the camera is turned off. C Red-eye Reduction This camera uses advanced red-eye reduction ("In-Camera Red-Eye Fix"). The flash fires repeatedly at low intensity before the main flash, reducing red-eye. The camera then analyzes the picture; if redeye is detected, the affected area will be processed to further reduce red-eye before the picture is saved. Note that because there is a slight lag between the shutter-release button being pressed and the picture being shot, this mode is not recommended when a quick shutter response is required. The time before the next picture can be shot also increases slightly. Advanced red-eye reduction may not produce the desired results in all situations. In extremely rare instances, areas not subject to red-eye may be affected by advanced red-eye reduction processing; in these cases, choose another mode and try again. 32
-
 1
1 -
2
-
3
-
4
-
5
-
6
-
7
-
8
-
9
-
10
-
11
-
12
-
13
-
14
-
15
-
16
-
17
-
18
-
19
-
20
-
21
-
22
-
23
-
24
-
25
-
26
-
27
-
28
-
29
-
30
-
31
-
32
-
33
-
34
-
35
-
36
-
37
-
38
-
39
-
40
-
 41
41 -
 42
42 -
 43
43 -
 44
44 -
 45
45 -
 46
46 -
 47
47 -
 48
48 -
 49
49 -
 50
50 -
 51
51 -
52
-
53
-
54
-
55
-
56
-
57
-
58
-
59
-
60
-
61
-
62
-
63
-
64
-
65
-
66
-
67
-
68
-
69
-
70
-
71
-
72
-
73
-
74
-
75
-
76
-
77
-
78
-
79
-
80
-
81
-
82
-
83
-
84
-
85
-
86
-
87
-
88
-
89
-
90
-
91
-
92
-
93
-
94
-
95
-
96
-
97
-
98
-
99
-
100
-
101
-
102
-
103
-
104
-
105
-
106
-
107
-
108
-
109
-
110
-
111
-
112
-
113
-
114
-
115
-
116
-
117
-
118
-
119
-
120
-
121
-
122
-
123
-
124
-
125
-
126
-
127
-
128
-
129
-
130
-
131
-
132
-
133
-
134
-
135
-
136
-
137
-
138
-
139
-
140
-
141
-
142
-
143
-
144
-
145
-
146
-
147
-
148
-
149
-
150
-
151
-
152
-
153
-
154
-
155
-
156
-
157
-
158
-
159
-
160
-
161
-
162
-
163
-
164
-
165
-
166
-
167
 |
 |