Oki C942 C911dn/C931dn/C931DP/C941dn/C941DP/C942 Basic Users Guide - English - Page 25
Main Control Panel Features, Control Panel Appearance, If a set value is displayed
 |
View all Oki C942 manuals
Add to My Manuals
Save this manual to your list of manuals |
Page 25 highlights
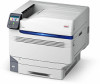
Parts Nomenclature and Functions Main Control Panel Features The control panel can be used to check the device status and implement various device functions. The toner cartridge can be replaced while viewing the liquid crystal display on the control panel. 1 Further, you can also perform operations while checking the messages displayed on the liquid crystal panel if paper jams or device malfunctions occur. Before use Reference zz See the control panel menus table "Table of control panel menu items" (P.119). Control Panel Appearance 2 This section explains the main control panel operations and control panel appearance. Setting Up There are two types of standby screen: "Remaining toner quantity display" and "Tray information display". The color display of the selected item is inverted. The name of the menu that is displayed. Displays the number of pages in the menu displayed on the liquid crystal panel. 3 Printing Basic Device Operations 4 If there is a scroll bar, there are items that are not displayed in the liquid crystal panel. Press the scroll button or to display them. A password must be entered to display the [Admin Setup]. Enter the administrator password (factory setting is "aaaaaa") in the password input screen. Press the scroll button or the to display the "Functions" menu screen as shown on the right. zzIf there is a selection menu at the next level or set values for an item, select the item and press the [OK] button to display the next screen. zzIf a set value is displayed, press the [OK] button to confirm the value that has been set. ( is displayed to the left of the value.) Appendix Index - 25 -
-
 1
1 -
2
-
3
-
4
-
5
-
6
-
7
-
8
-
9
-
10
-
11
-
12
-
13
-
14
-
15
-
16
-
17
-
18
-
19
-
 20
20 -
 21
21 -
 22
22 -
 23
23 -
 24
24 -
 25
25 -
 26
26 -
 27
27 -
 28
28 -
 29
29 -
 30
30 -
31
-
32
-
33
-
34
-
35
-
36
-
37
-
38
-
39
-
40
-
41
-
42
-
43
-
44
-
45
-
46
-
47
-
48
-
49
-
50
-
51
-
52
-
53
-
54
-
55
-
56
-
57
-
58
-
59
-
60
-
61
-
62
-
63
-
64
-
65
-
66
-
67
-
68
-
69
-
70
-
71
-
72
-
73
-
74
-
75
-
76
-
77
-
78
-
79
-
80
-
81
-
82
-
83
-
84
-
85
-
86
-
87
-
88
-
89
-
90
-
91
-
92
-
93
-
94
-
95
-
96
-
97
-
98
-
99
-
100
-
101
-
102
-
103
-
104
-
105
-
106
-
107
-
108
-
109
-
110
-
111
-
112
-
113
-
114
-
115
-
116
-
117
-
118
-
119
-
120
-
121
-
122
-
123
-
124
-
125
-
126
-
127
-
128
-
129
-
130
-
131
-
132
-
133
-
134
-
135
-
136
-
137
-
138
-
139
-
140
-
141
 |
 |
