Oki C9600n Guide: Network User's, OkiLAN 8200e
Oki C9600n Manual
 |
View all Oki C9600n manuals
Add to My Manuals
Save this manual to your list of manuals |
Oki C9600n manual content summary:
- Oki C9600n | Guide: Network User's, OkiLAN 8200e - Page 1
59367301_cvr.jpg - Oki C9600n | Guide: Network User's, OkiLAN 8200e - Page 2
and referred to in this guide will not affect the drivers and manuals are available from the web site: http://www.www.okiprintingsolutions.com Trademark Information Oki Data, Oki Printing Solutions, and OkiLAN are registered trademarks of Oki Microsoft Corporation in the United States and/or other - Oki C9600n | Guide: Network User's, OkiLAN 8200e - Page 3
15 Using AdminManager Quick Setup 16 Introduction 16 Using Quick Setup 17 Using a Web Browser 19 Launching the Web Browser 19 Using the Web Browser 23 Changing the Password 24 Using 123 Running PrintSuperVision 123 Uninstalling PrintSuperVision 124 OkiLAN 8200e Network User's Guide 3 - Oki C9600n | Guide: Network User's, OkiLAN 8200e - Page 4
167 Using NetBEUI Protocol 175 Installation Overview 175 Installing NetBEUI Protocol 176 Configuring Windows to Print to the Network Printer. . 177 Section 5: Printing from Novell NetWare 179 Overview 180 Supported Versions and Modes 180 Remote Printer Mode 180 Print Server Mode (Recommended - Oki C9600n | Guide: Network User's, OkiLAN 8200e - Page 5
7: Printing Using Macintosh 202 Overview 203 Supported Versions 203 Self-Diagnostic Test Printout 204 Installing the Driver 205 MAC OS 9.1 205 MAC OS 10.1 205 MAC OS 10.2x 206 MAC OS 10.3x 206 Setting Up the Printer 207 OS 9.1 207 OS 10.1 and Above 207 Section 8: Troubleshooting 208 - Oki C9600n | Guide: Network User's, OkiLAN 8200e - Page 6
: The Printer Menu 221 Menu Basics 221 Overview 222 Table Conventions Used 222 Admin List 233 Admin Setup 233 Calibration Menu 254 Print Statistics Menu 256 Boot Menu 257 Parallel Setup 257 USB Setup 258 Storage Setup 259 Power Setup 260 Index 261 OkiLAN 8200e Network User's Guide - Oki C9600n | Guide: Network User's, OkiLAN 8200e - Page 7
Important Boxes NOTE A note appears like this. A note provides additional information to supplement the main text which helps you to use and understand the product. Important! An important message appears like this. An important message provides supplemental information which can prevent potential - Oki C9600n | Guide: Network User's, OkiLAN 8200e - Page 8
The network addresses used in this manual are shown for example only. Network addresses used in your installation must be generated from your network administrator. The OkiLAN® Internal Print Server is a fast 100BASE-TX/10BASE-T network interface. This network print server supports IEEE 802.2, IEEE - Oki C9600n | Guide: Network User's, OkiLAN 8200e - Page 9
" on page 129 ᮣ "Section 4: Printing from Micosoft Windows" on page 159 ᮣ "Section 5: Printing from Novell NetWare" on page 179 ᮣ "Section 6: Printing Using UNIX" on page 182 ᮣ "Section 7: Printing Using Macintosh" on page 202 ᮣ "Section 8: Troubleshooting" on page 208 OkiLAN 8200e Network User - Oki C9600n | Guide: Network User's, OkiLAN 8200e - Page 10
, TELNET, HTTP, IPP, BOOTP, DHCP, SNMP, DNS, SMTP, POP3 • IPX/SPX (NetWare) - Remote printer mode (up to eight file servers and 32 queues) - Print server mode (up to eight print servers) - Encrypted password supported in print server mode - SNMP • EtherTalk: ELAP, AARP, DDP, AEP, NBP, ZIP, RTMP, ATP - Oki C9600n | Guide: Network User's, OkiLAN 8200e - Page 11
Supported Operating Systems Print Service Security Features Functions • Windows - XP - 2000 - NT 4.0 - Me/98 • Novell NetWare - 3.12J, 3.2J - 4.11J Self-diagnostic test printing • Banner supported • Monitoring/configure by Web browser • Printer status notification by E-Mail OkiLAN 8200e Network - Oki C9600n | Guide: Network User's, OkiLAN 8200e - Page 12
Self-Diagnostic Test With the printer power switched on, press the print server test button for more of "OK" see page 209. The printout contains the following network information: • Printer Information • General Information • TCP/IP Configuration • NetWare Configuration • EtherTalk Configuration • - Oki C9600n | Guide: Network User's, OkiLAN 8200e - Page 13
print server by using one of the address, Subnet Mask and Gateway for TCP/IP manually or by using DHCP. • Set NetWare Mode and create Queue/Print Server/Printer objects. • Zone name and Port name for system. Configure the print server and printer by using a Web browser such as Microsoft Internet - Oki C9600n | Guide: Network User's, OkiLAN 8200e - Page 14
AdminManage r (see page 25) Configure the print server in detail. TELNET (see page 60) Configure the print server using TELNET. System requirements Windows* • XP • 2000 • NT 4.0 • Me • 95/98 * with TCP/IP Application is standard in Windows, UNIX and Linux. OkiLAN 8200e Network User's Guide 14 - Oki C9600n | Guide: Network User's, OkiLAN 8200e - Page 15
explains the various ways you can configure your print server. It consists of the following: ᮣ Using AdminManager Quick Setup (page 16) ᮣ Using a Web Browser (page 19) ᮣ Using AdminManager Standard Setup (page 25) ᮣ Using TELNET (page 60) ᮣ Configurable Items (page 70) OkiLAN 8200e Network User - Oki C9600n | Guide: Network User's, OkiLAN 8200e - Page 16
TCP/IP, NetWare, EtherTalk, NetBEUI protocols. • Set IP address, Subnet Mask and Gateway for TCP/IP manually or by using DHCP. • Set NetWare mode and create Queue/Print Server/Printer objects. • Zone name and Port name for EtherTalk. Configuration requires a PC with one of the following Windows - Oki C9600n | Guide: Network User's, OkiLAN 8200e - Page 17
Using Quick Setup cd.jpg 1. Insert the Drivers CD provided with your printer into the CD-ROM drive and wait for it to 7. Select the language. 8. Click [OKI Device Quick Setup]. The Welcome window appears. 9. Click [Next] and follow the on-screen instructions. NOTE The NetWare Client 32 or - Oki C9600n | Guide: Network User's, OkiLAN 8200e - Page 18
The new settings are transmitted to the network card, but the network card is still operating with pre-transmission settings. 11. Click [Finish] to validate the new settings. The print server reinitializes. OkiLAN 8200e Network User's Guide 18 - Oki C9600n | Guide: Network User's, OkiLAN 8200e - Page 19
/IP, its settings and the printer menu settings can be configured using a Web browser such as • Microsoft Internet Explorer Version 5.5 and higher or • Netscape Navigator version 6.2 and higher. No guarantees are offered for other browsers. Refer to the relevant manuals for details of how to launch - Oki C9600n | Guide: Network User's, OkiLAN 8200e - Page 20
in the [Address] field. Netscape Navigator Enter the print server's IP Address in the [Location/Position] field. 4. Press the ENTER key. The Printer Status window appears. NOTE You can also launch the web browser from within the AdminManager utility. To do this, highlight the appropriate print - Oki C9600n | Guide: Network User's, OkiLAN 8200e - Page 21
configuration, [Security information] may appear. Uncheck [Display this message next time]. 6. Click [OK]. 7. Click [Administrator Login]. The [Connect to] window appears. OkiLAN 8200e Network User's Guide 21 - Oki C9600n | Guide: Network User's, OkiLAN 8200e - Page 22
8. Enter "root" for the [User Name] and your password-the default is the last six digits of the MAC address-under [Password]. Explorer_Pasword.bmp 9. Click [OK]. OkiLAN 8200e Network User's Guide 22 - Oki C9600n | Guide: Network User's, OkiLAN 8200e - Page 23
Using the Web Browser 8200e_WebAdmin_Ready.jpg 1. Click on a tab to access the details on setting non-security type configurable items using the web browser, see "Configurable Items" starting on page 70. For information on setting up security features using the web browser, see "IPP Encryption" on - Oki C9600n | Guide: Network User's, OkiLAN 8200e - Page 24
.jpg 3. Under [Administrator(root) Password Configuration], enter the new password, then enter it again under [Confirm New Admin Password]. 4. Click [Submit]. OkiLAN 8200e Network User's Guide 24 - Oki C9600n | Guide: Network User's, OkiLAN 8200e - Page 25
to the network with TCP/IP or IPX/SPX. • This utility must be used on a PC that is located in the same segment as the printer. • To create a NetWare queue, NetWare Client 32 or IntranetWare Client should be • Windows Me/98 • Windows NT Server 4.0/Work-station 4.0 OkiLAN 8200e Network User's Guide 25 - Oki C9600n | Guide: Network User's, OkiLAN 8200e - Page 26
Installing AdminManager cd.jpg 1. Insert the Drivers CD provided with your printer into the CD-ROM drive and wait for it to autorun. If the 6. Click [Admin Mgr / Quick Setup]. The Setup Utility opens. 7. Select your language. 8. Click [OKI Device Standard Setup]. OkiLAN 8200e Network User's Guide 26 - Oki C9600n | Guide: Network User's, OkiLAN 8200e - Page 27
hard drive and run it from there [Install and Execute]. 9. Click [Next]. a. If you selected [Install and Execute], follow the on-screen instructions to install AdminManager, then see the "The AdminManager Interface" section below. b. If you selected [Execute from CD-ROM], see the "The AdminManager - Oki C9600n | Guide: Network User's, OkiLAN 8200e - Page 28
open the standard version of AdminManager from your desktop, click [Start] → [Programs] → [OKI Setup Utility] → [Admin Manager]. AdminMgr_Interface1.bmp Pull-Down Menus File menu • Search: Locates and lists all printers in your network which have the OkiLAN 8200e installed. • Exit Exit the program - Oki C9600n | Guide: Network User's, OkiLAN 8200e - Page 29
status. For more information, see the NetMeter on-line Help file. • List of Configuration Items Displays current configuration. Configuration data can be saved as log file. Setup Menu AdminMgr_SetupMenu1.bmp • Oki Device Setup Use this to configure the print server card. NOTE To find corresponding - Oki C9600n | Guide: Network User's, OkiLAN 8200e - Page 30
General Tab (Oki Device Setup) 8200e_AdminMgr_General_Tab.bmp The General tab allows you to change the admin password, SNMP Write Community name and SNMP Read Community a MAC (Ethernet) Address of 00:80:87:A4:55:79, the password would be A45579. b. Click [OK]. OkiLAN 8200e Network User's Guide 30 - Oki C9600n | Guide: Network User's, OkiLAN 8200e - Page 31
TCP/IP Tab (Oki Device Setup) 8200e_AdminMgr_TCPIP_Tab.bmp Item Use TCP/IP Protocol Use DHCP/BOOTP Use RARP IP Address Subnet Mask Comments Enable/disable TCP/IP protocol. Click to select this card. Set the subnet mask of the selected network interface card. OkiLAN 8200e Network User's Guide 31 - Oki C9600n | Guide: Network User's, OkiLAN 8200e - Page 32
Server... Comments Set the default gateway of the selected network interface card. Use to enable/disable Network PnP and Rendezvous, and to set the Device Name. Set IP addresses for DNS primary and secondary servers. Use to set IP addresses for primary and secondary servers, and to enter a Scope - Oki C9600n | Guide: Network User's, OkiLAN 8200e - Page 33
NetWare Tab (Oki Device Setup) 8200e_AdminMgr_NetWare_Tab.bmp Item Use NetWare Protocol Use IPX Protocol Use TCP/IP Protocol Print Server Name Frame Type Operation Mode Comments Enable/disable NetWare protocol. Click to deselect if you do not wish to use IPX. Click this to select TCP/IP protocol. - Oki C9600n | Guide: Network User's, OkiLAN 8200e - Page 34
Setup] check box. Bindery Setup NDS Setup RPRINTER Setup Printer Name Comments Click to deselect Bindery. When Bindery Setup is Time Out Set the duration from the last data's arrival to freeing of the port, in seconds. Set the NetWare printer object name. OkiLAN 8200e Network User's Guide 34 - Oki C9600n | Guide: Network User's, OkiLAN 8200e - Page 35
EtherTalk Tab (Oki Device Setup) 8200e_AdminMgr_EtherTalk_Tab.bmp Item Use EtherTalk Protocol Printer Name Zone Name Comments Enable/disable EtherTalk protocol. Set the EtherTalk Printer object name. Set the name of the zone to which the print server belongs. OkiLAN 8200e Network User's Guide 35 - Oki C9600n | Guide: Network User's, OkiLAN 8200e - Page 36
.bmp Item Use NetBEUI Protocol Short Printer Name Workgroup Comment Comments Enable/disable NetBEUI protocol. Set a computer name for the print server. Set a name for the work group to which the print server belongs. Set the comments for the print server. OkiLAN 8200e Network User's Guide 36 - Oki C9600n | Guide: Network User's, OkiLAN 8200e - Page 37
SNMP Tab (Oki Device Setup) 8200e_AdminMgr_SNMP_Tab.bmp Item Comments Authentic Community This community name is used to check Set the printer manager name. SysName Set the printer model name. SysLocation Set the location where the printer is installed. OkiLAN 8200e Network User's Guide 37 - Oki C9600n | Guide: Network User's, OkiLAN 8200e - Page 38
can be configured: Printer Trap Community Name This community name is assigned to outgoing printer status traps such • Printer Reboot • Receive Illegal • Online • Offline • Paper Out • Paper Jam • Cover Open • Printer Error conditions: • Printer Reboot • Receive Illegal • Online • Offline • Paper Out - Oki C9600n | Guide: Network User's, OkiLAN 8200e - Page 39
8200e_AdminMgr_EmailSend_Tab.bmp Item Use SMTP Transmit SMTP Server Name Printer E-mail Address Comments Enable/disable sending E-mail using SMTP. Set the host name of the SMTP server. Set the E-mail address that is used in the [From] field in the mail header. OkiLAN 8200e Network User's Guide 39 - Oki C9600n | Guide: Network User's, OkiLAN 8200e - Page 40
Mode Set ON/OFF for the following events: • Consumable Warning (toner, image drum or staples are running low) • Consumable Error (toner cartridge is empty, image drum has reached end of life or staples have run out) • Maintenance Warning (belt or fuser is nearing end of life) • Maintenance Error - Oki C9600n | Guide: Network User's, OkiLAN 8200e - Page 41
Select whichever of the following information is to be included in the E-mail: • Printer Model • Network Interface • Serial Number • Asset Number • System Name • Printer Location • IP Address • Ethernet Address • Short Printer Name • Printer URL Set up to four lines of text to be included with the - Oki C9600n | Guide: Network User's, OkiLAN 8200e - Page 42
to set the following security information: Use SMTP Authenticatio n Enable/disable SMTP authentication. User ID Set the user ID for authentication number of SMTP (default is 25). Reply-To Address Set the E-mail address used for the [Reply-To] field in the mail header OkiLAN 8200e Network User - Oki C9600n | Guide: Network User's, OkiLAN 8200e - Page 43
to print PDF and text files attached to emails. Not all printers support this function. If the POP tab is not displayed, your printer does not support this function. 8200e_AdminMgr_EmailReceive_Tab.bmp Item Comments Use POP Receive Enable/disable receiving E-Mail via POP3. POP3 Server Set - Oki C9600n | Guide: Network User's, OkiLAN 8200e - Page 44
Receive Domain Filter... Comments Set the following: Use APOP Select if you want to use APOP. POP3 Port Number Set the port 10min, 30 min, 60 min. Enable/disable SMTP receive. Set the following: Use Domain Enable/disable domain filtering. Filter Filter Policy Select ACCEPT (the default) or - Oki C9600n | Guide: Network User's, OkiLAN 8200e - Page 45
SNTP Tab (Oki Device Setup) 8200e_AdminMgr_SNTP_Tab.bmp Item Use SNTP NTP Server 1 Address NTP Server 2 Address Adjust Interval Comments Enable/disable SNTP (Simple Network Time Protocol requests to the server. Select 1 hour (the default), 12 hours or 24 hours. OkiLAN 8200e Network User's Guide 45 - Oki C9600n | Guide: Network User's, OkiLAN 8200e - Page 46
Item Comments Local Time Zone Set the local time zone from -12:00 to +13:00. Minute interval is selectable from 00 (the default), 15, 30 or 45. Daylight Saving When this is selected, one hour is added to the local time. OkiLAN 8200e Network User's Guide 46 - Oki C9600n | Guide: Network User's, OkiLAN 8200e - Page 47
Maintenance Tab (Oki Device Setup) 8200e_AdminMgr_Maintenance_Tab.bmp Item LAN Scale Comments Select NORMAL (the default) or SMALL. OkiLAN 8200e Network User's Guide 47 - Oki C9600n | Guide: Network User's, OkiLAN 8200e - Page 48
configured: Use IP Filter Enable/disable IP Filtering. Default is disabled. Admin IP Address Enter the printer's IP address ranges. Default is disabled. Service... The following features can be FTP Service (enabled) • Telnet Service (enabled) • Web Service (enabled) • SNMP Service (enabled) - Oki C9600n | Guide: Network User's, OkiLAN 8200e - Page 49
SSL/TLS Tab (Oki Device Setup) See "Section 3: Security Features" starting on page 129 for more information. 8200e_AdminMgr_SSLTLS_Tab.bmp Item Encryption security, slowest speed • Standard = medium security, medium speed • Weak = least security, fastest speed OkiLAN 8200e Network User's Guide 49 - Oki C9600n | Guide: Network User's, OkiLAN 8200e - Page 50
the following items are configured: Common Name The printer's IP Address appears here. Organization Enter the name of your organization. Organization Unit Optional. Allows you to enter a subdivision or (month/date/year) for which the certificate is valid. OkiLAN 8200e Network User's Guide 50 - Oki C9600n | Guide: Network User's, OkiLAN 8200e - Page 51
Used for web encryption to provide security when printing over the internet. Requires an outside certification service which must be purchased separately. See page 144 for more information. When CA-signed Certificate is selected, the following items are configured: Common Name The printer - Oki C9600n | Guide: Network User's, OkiLAN 8200e - Page 52
printer's TELNET port. NOTE The TELNET application is not included as part of the print server package. Install the TELNET package on to your system. For further information, see your Windows manual. ᮣ Create NetWare Queues Use create a queue with the remote printer mode on NetWare 4.1, you should - Oki C9600n | Guide: Network User's, OkiLAN 8200e - Page 53
instructions. Mode NDS PSERVER/ Location RPRINTER Print Server Context should be specified . PSERVER mode Current Print Server name is used [OKI Device Setup] and continue your configuration. ᮣ Delete NetWare Object Use this to delete a NetWare queue/print server/printer from User's Guide 53 - Oki C9600n | Guide: Network User's, OkiLAN 8200e - Page 54
Setup Sets the static IP address of the network interface card manually. If you only use TCP/IP and the print server has not yet been configured, IP address that you set can be used after turning the printer OFF and ON. The requirement to turn your printer OFF and ON is dependent on the network - Oki C9600n | Guide: Network User's, OkiLAN 8200e - Page 55
/SPX Protocol If this item is selected, AdminManager uses IPX/SPX protocol to search/configure network interface cards. ᮣ Environment Setup Set environment items such as broadcast addresses for TCP/IP protocol, network addresses for NetWare protocol and Time Out. OkiLAN 8200e Network User's Guide 55 - Oki C9600n | Guide: Network User's, OkiLAN 8200e - Page 56
. The default is enabled. If disabled, the search will not be carried out using TCP/IP. Set broadcast addresses that are used to search OKI network interface cards using the TCP/IP protocol. Click [Add] to add the address to the list in the box. Select an address in the box, then click [Delete] to - Oki C9600n | Guide: Network User's, OkiLAN 8200e - Page 57
default is enabled. If disabled, the search will not be carried out using NetWare. If [Auto Search] is selected (the default), AdminManager will all networks that it can detect. Set network addresses that are used to search OKI network interface cards via NetWare protocol. If there any many NetWare - Oki C9600n | Guide: Network User's, OkiLAN 8200e - Page 58
Item Delete Comments Select a network number in the list box, then click [Delete] to remove it. OkiLAN 8200e Network User's Guide 58 - Oki C9600n | Guide: Network User's, OkiLAN 8200e - Page 59
Printer Search [Search Every (20-180sec)] Set the response waiting time from the network card in seconds. Default is 30 seconds. Set Timeout: Data [Retry (1-5)] Sets how many times AdminManager will retry to transmit/receive data to/from the network interface card. Default is 3 retries. Help Menu - Oki C9600n | Guide: Network User's, OkiLAN 8200e - Page 60
address for you network environment is used. Use of an incorrect IP address can cause serious problems on your network. Example TELNET method of configuring commands may differ between workstations. Refer to the workstation's manual. 1. Login as [root]. If you do not have Superuser rights Guide 60 - Oki C9600n | Guide: Network User's, OkiLAN 8200e - Page 61
3. Use the PING command to confirm the connection with the network card. Example For IP address 172.168.20.127: # ping 172.168.20.127 If there is no reply, there is a problem with the configuration of the IP address (the IP address has been already set manually or by the DHCP/RARP server - Oki C9600n | Guide: Network User's, OkiLAN 8200e - Page 62
127 Escape character is '^]'. EthernetBoard OkiLAN PRINTER". login: root 'root' user needs 5: Setup NetBEUI 6: Setup printer port 7: Display Status 8: Setup printer trap 9: Setup SMTP (E-Mail printer off and on again. NOTE The network card continues to use pre-transmission settings until the printer - Oki C9600n | Guide: Network User's, OkiLAN 8200e - Page 63
Hierarchical Structure Table For information on how to set the various reference numbers using AdminManager or Web browser, see the "Summary of Non-Security Configurable Items" TCPIP-7 TCPIP-8 TCPIP-9 - SNMP-1 SNMP-2 SNMP-3 SNMP-4 SNMP-5 SNMP-6 SNMP-7 SNMP-8 - OkiLAN 8200e Network User's Guide 63 - Oki C9600n | Guide: Network User's, OkiLAN 8200e - Page 64
prior menu Ref No. NetWare-1 NetWare-2 NetWare-3 NetWare-3 NetWare-4 NetWare-4 NetWare-4 NetWare-4 NetWare-4 NetWare-4 NetWare-4 NetWare-5 NetWare-6 NetWare-7 NetWare-8 NetWare-9 NetWare10 - OkiLAN 8200e Network User's Guide 64 - Oki C9600n | Guide: Network User's, OkiLAN 8200e - Page 65
menu - - Zone name - 99: Back to prior - menu Ref No. NetWare11 NetWare11 NetWare11 NetWare11 NetWare11 NetWare11 NetWare11 NetWare11 NetWare12 - - EtherTalk1 EtherTalk2 - OkiLAN 8200e Network User's Guide 65 - Oki C9600n | Guide: Network User's, OkiLAN 8200e - Page 66
port name port EtherTalk port name BOJ string EOJ string BOJ string(KANJI) EOJ string(KANJI) Printer type TAB size (char.) Page width (char.) Page length(line) lpr/ftp banner 99: -4 Port-5 Port-6 Port-7 Port-8 Port-9 Port-10 Port-11 - STATUS-1 STATUS-2 OkiLAN 8200e Network User's Guide 66 - Oki C9600n | Guide: Network User's, OkiLAN 8200e - Page 67
Setup printer trap Prn Paper Out trap Trap-5 Paper Jam trap Trap-6 Cover Open trap Trap-7 Printer Error trap Trap-8 TCP#1-5 Trap address Trap-9 99: Back to prior Paper Jam trap Trap-14 Cover Open trap Trap-15 Printer Error trap Trap-16 IPX Trap address Trap-17 IPX Trap net - Oki C9600n | Guide: Network User's, OkiLAN 8200e - Page 68
Ref No. - SMTP-1 - SMTP-2 - SMTP-3 - SMTP-4 - SMTP-5 - SMTP-6 To Address 1-5 SMTP-7 Re-send Interval SMTP-8 Off-Line SMTP-9 Consumable Message SMTP-10 Toner Low/Out SMTP-11 Paper Low/Out SMTP-12 Paper Jam SMTP-13 Cover Open SMTP-14 Stacker Error SMTP-15 Mass Storage - Oki C9600n | Guide: Network User's, OkiLAN 8200e - Page 69
98: Quit setup 99: Exit setup Level2 Level3 POP3 protocol - POP3 server - POP port number - POP3 server UserID - POP3 server Password - Use APOP - Retrieve every (min.) - 99: Back to prior - menu - - - - - - Ref No. POP-1 POP-2 POP-3 POP-4 POP-5 POP-6 POP-7 - ETC-1 - - OkiLAN - Oki C9600n | Guide: Network User's, OkiLAN 8200e - Page 70
Configuration: Configurable Items Summary of Non-Security Configurable Items NOTE Configurable items vary between printers. Default values are underlined. For information of configuring the print server's security features, • POP: see page 115 • ETC: see page 119 OkiLAN 8200e Network User's Guide 70 - Oki C9600n | Guide: Network User's, OkiLAN 8200e - Page 71
AdminManager [Setup] → [OKI Device Setup] → [TCP/IP] → [Use TCP/IP Protocol] Web Browser TCP/IP protocol cannot be disabled using Web Browser. TELNET [Setup ] → [OKI Device Setup] → [TCP/IP] → [Subnet Mask] Web Browser [Network] → [TCP/IP] → [Change Settings] → [Set IP address manually] → [Subnet - Oki C9600n | Guide: Network User's, OkiLAN 8200e - Page 72
manually] → [Default Gateway] TELNET [Setup TCP/IP] → [Gateway address] TCPIP-5 Enable / disable RARP. Default setting: Disable AdminManager [Setup] → [OKI Device Setup] → [TCP/IP] → [Use setting: Enable AdminManager [Setup] → [OKI Device Setup] → [TCP/IP] → [Use DHCP/BOOTP] Web Browser [Network] → - Oki C9600n | Guide: Network User's, OkiLAN 8200e - Page 73
Address for Secondary DNS Server, 0.0.0.0 to 255.255.255.255. Default setting: 0.0.0.0 AdminManager [Setup] → [OKI Device Setup] → [TCP/IP] → [DNS Server...] → [Secondary Server] Web Browser [Network] → [ Admin Password] TELNET [Setup TCP/IP] → [root password] OkiLAN 8200e Network User's Guide 73 - Oki C9600n | Guide: Network User's, OkiLAN 8200e - Page 74
used to check incoming SNMP requests. Displayed as asterisks (***) for security reasons. Up to 15 alphanumeric characters. Default setting: Public AdminManager [Setup] → [OKI ] → [OKI Device Setup] → [SNMP] → [TRAP Community] Web Browser [Network] → [SNMP Trap] → [STEP1] → [Printer Trap Community - Oki C9600n | Guide: Network User's, OkiLAN 8200e - Page 75
disabled) to 255.255.255.255. Default setting: 0.0.0.0 AdminManager [Setup] → [OKI Device Setup] → [SNMP] → [TRAP Address] Web Browser [Network] → [ Set the System Contact (printer manager) name. Up to 255 alphanumeric characters. Default setting: Null AdminManager [Setup] → [OKI Device Setup] → [ - Oki C9600n | Guide: Network User's, OkiLAN 8200e - Page 76
OKI Device Setup] → [SNMP] → [MIB-II Parameters] → [SysName] Web Browser Not availabl TELNET [Setup SNMP] → [SysName] SNMP-6 Set the SysLocation (the place where the printer is installed). Up to 255 alphanumeric characters. Default setting: Null AdminManager [Setup] → [OKI Device - Oki C9600n | Guide: Network User's, OkiLAN 8200e - Page 77
the Authentic Trap, 1 (enabled)/ 2 (disabled). Default setting: 2 (disabled) AdminManager Not available Web Browser Not available TELNET [Setup SNMP] → [Enable Authen Trap] OkiLAN 8200e Network User's Guide 77 - Oki C9600n | Guide: Network User's, OkiLAN 8200e - Page 78
. Default setting: Enable AdminManager [Setup] → [OKI Device Setup] → [NetWare] → [Use NetWare Protocol] Web Browser [Security] → [Protocol II, 802.3, 802.2, SNAP, or AUTO. Default setting: Auto AdminManager [Setup] → [OKI Device Setup] → [NetWare] → [Frame Type] Web Browser [Network] → [NetWare] - Oki C9600n | Guide: Network User's, OkiLAN 8200e - Page 79
Up to 47 alphanumeric characters per name. Default is null. Default setting: Null AdminManager [Setup] → [OKI Device Setup] → [NetWare] → [Bindery Setup] Web Browser [Network] → [NetWare] → [STEP1. TELNET [Setup NetWare] → [Setup PSERVER mode] → [PSERVER name 1-8] OkiLAN 8200e Network User's Guide 79 - Oki C9600n | Guide: Network User's, OkiLAN 8200e - Page 80
: Default includes the last six digits of the MAC address AdminManager [Setup] → [OKI Device Setup] → [NetWare] → [Print Server Name] Web Browser [Network] per password. Default is null. Default setting: Null AdminManager [Setup] → [OKI Device Setup] → [NetWare] → [Bindery Setup] → [Password] Web - Oki C9600n | Guide: Network User's, OkiLAN 8200e - Page 81
mode] → [Job Polling Interval] NetWare-8 Enable/Disable Bindery mode. Change to Disable if you use the print server as PSERVER on NDS. Default setting: Enable AdminManager [Setup] → [OKI Device Setup] → [NetWare] → [Check box beside Bindery Setup] Web Browser [Network] → [NetWare] → [STEP1 Select - Oki C9600n | Guide: Network User's, OkiLAN 8200e - Page 82
31 alphanumeric characters per name. Default setting: Null AdminManager [Setup] → [OKI Device Setup] → [NetWare] → [Deselect Bindery Setup...] → [NDS Setup to 77 alphanumeric characters. Default setting: Null AdminManager [Setup] → [OKI Device Setup] → [NetWare] → [Deselect Bindery Setup...] → [NDS - Oki C9600n | Guide: Network User's, OkiLAN 8200e - Page 83
last data's arrival to freeing the port) for Remote Printer. Range 4 to 255 seconds. Default setting: 10 seconds AdminManager [Setup] → [OKI Device Printer] → [To STEP2] → [NetWare Settings] → [Job Timeout] TELNET [Setup NetWare] → [SET PRINTER mode] → [Job timeout] OkiLAN 8200e Network User's Guide - Oki C9600n | Guide: Network User's, OkiLAN 8200e - Page 84
. Default setting: Enable AdminManager [Setup] → [OKI Device Setup] → [EtherTalk] → [Use EtherTalk Protocol] Web Browser [Security] → [Protocol 32 alphanumeric characters. Default is *. Default setting: * AdminManager [Setup] → [OKI Device Setup] → [EtherTalk] → [Zone Name] Web Browser [Network] → - Oki C9600n | Guide: Network User's, OkiLAN 8200e - Page 85
NetBEUI. Default setting: Enable AdminManager [Setup] → [OKI Device Setup] → [NetBEUI] → [Use NetBEUI Protocol] Web Browser [Security] → [Protocol ON AdminManager [Setup] → [OKI Device Setup] → [NetBEUI] → [Short Printer Name] Web Browser [Network] → [NetBEUI] → [Short Printer Name] TELNET [Setup - Oki C9600n | Guide: Network User's, OkiLAN 8200e - Page 86
, Default is PrintServer. Default setting: PrintServer AdminManager [Setup] → [OKI Device Setup] → [NetBEUI] → [Workgroup] Web Browser [Network] characters can be used. Default is EthernetBoard OkiLAN 8200e. Default setting: EthernetBoard OkiLAN 8200e AdminManager [Setup] → [OKI Device Setup] → - Oki C9600n | Guide: Network User's, OkiLAN 8200e - Page 87
→ [Printer Name] For Print Server (NDS only, IP) [Network] → [NetWare] → [STEP1. Select NetWare Mode] → [Print Server [top selection]] → [To STEP2] → [STEP2. Detail Settings] → [NetWare Settings] → [Printer Name] TELNET [Setup printer port] → [NetWare port name] OkiLAN 8200e Network User's Guide 87 - Oki C9600n | Guide: Network User's, OkiLAN 8200e - Page 88
[Setup] → [OKI Device Setup] → [EtherTalk] → [Printer Name] Web Browser [Network] → [EtherTalk] → [EtherTalk Printer Name] TELNET [Setup printer port] → [ (0x5c). AdminManager Not applicable Web Browser Not applicable TELNET [Setup printer port] → [BOJ string] OkiLAN 8200e Network User's Guide 88 - Oki C9600n | Guide: Network User's, OkiLAN 8200e - Page 89
-4 Set an appropriate command sequence to be sent to the connected printer after printing a job. Combination of alphanumeric characters and the following (0x5c). AdminManager Not applicable Web Browser Not applicable TELNET [Setup printer port] → [EOJ string] OkiLAN 8200e Network User's Guide 89 - Oki C9600n | Guide: Network User's, OkiLAN 8200e - Page 90
to be sent to the connected printer before printing a job when data is sent to the sjis/euc logical printer/directory. Combination of alphanumeric characters (0x5c). AdminManager Not applicable Web Browser Not applicable TELNET [Setup printer port] → [BOJ string(KANJI)] OkiLAN 8200e Network User - Oki C9600n | Guide: Network User's, OkiLAN 8200e - Page 91
command sequence to be sent to the connected printer after printing a job when data is sent to the sjis/euc logical printer/directory. Combination of alphanumeric characters and the Not applicable Web Browser Not applicable TELNET [Setup printer port] → [EOJ string(KANJI)] OkiLAN 8200e Network User - Oki C9600n | Guide: Network User's, OkiLAN 8200e - Page 92
of tabs when data is sent to the sjis/euc logical printer/directory. Range 0 to 16. Default is 8. When 0 is selected, there are no tabs. Default setting: 8 AdminManager Not applicable Web Browser Not applicable TELNET [Setup printer port] → [TAB size (char.)] OkiLAN 8200e Network User's Guide 92 - Oki C9600n | Guide: Network User's, OkiLAN 8200e - Page 93
Set page width when data is sent to the sjis/euc printer/directory. Range 0 to applicable TELNET [Setup printer port] → [Page width (char.)] Port-10 Set page length when data is sent to the sjis/euc printer/directory. Range 0 to [Setup printer port] → [Page length (char.)] OkiLAN 8200e Network User - Oki C9600n | Guide: Network User's, OkiLAN 8200e - Page 94
Port-11 Set banner printing for LPR/FTP enabled/disabled. Default setting: Disabled AdminManager Not applicable Web Browser Not applicable TELNET [Setup printer port] → [lpr/ftp banner] OkiLAN 8200e Network User's Guide 94 - Oki C9600n | Guide: Network User's, OkiLAN 8200e - Page 95
Status Status-1 Display the logical port status. Default setting: x AdminManager [Status] → [Printer Status] Web Browser [Status] → [Printer Status] TELNET [Display status] → [prn1] Status-2 Display the system status. Default setting: x AdminManager [Status] → [System Status] Web Browser [Network] → - Oki C9600n | Guide: Network User's, OkiLAN 8200e - Page 96
OKI Device Setup] → [SNMP] → [Printer Trap Setup ...] → [Printer Trap Community Name] Web Browser [Network] → [SNMP Trap] → [Printer Trap Settings] → [ STEP1. Set Printer Trap Community Name} → [Printer Trap Community Name] TELNET [Setup printer ] → [OKI Device Setup] → [SNMP] → [Printer Trap Setup - Oki C9600n | Guide: Network User's, OkiLAN 8200e - Page 97
OKI Device Setup] → [SNMP] → [Printer Trap Setup ...] → [TCP #!-5] → [Detail ...] → [Trap Enable] → [Offline] Web Browser [Network] → [SNMP Trap] → [STEP3. Set Printer Trap Assignments] → [Offline] TELNET [Setup printer trap] → [Setup TCP#1-5 trap] → [Off-line trap] OkiLAN 8200e Network User's Guide - Oki C9600n | Guide: Network User's, OkiLAN 8200e - Page 98
trap] → [Paper Out trap] Trap-6 Enable/disable sending a trap when the paper jam occurs. Default setting: Disable AdminManager [Setup] → [OKI Device Setup] → [SNMP] → [Printer Trap Setup ...] → [TCP #!-5] → [Detail ...] → [Trap Enable] → [Paper Jam] Web Browser [Network] → [SNMP Trap] → [STEP3. Set - Oki C9600n | Guide: Network User's, OkiLAN 8200e - Page 99
[SNMP] → [Printer Trap Setup ...] → [TCP #!-5] → [Detail ...] → [Trap Enable] → [Printer Error] Web Browser [Network] → [SNMP Trap] → [STEP3. Set Printer Trap Assignments] → [Printer Error] TELNET [Setup printer trap] → [Setup TCP#1-5 trap] → [Printer Error trap] OkiLAN 8200e Network User's Guide 99 - Oki C9600n | Guide: Network User's, OkiLAN 8200e - Page 100
OKI Device Setup] → [SNMP] → [Printer Trap Setup ...] → [TCP #!-5] Web Browser [Network] → [SNMP Trap] → [STEP2. Set Printer Trap Address] → [Address 1 [2, 3, 4, 5]] TELNET [Setup printer Default setting: Disable AdminManager [Setup] → [OKI Device Setup] → [SNMP] → [Printer Trap Setup ...] → [IPX] → - Oki C9600n | Guide: Network User's, OkiLAN 8200e - Page 101
is set to off-line. Default setting: Disable AdminManager [Setup] → [OKI Device Setup] → [SNMP] → [Off-line] Web Browser [Network] → [SNMP Trap] → [STEP3. Set Printer Trap Assignments] → [Offline] TELNET [Setup printer trap] → [Setup IPX trap] → [Off-line trap] OkiLAN 8200e Network User's Guide 101 - Oki C9600n | Guide: Network User's, OkiLAN 8200e - Page 102
OKI Device Setup] → [SNMP] → [Printer Trap Setup ...] → [IPX] → [Detail ...] → [Trap Enable] → [Paper Out] Web Browser [Network] → [SNMP Trap] → [STEP3. Set Printer Trap Assignments] → [Paper Out] TELNET [Setup printer AdminManager [Setup] → [OKI Device Setup] → [SNMP] → [Printer Trap Setup ...] → [ - Oki C9600n | Guide: Network User's, OkiLAN 8200e - Page 103
] → [SNMP] → [Printer Trap Setup ...] → [IPX] → [Detail ...] → [Trap Enable] → [Printer Error] Web Browser [Network] → [SNMP Trap] → [STEP3. Set Printer Trap Assignments] → [Printer Error] TELNET [Setup printer trap] → [Setup IPX trap] → [Printer Error trap] OkiLAN 8200e Network User's Guide 103 - Oki C9600n | Guide: Network User's, OkiLAN 8200e - Page 104
address. Default is 00000000000. Default setting: 00000000000 AdminManager [Setup] → [OKI Device Setup] → [SNMP] → [Printer Trap Setup ...] → [IPX] Web Browser [Network] → [SNMP Trap] → [STEP2. Set Printer Trap Address] → [IPX] TELNET [Setup printer trap] → [Setup IPX trap] → [IPX Trap address] Trap - Oki C9600n | Guide: Network User's, OkiLAN 8200e - Page 105
via SMTP. Default setting: Disable AdminManager [Setup] → [OKI Device Setup] → [E-mail(Receive)] → [Use SMTP Receive] Web Browser [Network] → [Email] → via SMTP. Default setting: Disable AdminManager [Setup] → [OKI Device Setup] → [E-mail(Send)] → [Use SMTP Transmit] Web Browser [Network] → [Email] - Oki C9600n | Guide: Network User's, OkiLAN 8200e - Page 106
to 64 characters: default is null. Default setting: Null AdminManager [Setup] → [OKI Device Setup] → [E-mail(Send)] → [SMTP Server Name] Web Browser [ Range 1 to 65535. Default is 25. Default setting: 25 AdminManager [Setup] → [OKI Device Setup] → [E-mail(Send)] → [Others] → [SMTP Port Number] Web - Oki C9600n | Guide: Network User's, OkiLAN 8200e - Page 107
setting: Null AdminManager [Setup] → [OKI Device Setup] → [E-mail(Send)] → [Printer E-mail Address] Web Browser [Network] → [Email] → [Send Settings] → [STEP2] → [Printer Email Address] TELNET [Setup SMTP (E-mail)] → [E-mail address] SMTP-6 Set the E-mail address used for the [Reply-To] field in - Oki C9600n | Guide: Network User's, OkiLAN 8200e - Page 108
alphanumeric characters per address. Default is null. Default setting: Null AdminManager [Setup] → [OKI Device Setup] → [E-mail(Send] → [Destination Address] → [1...-5...] → [Destination Address] [Setup SMTP (E-mail)] → [Event to address 1-5] → [Re-send Interval OkiLAN 8200e Network User's Guide 108 - Oki C9600n | Guide: Network User's, OkiLAN 8200e - Page 109
the printer needs maintenance. Default setting: Disable AdminManager By EVENT: [Setup] → [OKI Device Error = ON or NoWait] By PERIOD: [Setup] → [OKI Device Setup] → [E-mail(Send] → [Destination Address] → a Summary ...] → [Table below] → [Maintenance Unit] TELNET [Setup SMTP (E-mail)] → [Event to - Oki C9600n | Guide: Network User's, OkiLAN 8200e - Page 110
SMTP-11 Enable/disable sending an E-mail when the toner is low or out. Default setting: x AdminManager By EVENT: [Setup] → [OKI Device Setup] → [E-mail(Send] → [Destination Address] → [1...-5...] [Setup SMTP (E-mail)] → [Event to address 1-5] → [Paper Low/Out] OkiLAN 8200e Network User's Guide 110 - Oki C9600n | Guide: Network User's, OkiLAN 8200e - Page 111
] SMTP-14 Enable/disable sending an E-mail when the printer cover is opened. Default setting: Disable AdminManager By EVENT: [Setup] → [OKI Device Setup] → [E-mail(Send] → [Destination Address ] TELNET [Setup SMTP (E-mail)] → [Event to address 1-5] → [Cover Open] OkiLAN 8200e Network User's Guide 111 - Oki C9600n | Guide: Network User's, OkiLAN 8200e - Page 112
when a mass storage error occurs. Default setting: Disable AdminManager By EVENT: [Setup] → [OKI Device Setup] → [E-mail(Send] → [Destination Address] → [1...-5...] → [Notify Mode = TELNET [Setup SMTP (E-mail)] → [Event to address 1-5] → [Mass Storage Error] OkiLAN 8200e Network User's Guide 112 - Oki C9600n | Guide: Network User's, OkiLAN 8200e - Page 113
sending an E-mail when a service call request occurs. Default setting: Disable AdminManager By EVENT: [Setup] → [OKI Device Setup] → [E-mail(Send Summary ...] → [Table below] → [Other] TELNET [Setup SMTP (E-mail)] → [Event to address 1-5] → [Service Call Req.] OkiLAN 8200e Network User's Guide 113 - Oki C9600n | Guide: Network User's, OkiLAN 8200e - Page 114
Mode] → [Printing Error = ON or NoWait] By PERIOD: [Setup] → [OKI Device Setup] → [E-mail(Send] → [Destination Address] → [1...-5...] → [ Period . Up to 63 alphanumeric characters Default setting: Null AdminManager [Setup] → [OKI Device Setup] → [E-mail(Send)] → [Comment ...] Web Browser [Network] - Oki C9600n | Guide: Network User's, OkiLAN 8200e - Page 115
→ [OKI Device Setup] → [E-mail(Receive)] → [Use POP OKI Device Setup] → [E-mail(Receive)] → [POP3 Server] Web Browser [Network] → [Email] → [Receive Settings] → [Select POP3] → [To STEP2] → [STEP1] → [POP Server Name] TELNET [Setup POP (E-mail)] → [POP3 server] OkiLAN 8200e Network User's Guide - Oki C9600n | Guide: Network User's, OkiLAN 8200e - Page 116
of POP. Range 1 to 65536. Default setting: 110 AdminManager [Setup] → [OKI Device Setup] → [E-mail(Receive)] → [POP Detail...] → [POP3 Port Number] Up to 16 alphanumeric characters. Default setting: Null AdminManager [Setup] → [OKI Device Setup] → [E-mail(Receive)] → [POP3 Server User ID] Web - Oki C9600n | Guide: Network User's, OkiLAN 8200e - Page 117
Setup] → [OKI Device Setup] → [E-mail(Receive)] → [POP Detail...] → [Use APOP] Web Browser [Network] → [Email] → [Receive Settings] → [Select POP3] → [To STEP2] → [STEP2] → [>>More] → [Security settings] → [APOP Support] TELNET [Setup POP (E-mail)] → [User APOP] OkiLAN 8200e Network User's Guide 117 - Oki C9600n | Guide: Network User's, OkiLAN 8200e - Page 118
retrieve E-mails from the POP3 server. Off, 1 min, 5 min, 10 min, 30 min, 60 min. Default setting: Off AdminManager [Setup] → [OKI Device Setup] → [E-mail(Receive)] → [POP Detail...] → [Mail Polling Time] Web Browser [Network] → [Email] → [Receive Settings] → [POP3] → [To STEP2] → [STEP2] → [>>More - Oki C9600n | Guide: Network User's, OkiLAN 8200e - Page 119
] → [Reset / Restore] → [Reset Printer] TELNET [Reset to factory set] ETC-2 Display printer serial number. Default setting: Not applicable AdminManager [Summary] → [Network Summary] TELNET Not applicable. ETC-3 Set a printer asset number. Up to 8 alphanumeric characters. Default is null. Default - Oki C9600n | Guide: Network User's, OkiLAN 8200e - Page 120
Section 2: Utilities This section covers the following: ᮣ PrintSuperVision Management Utility (page 121) ᮣ Oki LPR Printing Utility (page 125) OkiLAN 8200e Network User's Guide 120 - Oki C9600n | Guide: Network User's, OkiLAN 8200e - Page 121
It consists of two parts: • A web printers. • Integrating with Oki Data's on-line web support. System Requirements Windows The main PrintSuperVision application can be installed in any of the following Windows systems. Operating System Windows XP Home/Professional Windows 2000 Professional Service - Oki C9600n | Guide: Network User's, OkiLAN 8200e - Page 122
Information Server) PWS (Personal Web Server) Internet Service Manager included in the OS Supported Browsers • Internet Explorer (IE) 5.5 and Supported Printers PrintSuperVision provides general management information for Oki and non-Oki printers connected to the network. For Oki printers using - Oki C9600n | Guide: Network User's, OkiLAN 8200e - Page 123
administrator privileges. cd.jpg 1. Insert the Drivers CD provided with your printer into the CD-ROM drive and wait installation Wizard opens. 7. Follow the on-screen instructions. - In the "Edit Data" window, you can specify a port number ] → [PrintSuperVision] OkiLAN 8200e Network User's Guide 123 - Oki C9600n | Guide: Network User's, OkiLAN 8200e - Page 124
PrintSuperVision To uninstall PrintSuperVision, either use the utility's uninstall program or use the Windows Add/Remove Programs In some cases, an empty [Okidata/PrintSuperVision/] directory may be left behind. If so, you need to delete the directory manually. OkiLAN 8200e Network User's Guide 124 - Oki C9600n | Guide: Network User's, OkiLAN 8200e - Page 125
data to the lpr port of the specified IP address. System Requirements Oki LPR works with the following Windows Operating Systems, with TCP/IP protocol installed: • XP • 2000 • Me • 98 • NT4.0 Installing Oki LPR Installation consists of three steps: • Step 1: Load the Printer Driver User's Guide 125 - Oki C9600n | Guide: Network User's, OkiLAN 8200e - Page 126
Printer Driver Installer]. 5. Select [Local printer], then click [Next]. 6. Select [LPT1:], then click [Next]. 7. Follow the on-screen instructions to complete the driver installation. The driver your Windows manual. 1. Click [Network Software]. 2. Click [Installation/Config] 3. Click [Oki LPR]. 4. - Oki C9600n | Guide: Network User's, OkiLAN 8200e - Page 127
I want to launch Oki LPR Utility now]. 12. Click [Finish]. The utility starts. LPR_status_no_Oki.bmp Step 3: Add The Printer to the Utility 1. printer. When the "Discovery" window appears, click the printer in the box, then click [OK]. 3. Click [OK]. The printer is added to the main window. Using Oki - Oki C9600n | Guide: Network User's, OkiLAN 8200e - Page 128
LPR icon in the system tray and click [Exit]. 2. Select [Start] →[Programs] →[Okidata] →[Oki LPR Utility] →[Uninstall Oki LPR Utility]. 3. Click [Yes] when the "Confirm File Deletion" window appears. Deletion of the OKI LPR utility starts. 4. When the "Uninstall Complete" window appears, click [OK - Oki C9600n | Guide: Network User's, OkiLAN 8200e - Page 129
Section 3: Security Features This section covers the following: ᮣ Overview (page 130) ᮣ IPP Encryption (page 133) ᮣ Web Encryption (page 144) ᮣ Unused Protocols (page 157) OkiLAN 8200e Network User's Guide 129 - Oki C9600n | Guide: Network User's, OkiLAN 8200e - Page 130
service is not provided as part of the OkiLAN 8200e print server.) • Requires Microsoft Internet Explorer Version 5.5 and higher or Netscape Navigator version 6.2 and higher. NOTE Other browsers which support SSL/TLS may work, but no guarantees are offered for them. OkiLAN 8200e Network User's Guide - Oki C9600n | Guide: Network User's, OkiLAN 8200e - Page 131
Web Encryption Prevents • Wiretapping Wiretap.jpg • Spoofing (impersonating) Spoofing.jpg OkiLAN 8200e Network User's Guide 131 - Oki C9600n | Guide: Network User's, OkiLAN 8200e - Page 132
(128 or 256 bits) • MD5 • SHA-1 SHA-1 One-way authentication NAa (PC → Printer) • Self-Signed Certificate • Certificate signed by a Certificate Authority Self- Signed Unused Protocols Protocols which are not used by your system can be turned off to prevent unauthorized access through them - Oki C9600n | Guide: Network User's, OkiLAN 8200e - Page 133
Using the Web Browser • Requires Microsoft Internet Explorer Version 5.5 and higher or Netscape Navigator version 6.2 and higher. NOTE Other browsers which support SSL/TLS may work, but no guarantees are offered for them. 1. Open the web browser. 2. Type in the printer's IP - Oki C9600n | Guide: Network User's, OkiLAN 8200e - Page 134
the default is the last six digits of the MAC [Ethernet] Address, minus any punctuation). 4. Click the [Security] tab. 5. On the left side, click [Cipher (SSL/TLS)]. The "Encryption of Configuration and Print" window appears. 8200e_Browser_Security_Cipher1.bmp OkiLAN 8200e Network User's Guide 134 - Oki C9600n | Guide: Network User's, OkiLAN 8200e - Page 135
Strong will increase security, but slow down the speed. Changing the setting to Weak gives the fastest speed, but provides the least security. 8. Make sure [Using self-signed Certificate] is selected (the default). 8200e_Browser_Security_Cipher1_SelfSigned.bmp OkiLAN 8200e Network User - Oki C9600n | Guide: Network User's, OkiLAN 8200e - Page 136
.bmp b. Select the desired method and key size, then click [OK]. 10. When done, click [OK] to send the setting to the print server. A Value List window appears. OkiLAN 8200e Network User's Guide 136 - Oki C9600n | Guide: Network User's, OkiLAN 8200e - Page 137
settings, then click [Submit]. Using AdminManager 1. Launch the AdminManager utility: From the Drivers CD supplied with your printer: [Next] → select → [Programs] → [OKI Setup Utility] → [Admin Manager]. 2. Click the printer to configure from the list. 3. Click [Setup] → [OKI Device Setup]. The " - Oki C9600n | Guide: Network User's, OkiLAN 8200e - Page 138
slower speed. Switching to Weak provides the fastest speed, but the least security. Self-signed Certificate The default type of certificate. OkiLAN 8200e Network User's Guide 138 - Oki C9600n | Guide: Network User's, OkiLAN 8200e - Page 139
the printer. Organization Enter a name for the organization. Organizational Unit Optional. for which the certificate is valid CA-signed Certificate Used to set up a CA certificate for internet printing. ]. A window appears listing the settings you have made. 8. Review the information entered, - Oki C9600n | Guide: Network User's, OkiLAN 8200e - Page 140
your certification selection. 12. Click [OK]. C9600_Cipher_Cert_CA_AdminMgr.jpg 13. Click [Yes]. The print server reboots with the new certification settings engaged. OkiLAN 8200e Network User's Guide 140 - Oki C9600n | Guide: Network User's, OkiLAN 8200e - Page 141
] Address, minus any punctuation). 4. Click the [Network] tab. 5. On the left side, click [IPP], then [Settings]. 6. Select ENABLE for [IPP]. 7. Click [Submit] Using AdminManager 1. Launch the AdminManager utility: From the Drivers CD supplied with your printer OkiLAN 8200e Network User's Guide 141 - Oki C9600n | Guide: Network User's, OkiLAN 8200e - Page 142
Manager]. 2. Click the printer to configure from the list. 3. Click [Setup] → [OKI Device Setup]. The Password window appears. 4. Enter your password, then click [OK]. 5. Click the [Maintenance] tab. 8200e_AdminMgr_Maintenance_Tab.bmp 6. Click [Service...]. OkiLAN 8200e Network User's Guide 142 - Oki C9600n | Guide: Network User's, OkiLAN 8200e - Page 143
[Use IPP Service] to Using IPP Encryption 1. Open the file to be printed in your application. 2. Click [File] → [Print]. 3. Select the created IPP encrypted printer (e.g., Model 1234 on https:// 155.37.177.60) from the [Select Printer] list, then click [Print]. OkiLAN 8200e Network User's Guide - Oki C9600n | Guide: Network User's, OkiLAN 8200e - Page 144
service for a certificate. Step 2: Install the certificate on the print server. Step 1: Apply for a CA Certificate Using browsers which support SSL/TLS may work, but no guarantees are offered for them. 1. Open the web browser. 2. Type in the printer's IP Address OkiLAN 8200e Network User's Guide 144 - Oki C9600n | Guide: Network User's, OkiLAN 8200e - Page 145
5. On the left side, click [Cipher (SSL/TLS)]. The "Encryption of Configuration and Print" window appears. 8200e_Browser_Security_Cipher1.bmp 6. Change [SSL/TLS] to ON. 8200e_Browser_Security_Cipher1_SSL_ON.bmp OkiLAN 8200e Network User's Guide 145 - Oki C9600n | Guide: Network User's, OkiLAN 8200e - Page 146
to Strong will increase security, but slow down the speed. Changing the setting to Weak gives the fastest speed, but provides the least security. 8. Click [Using a Certificate which a Certification Authority signed]. 8200e_Browser_Security_Cipher1_CASigned.bmp OkiLAN 8200e Network User - Oki C9600n | Guide: Network User's, OkiLAN 8200e - Page 147
9. Scroll down and type in the information to be used in the certification: 8200e_Browser_Security_Cipher1_SelfSigned_info.bmp a. To change the Key and key size, then click [OK]. 10. Click [OK]. The "Value List" window appears. 11. Check the settings, then click [OK]. OkiLAN 8200e Network User - Oki C9600n | Guide: Network User's, OkiLAN 8200e - Page 148
with "BEGIN CERTIFICATE SIGNING REQUEST" and ending with "END CERTIFICATE SIGNING REQUEST", and submit it to your selected Certification Authority service, following their instructions. 14. Click [OK]. Important! It can take about 2 weeks to get a certificate issued. While you are waiting to receive - Oki C9600n | Guide: Network User's, OkiLAN 8200e - Page 149
Using AdminManager 1. Launch the AdminManager utility: From the Drivers CD supplied with your printer [Next] → select language → [Custom Install] → [Network Software] → [Installation/Config] → [Admin Mgr / Quick Setup] → select language → [OKI Device Standard Setup] → [Execute from CD-ROM]. From - Oki C9600n | Guide: Network User's, OkiLAN 8200e - Page 150
certificate, including Common Name Enter the IP Address for the printer. Organization Enter a name for the organization. Organizational Unit Optional. Enter a name to differentiate between divisions within an bits. The default, 1024 bits, is recommended. OkiLAN 8200e Network User's Guide 150 - Oki C9600n | Guide: Network User's, OkiLAN 8200e - Page 151
for the "View the CSR data" window to appear. 10. Copy the text in the box starting with "BEGIN CERTIFICATE SIGNING REQUEST" and ending with "END CERTIFICATE SIGNING REQUEST", and submit it to your selected Certification Authority service, following their instructions. 11. Click [OK]. Important! It - Oki C9600n | Guide: Network User's, OkiLAN 8200e - Page 152
Using Web Browser • Requires Microsoft Internet Explorer Version 5.5 and higher or Netscape Navigator version 6.2 and higher. NOTE Other browsers which support SSL/TLS may work, but no guarantees are offered for them. 1. Open the web browser. 2. Type in the printer 8200e Network User's Guide 152 - Oki C9600n | Guide: Network User's, OkiLAN 8200e - Page 153
6. Copy the certificate text sent by the CA service, starting with "BEGIN CERTIFICATE" and ending with "END CERTIFICATE", and paste it into the "Paste your signed certificate(PEM) ..." that the certificate installation is competed and that SSL/TLS is turned on. OkiLAN 8200e Network User's Guide 153 - Oki C9600n | Guide: Network User's, OkiLAN 8200e - Page 154
Using AdminManager 1. Launch the AdminManager utility: From the Drivers CD supplied with your printer [Next] → select language → [Custom Install] → [Network Software] → [Installation/Config] → [Admin Mgr / Quick Setup] → select language → [OKI Device Standard Setup] → [Execute from CD-ROM]. From - Oki C9600n | Guide: Network User's, OkiLAN 8200e - Page 155
7. Copy the certificate text sent by the CA service, starting with "BEGIN CERTIFICATE" and ending with "END CERTIFICATE", and paste it into the box, then click [Install The SSL/TLS tab windows appears. 9. Click [Apply]. A window appears summarizing the changes. OkiLAN 8200e Network User's Guide 155 - Oki C9600n | Guide: Network User's, OkiLAN 8200e - Page 156
and higher or Netscape Navigator version 6.2 and higher. Other browsers which support SSL/TLS may work, but no guarantees are offered for them. To make connection with the encrypted printer: 1. Open your web browser. 2. Enter the printer's IP address as follows (be sure to include the s after "http - Oki C9600n | Guide: Network User's, OkiLAN 8200e - Page 157
server through those protocols. The easiest way to disable unused protocols is to use the Web Browser. 1. Open the web browser. 2. Enter the print Address in the [Location/Position] field. 3. Press the ENTER key. The Printer Status window appears. NOTE You can also launch the web browser from within - Oki C9600n | Guide: Network User's, OkiLAN 8200e - Page 158
5. The "Protocol ON/OFF" window opens. 8200e_Security_Protocol_OnOff.jpg 6. Here you can set the various available protocols to enable or disable. 7. When done, click [Submit]. OkiLAN 8200e Network User's Guide 158 - Oki C9600n | Guide: Network User's, OkiLAN 8200e - Page 159
for the exact details of each configuration option within Windows This section consists of the following: ᮣ Overview (page 160) ᮣ Using TCP/IP Protocol (page 161) ᮣ Using NetBEUI Protocol (page 175) NOTE For information on IPX (Novell NetWare), see "Section 5: Printing from Novell NetWare" starting - Oki C9600n | Guide: Network User's, OkiLAN 8200e - Page 160
systems and this is a good reference point for the exact details of each configuration option within Windows. The network printer supports the following protocols that can be used in conjunction with the Windows operating system: ᮣ TCP/IP ᮣ NetBEUI ᮣ IPX (Novell® NetWare®) OkiLAN 8200e Network User - Oki C9600n | Guide: Network User's, OkiLAN 8200e - Page 161
OKI LPR Utility Microsoft LPRa Port 9100a IPPa Me OKI LPR Utility 98 NT 4.0 OKI LPR Utility Microsoft LPRa a.These functions are built into Windows and are displayed as options when using the Add Printer incorrect IP address may cause severe network problems. Please check the address with the - Oki C9600n | Guide: Network User's, OkiLAN 8200e - Page 162
See "Configuring Windows to Print to the Network Printer" on page 167. NOTE If your network environment uses domain names, DNS should be enabled and configured on your system. However, this step is not essential to enable network printing. Step 4: Restart your computer. - Oki C9600n | Guide: Network User's, OkiLAN 8200e - Page 163
window. 4. If the [Internet Protocol (TCP/IP)] is not listed, click [Install.]. 5. In the "Select Network Component Type" Protocol (TCP/IP)] → [OK]. 7. Follow the on-screen instructions to finish the installation. Windows 2000 1. Click [Start] → [ Click [Close]. OkiLAN 8200e Network User's Guide 163 - Oki C9600n | Guide: Network User's, OkiLAN 8200e - Page 164
listed, click [Add]. 5. In the "Select Network Protocol" window, click [TCP/IP Protocol] → [OK]. 6. Follow the on-screen instructions Networks] is not listed, click [Add]. list of manufacturers, then click [TCP/IP] from the list of network protocols. 7. Click [OK]. 8. Follow the on-screen instructions - Oki C9600n | Guide: Network User's, OkiLAN 8200e - Page 165
as follows. Using Web Browser 1. Open your web browser, then type the printer's IP address in Using AdminManager 1. Launch the AdminManager utility. If you installed the utility on your computer, click [Start] → [Programs] → [Okidata] → [Oki Setup Utility] → [AdminManager]. To run it off the Drivers - Oki C9600n | Guide: Network User's, OkiLAN 8200e - Page 166
network card, using the Ethernet (MAC) address to identify it, and click [Setup] → [Oki Device Setup]. 3. Click the [TCP/IP] tab and enter the values for the [IP Address], [Subnet Mask] and [Default Gateway]. 4. Click [Apply]. 5. Close the AdminManager utility. OkiLAN 8200e Network User's Guide 166 - Oki C9600n | Guide: Network User's, OkiLAN 8200e - Page 167
Printer Windows XP Windows XP requires administrator privileges. With Windows XP, there are four options for printing using TCP/IP. • Oki LPR • Microsoft LPR* • Port 9100 • IPP * In order to use Microsoft LPR, it must first be installed on your system. Oki [LPR]. OkiLAN 8200e Network User's Guide 167 - Oki C9600n | Guide: Network User's, OkiLAN 8200e - Page 168
]. 14. Follow the on-screen instructions to finish the installation. IPP 1. Click [Start] → [Settings] → [Control Panel] → [Printers and Other Hardware]. 2. Click [Printers and Faxes]. 3. Click [Add Printer] → [Next]. 4. Click [A network printer, or a printer attached to another computer]. 5. Click - Oki C9600n | Guide: Network User's, OkiLAN 8200e - Page 169
6. Click [Connect to a printer on the Internet or on a home or office network] and type the printer URL in the text box, e.g. http:// 172.168.1.31/ipp/lp. 7. Click [Next]. 8. Install the printer driver OkiLAN 8200e Network User's Guide 169 - Oki C9600n | Guide: Network User's, OkiLAN 8200e - Page 170
Windows to Print to the Network Printer Windows 2000 Windows 2000 requires administrator privileges. With Windows 2000, there are four options for printing using TCP/IP. • Oki LPR • Microsoft LPR • Port 9100 • IPP Oki LPR Please follow the procedure described under "Installing Oki LPR" on page 125 - Oki C9600n | Guide: Network User's, OkiLAN 8200e - Page 171
[OK]. 15. Follow the on-screen instructions to finish the installation. IPP 1. Click [Start] → [Settings] → [Control Panel and Printers]. 2. Open the [Printers Folder]. 3. Double-click [Add Printer]. 4. Click [Next]. 5. Click [Network Printer]. 6. Click [Next]. OkiLAN 8200e Network User's Guide 171 - Oki C9600n | Guide: Network User's, OkiLAN 8200e - Page 172
7. Type the printer URL in the text box labelled [Connect to a printer in the Internet or your Intranet], e.g. http://172.168.1.31/ipp/lp. 8. Click [Next]. 9. Install the printer driver. OkiLAN 8200e Network User's Guide 172 - Oki C9600n | Guide: Network User's, OkiLAN 8200e - Page 173
Windows to Print to the Network Printer Windows NT 4.0 NT 4.0 requires administrator privileges. With Windows NT 4.0, you have two options for printing using TCP/IP. They are: • Oki LPR • Microsoft LPR Oki LPR Please follow the procedure described under "Installing Oki LPR" on page 125. Microsoft - Oki C9600n | Guide: Network User's, OkiLAN 8200e - Page 174
Configuring Windows to Print to the Network Printer Windows Me/98 When printing using TCP/IP, the Oki LPR utility is the only option to use. See "Installing Oki LPR" on page 125. OkiLAN 8200e Network User's Guide 174 - Oki C9600n | Guide: Network User's, OkiLAN 8200e - Page 175
use on small workgroups or LANs. Within Windows, NetBEUI is used for file and printer NetBEUI within the printer. These can be configured using the AdminManager the procedure for printing using NetBEUI is the same. the Network Printer. See "Configuring Windows to Print to the Network Printer." on - Oki C9600n | Guide: Network User's, OkiLAN 8200e - Page 176
supported. You should be able to use NetBEUI on LAN connections although you will not be able to use this on Remote Access Service " window appears. 4. If [NetBEUI Protocol] is not listed, click [Install]. 5. Click [Protocol] → [Add]. the [Protocols] tab. OkiLAN 8200e Network User's Guide 176 - Oki C9600n | Guide: Network User's, OkiLAN 8200e - Page 177
of manufacturers, then select [NetBEUI] from the list of [Network Protocols]. 7. Click [OK]. 8. Follow the on-screen instructions to finish the installation. Configuring Windows to Print to the Network Printer. In the following example, the printer has been configured as follows: Computer Name - Oki C9600n | Guide: Network User's, OkiLAN 8200e - Page 178
3. Select the relevant printer driver, then click [Properties]. 4. Click the [Details] tab. 5. Click [Add Port] → [Network] [OK] to close [Properties]. NOTES • Printing can be carried out using the application software. • The Master Browser function manages machine information from the 's Guide 178 - Oki C9600n | Guide: Network User's, OkiLAN 8200e - Page 179
Section 5: Printing from Novell NetWare This section consists of the following: ᮣ Overview (page 180) ᮣ Setup (page 181) OkiLAN 8200e Network User's Guide 179 - Oki C9600n | Guide: Network User's, OkiLAN 8200e - Page 180
guide is for NetWare administrators. It should be read in conjunction with the relevant Novell NetWare manual. The latest Novell service packs and Novell client versions should be installed. Supported on which the NetWare Rprinter operates. Remote Printer Mode adds additional traffic to the network - Oki C9600n | Guide: Network User's, OkiLAN 8200e - Page 181
of the Ethernet address are unique to each card. Create and Set Up NetWare Printer Objects Use NWAdmin32 or the Pconsole utility to create and set up NetWare printer objects. Please refer to the Novell documentation for instructions on how to achieve this. Configure the Print Server See "Section - Oki C9600n | Guide: Network User's, OkiLAN 8200e - Page 182
Section 6: Printing Using UNIX The print server supports many protocols such as LPD, FTP, TELNET, SNMP and IPP, and works within the UNIX environment. This section consists Server (page 184) ᮣ Configuring the Operating System (page 187) ᮣ LPD and FTP (page 196) OkiLAN 8200e Network User's Guide 182 - Oki C9600n | Guide: Network User's, OkiLAN 8200e - Page 183
UNIX environment. To use the network card within the UNIX environment, the following steps are required: Step 1: Configure the print server card. Step 2: Configure the UNIX operating system. Step 3: Use one of the print commands to send the job to the printer. OkiLAN 8200e Network User's Guide 183 - Oki C9600n | Guide: Network User's, OkiLAN 8200e - Page 184
The network addresses used in this manual are shown as examples only. Network addresses used in your uses Sun Solaris 2.8 (Solaris 8) as an example. The actual commands may differ between versions of UNIX, so refer to the workstation manuals Use the ping command to confirm the connection with - Oki C9600n | Guide: Network User's, OkiLAN 8200e - Page 185
is no reply, there is a problem with the configuration of the IP address (the IP address has been already set manually or by the DHCP/ RARP 3 : Setup NetWare 4 : Setup EtherTalk 5 : Setup NetBEUI 6 : Setup printer port 7 : Display Status 8 : Setup printer trap OkiLAN 8200e Network User's Guide 185 - Oki C9600n | Guide: Network User's, OkiLAN 8200e - Page 186
protocol : DISABLE 6 : DHCP/ BOOTP protocol: DISABLE 7 : root password : " " 99 : Back to prior menu Please select (1- 99)? 6. Log out from the network interface card. 7. Turn the printer off and on again to validate the settings. OkiLAN 8200e Network User - Oki C9600n | Guide: Network User's, OkiLAN 8200e - Page 187
20.127 PRINTER 3. Use the ping command to confirm connection with the network card. Example For host name PRINTER: # ping PRINTER If there is no reply, then there is a problem with the configuration of the IP address (the IP address has been already set manually OkiLAN 8200e Network User's Guide 187 - Oki C9600n | Guide: Network User's, OkiLAN 8200e - Page 188
problem after resetting the network interface card, consult the network manager. 4. Register the printer in the /etc/printcap file. Example: For host name PRINTER of the printer queue lp: The name of the device used to connect to the printer. Does not usr/spool/PRINTER_lp/PRINTER _lp_errs # chown -R - Oki C9600n | Guide: Network User's, OkiLAN 8200e - Page 189
used to register remote printers on Open Windows. However, it cannot be used here, because the data uses Sun Solaris 2.8 (known as Solaris 8) and an OKI printer as examples. The absolute path and method of configuring commands may differ in other versions of the OS. Refer to the workstation manual - Oki C9600n | Guide: Network User's, OkiLAN 8200e - Page 190
172.168.20.127PRINTER 4. Use the ping command to confirm connection with the network card. Example For host name PRINTER # ping PRINTER If there is no reply, there is a problem with the configuration of the IP address (the IP address has been already set manually or by the DHCP/RARP server), or - Oki C9600n | Guide: Network User's, OkiLAN 8200e - Page 191
netstandard model file then add it using the lpadmin command. Example For printer PRINTER_lp, with model file called uses HP-UX10.20 and an OKI printer as examples. The absolute path and method of configuring commands may differ in other versions of the OS. Refer to the workstation manual - Oki C9600n | Guide: Network User's, OkiLAN 8200e - Page 192
172.168.20.127 PRINTER 3. Use the ping command to confirm connection with the network card. Example For host name PRINTER # ping PRINTER If there is no reply, there is a problem with the configuration of the IP address (the IP address has been already set manually or by the DHCP/RARP server), or - Oki C9600n | Guide: Network User's, OkiLAN 8200e - Page 193
sbin/lpsched AIX 4.1.5 Configuration The following explanation uses AIX 4.1.5 and an OKI printer as examples. The absolute path of commands and the method of configuring may differ with the OS version. Refer to the workstation's manual Guide 193 - Oki C9600n | Guide: Network User's, OkiLAN 8200e - Page 194
okiprinter 172.168.20.127 PRINTER 3. Use the ping command to confirm connection with the network card. Example For host name okiprinter # ping PRINTER If there is no reply, there is a problem with the configuration of the IP address (the IP address has been already set manually or by the DHCP/RARP - Oki C9600n | Guide: Network User's, OkiLAN 8200e - Page 195
port lp with print queue printer_lp and print server printer Queue to be added"printer_lp" Host name of the remote server"printer" Queue name of the remote server"lp" Type of print spooler of the remote server"BSD" Description of printer name of the remote server"Optional comment" OkiLAN 8200e - Oki C9600n | Guide: Network User's, OkiLAN 8200e - Page 196
workstation's manual for details of the lpr and lp commands. The following explanation uses: • print file = test.prn • printer name = PRINTER_lp Logical printers The print server includes three logical printers. Logical printer Used for lp Printing a file created using the printer driver. sjis - Oki C9600n | Guide: Network User's, OkiLAN 8200e - Page 197
Status Verify the printer status using the lpq command. • The result of lpq may not be displayed correctly a print job (Job ID 456) in the printer_lp # cancel Cprinter_lp -456 Printer Status Verify the printer status using the lpstat command: # lpstat -pCprinter_lp NOTE The result of lpstat may not - Oki C9600n | Guide: Network User's, OkiLAN 8200e - Page 198
a file with TCP/IP. If the print data is sent to a logical printer via FTP, it is printed. Refer to the workstation's manual for details of the ftp command. The following explanation uses: • print file = test.prn • printer name = okiprinter_lp Logical Directories The print server includes - Oki C9600n | Guide: Network User's, OkiLAN 8200e - Page 199
is not possible to output print data to the root directory. 2. Move to the preferable logical directory using the cd command. Example Moving to code to the CR+LF code. If a binary file converted by the printer driver is transferred, the transfer mode has to be BINARY mode. Example Changing transfer - Oki C9600n | Guide: Network User's, OkiLAN 8200e - Page 200
data specified by absolute path/users/test/ test.prn ftp> put /users/test/test.prn /lp 5. Logout from the network card using the quit command: ftp> quit Viewing Status Three states can be verified using the quote command stat: • IP address • login user name • transfer mode. In addition, printer - Oki C9600n | Guide: Network User's, OkiLAN 8200e - Page 201
User logged in: root Transfer type: BINARY Data connection: Closed. 211 End of status. ftp> Example Displaying the network card status (directory name: lp). ftp> quote stat /lp 211-FTP directory status: Ready 211 End of status ftp> OkiLAN 8200e Network User's Guide 201 - Oki C9600n | Guide: Network User's, OkiLAN 8200e - Page 202
Using Macintosh The print server supports the Apple® Macintosh® AppleTalk® environment. This section consists of the following: ᮣ Overview (page 203) ᮣ Self-Diagnostic Test Printout (page 204) ᮣ Installing the Driver (page 205) ᮣ Setting Up the Printer (page 207) OkiLAN 8200e Network User's Guide - Oki C9600n | Guide: Network User's, OkiLAN 8200e - Page 203
Macintosh: Overview The print server supports the Apple® Macintosh® AppleTalk® environment. This guide is for administrators and it should be read in conjunction with the relevant Macintosh manual. The latest Macintosh service packs should be installed. Supported Versions Macintosh operating systems - Oki C9600n | Guide: Network User's, OkiLAN 8200e - Page 204
Macintosh: Self-Diagnostic Test Printout The printer server's self-diagnostic test reports the printer's MAC Address (Ethernet address), required for Macintosh configuration. 1. Turn the printer on. 2. Press the print server set up the print server for Macintosh. OkiLAN 8200e Network User's Guide 204 - Oki C9600n | Guide: Network User's, OkiLAN 8200e - Page 205
plus your selection of utilities-select [Custom Install] in the drop-down list. Click the boxes beside the items you wish to install, then click [Install]. 10. Click [Quit]. MAC OS 10.1 1. Place the Drivers CD, supplied with your printer, in the CD-ROM drive. 2. Double-click the icon that appears on - Oki C9600n | Guide: Network User's, OkiLAN 8200e - Page 206
X.1-X.2x Drivers] from the drop-down list, then click [Install]. 10. Once the driver is list, then click [Install]. 11. Click [Quit]. MAC OS 10.3x 1. Place the Drivers CD, supplied with your printer OS X.3x Driver] from the drop-down list, then click [Install]. 10. Once the driver is installed, - Oki C9600n | Guide: Network User's, OkiLAN 8200e - Page 207
ID#). OS 10.1 and Above In Mac OS 10 you use the Print Center to setup network printers. Mac6.tif 3. Run the Print Server. 4. Click [Add Printer.] 5. Select [Appletalk]. 6. From the [Printer Model] drop down menu, select your printer model. 7. Click [Add]. 8. Quit the Print Center. OkiLAN 8200e - Oki C9600n | Guide: Network User's, OkiLAN 8200e - Page 208
Section 8: Troubleshooting Important! The network addresses used in this manual are shown for example only. Network addresses used in your installation must be generated from your own network. ᮣ Self-Diagnostic Test (page 209) ᮣ TCP/IP (page 210) ᮣ Novell NetWare (page 211) ᮣ EtherTalk (page - Oki C9600n | Guide: Network User's, OkiLAN 8200e - Page 209
Troubleshooting: Self-Diagnostic Test Printer does not print. Ensure the printer emulation is set to PS (if available) or Automatic. NG is printed in the Self-diagnostic test. • Confirm that the NIC is installed correctly and turn the printer off and on again. • Ensure the network cable is correctly - Oki C9600n | Guide: Network User's, OkiLAN 8200e - Page 210
Troubleshooting: TCP/IP Printer cannot find the network interface card. • Turn the printer off and on again. • Confirm that the network interface is enabled on the printer test (with printer on, press and used, ensure they have been set to Disable. Cannot print with lpr and ftp. • Turn the printer - Oki C9600n | Guide: Network User's, OkiLAN 8200e - Page 211
Troubleshooting: Novell NetWare Important! The network addresses used in this manual are shown for example only. Network addresses used in your installation must be generated from your own network. Printer cannot find the network print server. • Turn the printer Printer . Problems with Printer - Oki C9600n | Guide: Network User's, OkiLAN 8200e - Page 212
the File Server. • Make sure the printer driver has been mapped to the correct NetWare queue. PostScript error occurs if a banner page is printed. A PostScript banner page cannot be printed in NetWare 3.12 Remote Printer mode. If a PostScript printer is used and a banner page is printed, "PostScript - Oki C9600n | Guide: Network User's, OkiLAN 8200e - Page 213
Troubleshooting: EtherTalk Not identified by the Chooser and the Setup Utility. • Turn the printer off and on again. • is selected in AppleTalk. (In some OS versions Network is used instead of AppleTalk.) • Make sure the print driver is selected in the Chooser. • Make sure the EtherTalk protocol - Oki C9600n | Guide: Network User's, OkiLAN 8200e - Page 214
Troubleshooting: NetBEUI The network interface card is not identified. • Turn the printer off and on again. • Make sure the different from the computer name on the network. Error writing to Prn1. • Make sure the printer is online. • If there is an error message indicating the paper has run out, add - Oki C9600n | Guide: Network User's, OkiLAN 8200e - Page 215
Troubleshooting: Security Connection Error in Web Browser Try connecting the printer using http://. Problem Solution If the printer ]. Using AdminManager: 1. Launch the AdminManager utility and login. 2. Click the printer in the list, then click [Setup] →[OKI Device - Oki C9600n | Guide: Network User's, OkiLAN 8200e - Page 216
login. 2. Click the printer in the list, then click [Setup] →[OKI Device Setup]. 3. Enter your password, click [OK]. 4. Click the [SSL/TLS] tab. 5. Change [Encryption Strength] to [Weak] and click [Apply]. 6. Close the utility. The browser you are using does not support the selected key exchange - Oki C9600n | Guide: Network User's, OkiLAN 8200e - Page 217
Try connecting the printer using http://. Problem Solution If the printer setup page appears: Close the web browser. Using AdminManager: 1. Launch the AdminManager utility and login. 2. Click the printer in the list, then click [Setup] →[OKI Device Setup]. 3. Enter - Oki C9600n | Guide: Network User's, OkiLAN 8200e - Page 218
Settings] 4. Change the setting to [Weak] and click [OK]. 5. Close the web browser. Using AdminManager: 1. Launch the AdminManager utility and login. 2. Click the printer in the list, then click [Setup] →[OKI Device Setup]. 3. Enter your password, click [OK]. 4. Click the [SSL/TLS] tab. 5. Change - Oki C9600n | Guide: Network User's, OkiLAN 8200e - Page 219
Problem Solution The browser you are using does not support the selected key exchange method. • Switch to a browser that supports the web browser. Using AdminManager: 1. Launch the AdminManager utility and login. 2. Click the printer in the list, then click [Setup] →[OKI Device Setup]. 3. Enter - Oki C9600n | Guide: Network User's, OkiLAN 8200e - Page 220
the policy of the CA service used. Problem Solution The IP Address for supports only one certificate. If your CA service requires both an intermediate and an SSL server certificate, install the intermediate certificate on a client PC. Then delete the intermediate certificate from the printer using - Oki C9600n | Guide: Network User's, OkiLAN 8200e - Page 221
Appendix: The Printer Menu Menu Basics Top Level Functions The top-level Functions menus are: ᮣ Configuration (refer to Appendix B in the User's Guide) ᮣ Print Information (refer to Appendix B in the User's Guide) ᮣ Print Secure Job (refer to Appendix B in the User's Guide) ᮣ Menus (refer to - Oki C9600n | Guide: Network User's, OkiLAN 8200e - Page 222
Setup, Calibration, Print Statistics and Boot Menu trees. The remainder of the menus above are described in Appendix B of the on-line printer User's Guide. Table Conventions Used • The menu trees are given to the lowest menu item level. Typically, this can be a parameter that can be set by selecting - Oki C9600n | Guide: Network User's, OkiLAN 8200e - Page 223
:Wireless: appears only if the optional wireless card is installed. See the documentation supplied with the wireless card for more information. OkiLAN 8200e Network User's Guide 223 - Oki C9600n | Guide: Network User's, OkiLAN 8200e - Page 224
Personality Copies Duplex Binding Job Offset Output Bin Finisher Setup Media Check Transparency Detect Resolution Toner Save Mode Mono-print speed Default Orientation Form Length Edit Size X Dimension Y Dimension Margin True Black Pen-width Adjust Tray ID# OkiLAN 8200e Network User's Guide 224 - Oki C9600n | Guide: Network User's, OkiLAN 8200e - Page 225
Submenu 1 IBM PPR Setup (see page 243) Epson FX Setup (see page 245) Color Setup (see page 247) Memory Setup (see page 248) Submenu 2 Character Pitch Font Condense Character Set CMY 100% Density CMYK ConversionResource Save Receive Buffer Size Resource Save OkiLAN 8200e Network User's Guide 225 - Oki C9600n | Guide: Network User's, OkiLAN 8200e - Page 226
Resize PS Area Initialize Resize Partition Format Partition Near Life LED New Password Verify Password Reset Settings Save Settings Restore Settings OkiLAN 8200e Network User's Guide 226 - Oki C9600n | Guide: Network User's, OkiLAN 8200e - Page 227
Yellow Tuning Black Tuning Submenu 2 - - - - Highlight Mid-Tone Dark Highlight Mid-Tone Dark Highlight Mid-Tone Dark Highlight Mid-Tone Dark OkiLAN 8200e Network User's Guide 227 - Oki C9600n | Guide: Network User's, OkiLAN 8200e - Page 228
Print Statistics C96_Functions_Menu_b.JPG Function Print Statistics (see page 256) Submenu 1 Statistics Log Submenu 2 - OkiLAN 8200e Network User's Guide 228 - Oki C9600n | Guide: Network User's, OkiLAN 8200e - Page 229
Soft Reset Offline Receive Serial Number Check File System Check All Sectors Enable HDD Enable Initialization Peak Power Control Power Save OkiLAN 8200e Network User's Guide 229 - Oki C9600n | Guide: Network User's, OkiLAN 8200e - Page 230
C96_ReadyToPrint.jpg 1. Ensure that the LDC Dispaly panel indicates that the printer is ready to print. 2. Press Enter to switch to the Menu to the Function you wish to change, then press the Enter button. 4. Continue to use the Up-arrow or Down-arrow [▲ or ▼ ] buttons and Enter buttons in a Guide 230 - Oki C9600n | Guide: Network User's, OkiLAN 8200e - Page 231
FTP 1. Ensure that the LCD Display panel indicates that the printer is ready to print. 2. Press the Enter button to the Up-arrow or Down-arrow [▲ or ▼ ] buttons repeatedly until [FTP] is highlighted. 12. Use the Up-arrow or Down-arrow [▲ or ▼ ] buttons to highlight [Enable]. 13. Press the Enter - Oki C9600n | Guide: Network User's, OkiLAN 8200e - Page 232
Menu 1. Turn the printer OFF. 2. Press and hold the Enter button while turning the printer back on: be sure to keep pressing the Enter button until [Initializing] appears on the display . C96_Boot_Menu.JPG 3. Use the Up-arrow or to the Ready to print status. OkiLAN 8200e Network User's Guide 232 - Oki C9600n | Guide: Network User's, OkiLAN 8200e - Page 233
Printer Menu Functions List Admin Setup Password Item Enter password Value nnnn Description Enter a password to enter the Administrator menu. The default password is 0000 (four zeroes). OkiLAN 8200e Network User's Guide 233 - Oki C9600n | Guide: Network User's, OkiLAN 8200e - Page 234
Telnet Value Enable Disable Enable Disable Enable Disable Enable Disable Auto 802.2 802.3 Ethernet II SNAP Auto Manual xxx.xxx.xxx .xxx 255.255.25 5.0 xxx.xxx.xxx .xxx Execute Enable Disable Enable Disable Web/IPP (TCP/IP). Enables/Disables Telnet (TCP/IP). OkiLAN 8200e Network User's Guide 234 - Oki C9600n | Guide: Network User's, OkiLAN 8200e - Page 235
). Normal: Can work effectively even when connected to a HUB that has a spanning tree feature. However, printer start up time gets longer when computers are connected to two or three small LANs. Small: Computers can cover on menu settings for this option. OkiLAN 8200e Network User's Guide 235 - Oki C9600n | Guide: Network User's, OkiLAN 8200e - Page 236
HP-GL2 Selects a printer language. Copies 1 ~ 999 Sets number of copies. Disabled for local print, except for demo data. Duplex ON OFF Media check Enable Disable Enables/Disables whether the printer checks that paper size required by the print data matches that of the tray. Only standard - Oki C9600n | Guide: Network User's, OkiLAN 8200e - Page 237
600x1200dpi 600dpi multi-level ON OFF Auto Color speed Normal speed Portrait Landscape 5 ~ 60 (L) ~ 64 (A) ~ 128 lines Description Sets the resolution. Sets toner saving mode. Sets the monochrome print speed corresponding to the size of paper in the tray. OkiLAN 8200e Network User's Guide 237 - Oki C9600n | Guide: Network User's, OkiLAN 8200e - Page 238
direction of motion of paper. Sets default Custom paper length, in the same direction as the direction of motion of paper. OkiLAN 8200e Network User's Guide 238 - Oki C9600n | Guide: Network User's, OkiLAN 8200e - Page 239
ASCII RAW Parallel protocol ASCII RAW USB protocol ASCII RAW Description Specifies PS transmission protocol for network data. It does not appear for NonPS type. Specifies PS transmission protocol for Centronics data. It does not appear for Non-PS type. Specifies PS transmission protocol for USB - Oki C9600n | Guide: Network User's, OkiLAN 8200e - Page 240
. Sets the PCL font number. Sets the width of the PCL default fonts. Sets the height of the PCL default font. OkiLAN 8200e Network User's Guide 240 - Oki C9600n | Guide: Network User's, OkiLAN 8200e - Page 241
paper in PCL. OFF ON Sets to eject a page with non-print data (blank page) on receipt of the FF command (0CH) in PCL. Set inch 1/6 inch Sets the margin for paper printable area. OFF ON Sets use in PCL of Composite Black (mixed color of CMKY) or Pure Black (only K) for black (100%). OFF: Sets - Oki C9600n | Guide: Network User's, OkiLAN 8200e - Page 242
destination command in PCL5e emulation. Sets the number to specify MP Tray for the paper feed destination command in PCL5e emulation. OkiLAN 8200e Network User's Guide 242 - Oki C9600n | Guide: Network User's, OkiLAN 8200e - Page 243
to 20CPI 12 to 12CPI Sets the 12CPI pitch for Condensed printing mode. SET-2 SET-1 Sets the character set to be used. IBM-437, IBM-850, IBM-860, IBM-863, IBM-865, PC Set1, PC Ext US, PC Ext D/N, PC Slashed Sets the 0 style. 6LPI 8LPI Sets the line pitch. OkiLAN 8200e Network User's Guide 243 - Oki C9600n | Guide: Network User's, OkiLAN 8200e - Page 244
fits print data equivalent to 11 inch (66 lines) into Letter size printable area. Sets character height. Same: same height, regardless of CPI. Diff: character heights vary according to CPI. Sets the edit direction of paper supported by A3 printer to landscape. OkiLAN 8200e Network User's Guide 244 - Oki C9600n | Guide: Network User's, OkiLAN 8200e - Page 245
skip Value Description 10CPI 12CPI 17CPI 20CPI Proportional Sets the character pitch. SET-2 SET-1 Sets the character set to be used. IBM-437, IBM-850, IBM-860, IBM-863, IBM-865, PC Set1, PC Ext US, PC Ext . OFF ON Sets whether a blank sheet is ejected. OkiLAN 8200e Network User's Guide 245 - Oki C9600n | Guide: Network User's, OkiLAN 8200e - Page 246
the print mode that fits print data equivalent to 11 inch (66 lines) into Letter size printable area. Sets character height. Same: same, regardless of CPI. Diff: varies according to CPI. Sets the edit direction of paper supported by A3 printer to landscape. OkiLAN 8200e Network User's Guide 246 - Oki C9600n | Guide: Network User's, OkiLAN 8200e - Page 247
Simulates a standard printing color by the printer. The function is valid only for jobs using PS languages. Sets toner layer thickness. (Medium or purpose such as specification in CMYK color diminution of PS. Set to OFF to simplify the conversion process of CMYK data and reduce the processing time. - Oki C9600n | Guide: Network User's, OkiLAN 8200e - Page 248
Memory Setup Item Value Receive buffer size Auto 0.5 MB 1 MB 2 MB 4 MB 8 MB 16 MB 32 MB Resource save Auto Off 0.5 MB 1 MB 2 MB 4 MB 8 MB 16 MB 32 MB Description Sets the size of the receive buffer. Sets the size of the resource saving area. OkiLAN 8200e Network User's Guide 248 - Oki C9600n | Guide: Network User's, OkiLAN 8200e - Page 249
Flash Memory Setup Item Initialize Value Execute Resize PS area nn% [n.n MB] 30% [1.1megabyte] Description Initializes resident flash memory. Sets the size of the PS area in resident flash memory. OkiLAN 8200e Network User's Guide 249 - Oki C9600n | Guide: Network User's, OkiLAN 8200e - Page 250
Description Initializes the HDD to the factory default state. nn% mm% ll% Sets partition size. - Sets the format of a specified partition. OkiLAN 8200e Network User's Guide 250 - Oki C9600n | Guide: Network User's, OkiLAN 8200e - Page 251
System Setup Item Near life LED Value Enable Disable Description Enables the Attention LED to be turned on when a warning for NEAR LIFE of a toner, a drum, a fuser, or a belt occurs. OkiLAN 8200e Network User's Guide 251 - Oki C9600n | Guide: Network User's, OkiLAN 8200e - Page 252
Change Password Item Value New password nnnn Verify password nnnn Description Sets a new password to enter Admin Setup. Lets a user verify the new password to be used to enter Admin Setup. OkiLAN 8200e Network User's Guide 252 - Oki C9600n | Guide: Network User's, OkiLAN 8200e - Page 253
Settings Item Reset settings Save settings Value Execute Execute Description Resets EEPROM of the CU. Returns a user's menu setup to the factory default state. Saves the current menu settings. OkiLAN 8200e Network User's Guide 253 - Oki C9600n | Guide: Network User's, OkiLAN 8200e - Page 254
under the printer specified conditions and reflected in TRC compensation. OFF: the printer does not carry out density adjustment automatically. When Execute is selected, the printer carries the printer is idling. Allows you to print a pattern to help you adjust TRC manually. ( - Oki C9600n | Guide: Network User's, OkiLAN 8200e - Page 255
lighter. Adjusts dark (dense area) of Cyan, Magenta, Yellow, or Black TRC. Plus indicates adjustment towards darker and minus towards lighter. OkiLAN 8200e Network User's Guide 255 - Oki C9600n | Guide: Network User's, OkiLAN 8200e - Page 256
entry Value nnnn Statistics log Enable Disable Description Enter password. The default password is 0000 (four zeroes). When there is no support for the print statistics function, Print Statistics is not displayed. Enables/Disables the print statistics function. OkiLAN 8200e Network User - Oki C9600n | Guide: Network User's, OkiLAN 8200e - Page 257
Menu Boot Menu To access the Boot Menu: 1. Turn the printer off. 2. Press and hold the Enter key while turning the printer back on: be sure to continue holding the Enter key until " the BUSY signal only when the reception buffer is full or a service call occurs. PS only. OkiLAN 8200e Network User - Oki C9600n | Guide: Network User's, OkiLAN 8200e - Page 258
state even when you press the Offline operating panel switch. The interface sends the BUSY signal only when the reception buffer is full or a service call occurs. PS only. Enables/Disables the USB serial number, used to identify a USB device to which a PC is connected. OkiLAN 8200e Network User - Oki C9600n | Guide: Network User's, OkiLAN 8200e - Page 259
mismatch between actual memory and displayed memory available in a file system and performs administration data (FAT information) recovery. Performs these by file system. This function takes several accompanying initialization of Block Device (HDD, FLASH). OkiLAN 8200e Network User's Guide 259 - Oki C9600n | Guide: Network User's, OkiLAN 8200e - Page 260
printer has two lamps. When the lamps turn on, the printer's power draw increases dramatically. Normal: Both lamps light at the same time. When this happens, the printer 's power draw increases dramatically. Low: The lamps do NOT light at the same time. The printer's electrical - Oki C9600n | Guide: Network User's, OkiLAN 8200e - Page 261
26-27 interface 28-59 IPP encryption 137-143 OKI device setup E-mail(Receive) tab 43 E-mail(Send for 144-151 installing 152-156 troubleshooting 220 Certificates CA 144-156 self-signed 133-143 Color Setup menu 247 Community name menu 35 troubleshooting 213 F File menu 28 FTP printing 198-201 - Oki C9600n | Guide: Network User's, OkiLAN 8200e - Page 262
using 143 setting up 133-143 IPX protocol 33 L LPD printing 196-197 LPR, Microsoft Windows 2000 170 Windows NT 4.0 173 Windows XP 167 M Macintosh printing installing the driver 205-206 overview 203 printer setup 207 self-diagnostic test 204 troubleshooting troubleshooting 211-212 O Oki LPR Guide 262 - Oki C9600n | Guide: Network User's, OkiLAN 8200e - Page 263
/disable 31, 72 Rendezvous 32 Reset the printer 119 RPRINTER mode 33, 180 NDS 53 set 79 setup 34 setup print servers 83 timeout 83 S Security CA certificate 144-156 IPP encryption 133-143 overview 130-132 self-signed certificate 133-143 troubleshooting 215-220 unused protocols 157-158 web encryption - Oki C9600n | Guide: Network User's, OkiLAN 8200e - Page 264
31 troubleshooting 210 96-104 Troubleshooting CA Oki LPR 125-128 PrintSuperVision 121-124 W Web browser 19-24 CA certificate applying for 144-148 installing 152-153 changing password 24 IPP encryption 133-137, 141 launching 19-22 self-signed certificate creating 133 troubleshooting 215-216 using
-
 1
1 -
 2
2 -
 3
3 -
 4
4 -
 5
5 -
 6
6 -
 7
7 -
8
-
9
-
10
-
11
-
12
-
13
-
14
-
15
-
16
-
17
-
18
-
19
-
20
-
21
-
22
-
23
-
24
-
25
-
26
-
27
-
28
-
29
-
30
-
31
-
32
-
33
-
34
-
35
-
36
-
37
-
38
-
39
-
40
-
41
-
42
-
43
-
44
-
45
-
46
-
47
-
48
-
49
-
50
-
51
-
52
-
53
-
54
-
55
-
56
-
57
-
58
-
59
-
60
-
61
-
62
-
63
-
64
-
65
-
66
-
67
-
68
-
69
-
70
-
71
-
72
-
73
-
74
-
75
-
76
-
77
-
78
-
79
-
80
-
81
-
82
-
83
-
84
-
85
-
86
-
87
-
88
-
89
-
90
-
91
-
92
-
93
-
94
-
95
-
96
-
97
-
98
-
99
-
100
-
101
-
102
-
103
-
104
-
105
-
106
-
107
-
108
-
109
-
110
-
111
-
112
-
113
-
114
-
115
-
116
-
117
-
118
-
119
-
120
-
121
-
122
-
123
-
124
-
125
-
126
-
127
-
128
-
129
-
130
-
131
-
132
-
133
-
134
-
135
-
136
-
137
-
138
-
139
-
140
-
141
-
142
-
143
-
144
-
145
-
146
-
147
-
148
-
149
-
150
-
151
-
152
-
153
-
154
-
155
-
156
-
157
-
158
-
159
-
160
-
161
-
162
-
163
-
164
-
165
-
166
-
167
-
168
-
169
-
170
-
171
-
172
-
173
-
174
-
175
-
176
-
177
-
178
-
179
-
180
-
181
-
182
-
183
-
184
-
185
-
186
-
187
-
188
-
189
-
190
-
191
-
192
-
193
-
194
-
195
-
196
-
197
-
198
-
199
-
200
-
201
-
202
-
203
-
204
-
205
-
206
-
207
-
208
-
209
-
210
-
211
-
212
-
213
-
214
-
215
-
216
-
217
-
218
-
219
-
220
-
221
-
222
-
223
-
224
-
225
-
226
-
227
-
228
-
229
-
230
-
231
-
232
-
233
-
234
-
235
-
236
-
237
-
238
-
239
-
240
-
241
-
242
-
243
-
244
-
245
-
246
-
247
-
248
-
249
-
250
-
251
-
252
-
253
-
254
-
255
-
256
-
257
-
258
-
259
-
260
-
261
-
262
-
263
-
264
 |
 |
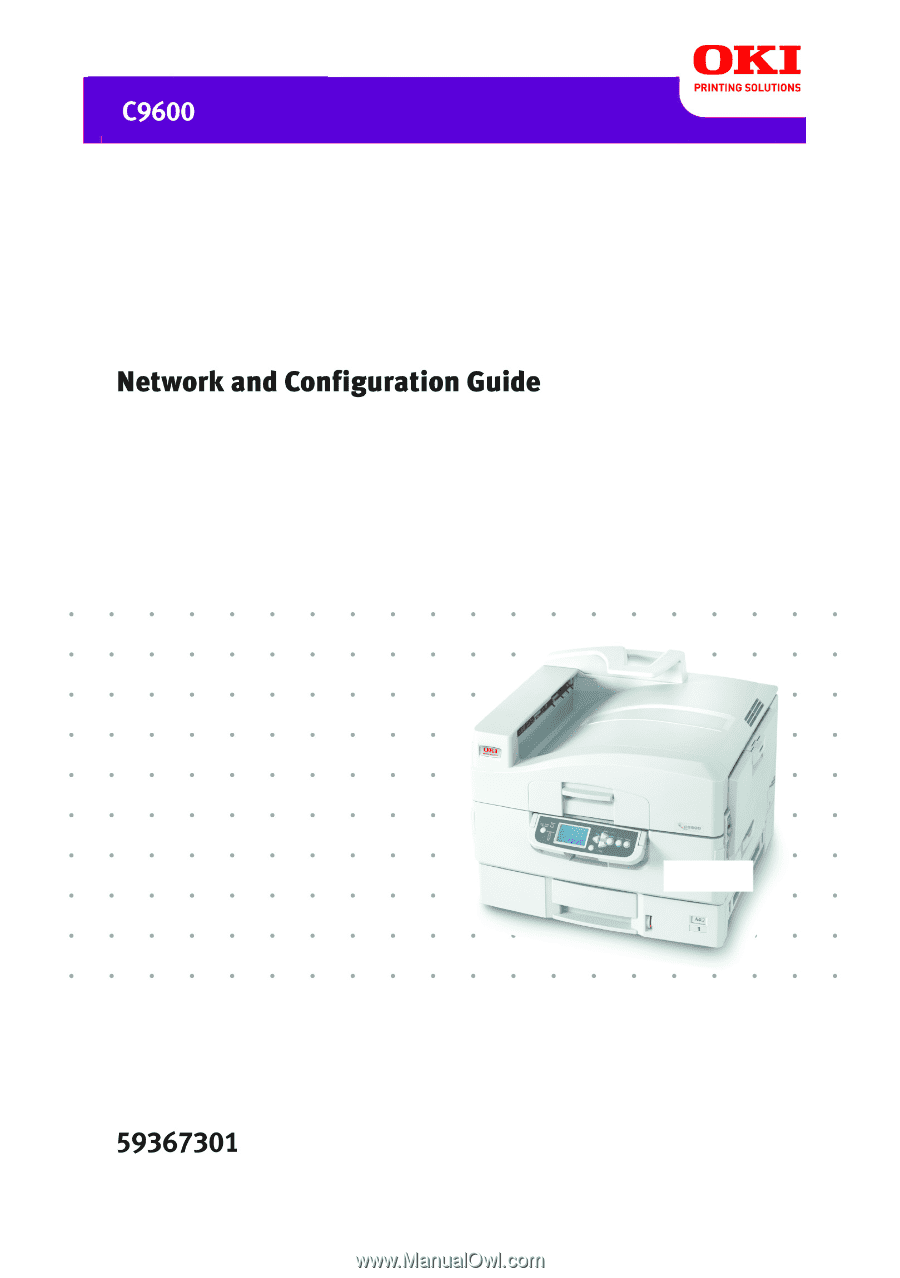
59367301_cvr.jpg