Olympus WS-310M WS-300M Instructions (English) - Page 49
Click the [Start Sync]. - software
 |
UPC - 050332299368
View all Olympus WS-310M manuals
Add to My Manuals
Save this manual to your list of manuals |
Page 49 highlights
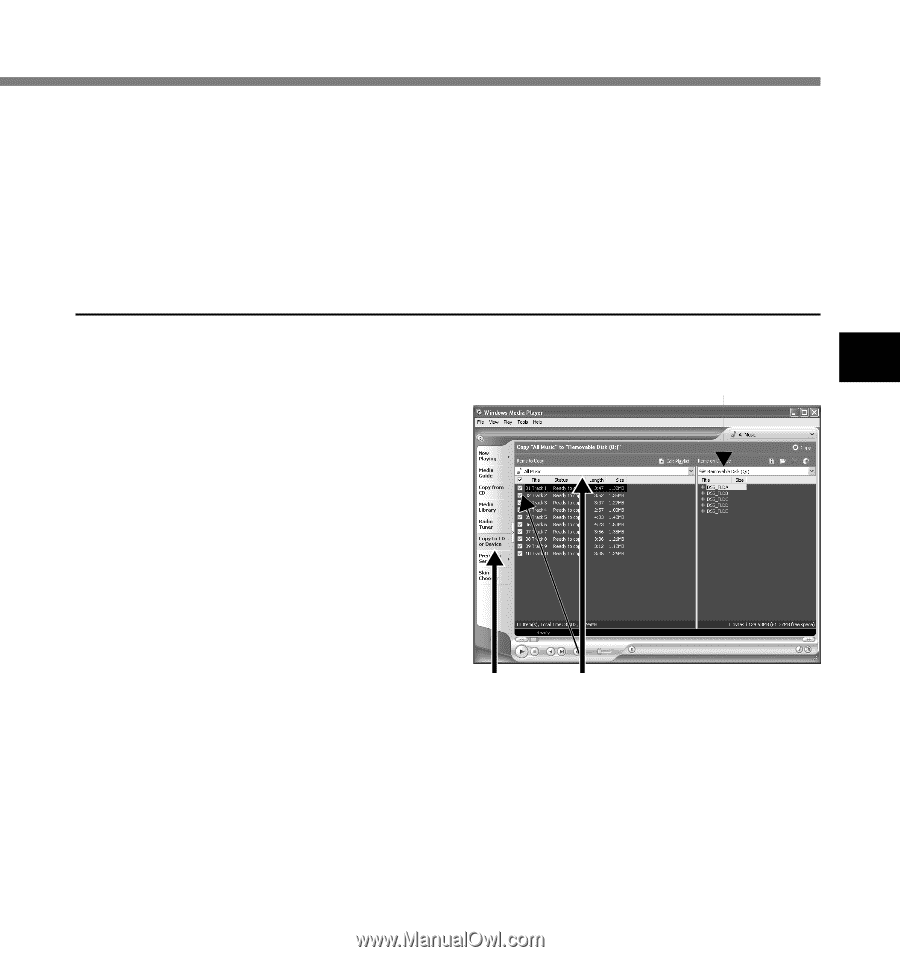
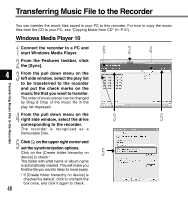
6 Click the [Start Sync]. The file is transferred to the recorder. The music file transferred to the recorder is displayed in Item on Device. After transferring a language-learning file to the music folder, if you further transfer or copy the file to your desired voice folder (DSS_FLDA to DSS_FLDE) using a software like "Explorer", you can use the functions such as partial repeat, fast playback, slow playback, and previous playback. Windows Media Player 9 1 Connect the recorder to a PC and start Windows Media Player. 4 4 Transferring Music File to the Recorder 2 From the Features taskbar, click the [Copy to CD or Device] menu. 3 Select the play list to be transferred to the recorder and put the check marks on the music file that you want to transfer. The order of music pieces can be changed by Drag & Drop of the music file in the play list displayed. 4 From Item on Device, select the drive corresponding to the recorder. 23 The recorder is recognized as a removable disk. 49
-
 1
1 -
2
-
3
-
4
-
5
-
6
-
7
-
8
-
9
-
10
-
11
-
12
-
13
-
14
-
15
-
16
-
17
-
18
-
19
-
20
-
21
-
22
-
23
-
24
-
25
-
26
-
27
-
28
-
29
-
30
-
31
-
32
-
33
-
34
-
35
-
36
-
37
-
38
-
39
-
40
-
41
-
42
-
43
-
 44
44 -
 45
45 -
 46
46 -
 47
47 -
 48
48 -
 49
49 -
 50
50 -
 51
51 -
 52
52 -
 53
53 -
 54
54 -
55
-
56
-
57
-
58
-
59
-
60
-
61
-
62
-
63
-
64
-
65
-
66
-
67
-
68
-
69
-
70
-
71
-
72
-
73
-
74
-
75
-
76
-
77
-
78
-
79
-
80
-
81
-
82
-
83
-
84
-
85
-
86
-
87
 |
 |