Onkyo TX-DS575x Owner Manual - Page 11
Positioning speakers, Connecting the power - receivers
 |
View all Onkyo TX-DS575x manuals
Add to My Manuals
Save this manual to your list of manuals |
Page 11 highlights
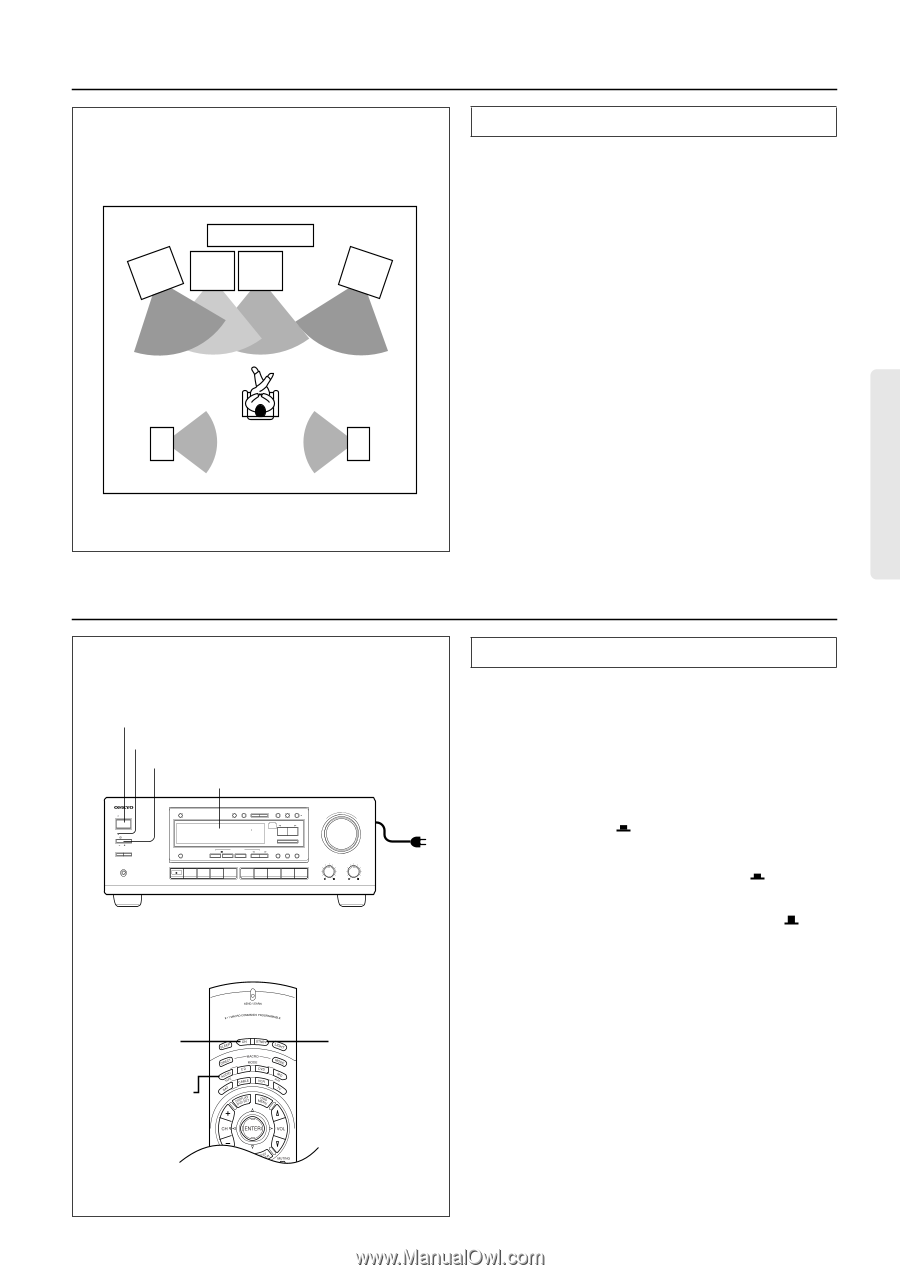
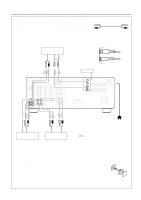
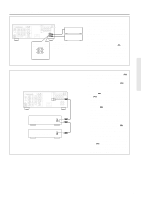
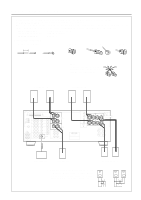
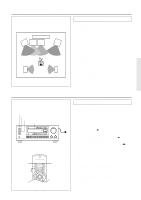
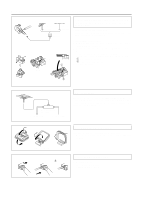
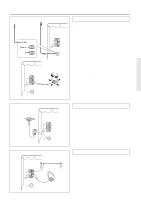
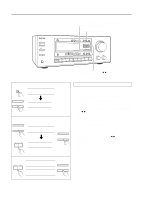
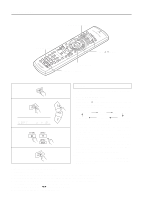
Positioning speakers sFpreoLanekt fetr TV or Screen Subwoofer speaker Center speaker sRpeiFgarhoktnetr Surround speaker Left Listener Surround speaker Right Positioning speakers Speaker placement plays an important role in the reproduction of Surround sound. The placement of the speakers varies depending on the size of the room and the wall coverings used in the room. The illustration shows an example of a layout for standard speaker placement. Refer to this example when you position the speakers in order to experience the best of Surround sound. Standard speaker placement For ideal Surround effects, all speakers should be installed. If a center speaker or subwoofer is not connected, the sound from the unused channel is properly distributed to the connected speakers in order to produce the best Surround sound possible. Front: The left, right, and center speakers should face the seated listener and be placed at ear level. The center speaker produces a richer sound image by enhancing the perception of the sound's source and movement. Surround: Place the left and right Surround speakers 1 meter (3 feet) above the listener's ear level and facing toward the sides of the room, making sure that the listener is within the speakers' dispersion angle. These speakers produce the feel of a moving sound while creating the sensation of being in the middle of the action. Subwoofer: Install a subwoofer with a built-in power amplifier for powerful bass sounds. The placement of the subwoofer does not affect the final quality of the sound image too much, so you can install it with the room layout in mind. Refer to the speaker's instruction manual for more details. Connecting the power 3. STANDBY/ON button STANDBY indicator 2. POWER switch Display STANDBY/ON STANDBY POWER ON OFF A SPEAKERS B PHONES PTY/TP DISPLAY FM MUTE / MEMORY MODE DOWN TUNING UP DIGITAL/ ANALOG SP/ SYS SETUP CH LEVEL MODE PRESET / MODE ADJ DOW N UP STEREO LISTENING MODE /DTS SURROUND 5 CH STEREO ENTER / SCAN DSP LATE NIGHT/ LFE LEVEL FRONT EFFECT Re-EQ CONTROL MULTI CH INPUT DVD VIDEO 1 VIDEO 2 VIDEO 3 TAPE FM AM PHONO C D DOWN MASTER VOLUME UP BASS TREBLE AV RECEIVER TX-DS575X 1. To wall outlet 3. ON button 2. MODE AUDIO button 3. STNBY button Connecting the power • Before you plug in the receiver, confirm that all connections have been made properly. • Turning on this receiver's power may cause a momentary power surge, which might interfere with other electrical equipment, such as computers. If this happens, use a wall outlet on a different circuit. 1. Plug the power cord into an AC wall outlet. NOTE: When you use the TX-DS575X for the first time: When the TX-DS575X is shipped from the factory, the POWER switch is set to ON ( ). Therefore, when you plug in the power cord to the AC outlet, the Standby indicator lights up and the unit enters Standby mode as described in Step 2. 2. Press the POWER switch to set it to the ON( ) position to place the receiver in Standby mode. The STANDBY indicator will light up. Press the POWER switch again to set it to the OFF ( ) position to turn off the power to the receiver. 3. Press the STANDBY/ON button to turn on the receiver. The display will light up and the STANDBY indicator will be turned off. If you press the STANDBY/ON button, the receiver returns to Standby mode. Turning the power on from the remote controller: 1. Press the POWER switch of the TX-DS575X to turn on the power to the unit. 2. Press the MODE AUDIO button. 3. Press the ON button to turn on the power to the TXDS575X, or press the STNBY button to set the receiver in standby mode. • You cannot use the remote controller if the POWER switch on the receiver is set to OFF. • Set the volume level to minimum before you turn off the power to the receiver. 11
-
 1
1 -
2
-
3
-
4
-
5
-
 6
6 -
 7
7 -
 8
8 -
 9
9 -
 10
10 -
 11
11 -
 12
12 -
 13
13 -
 14
14 -
 15
15 -
 16
16 -
17
-
18
-
19
-
20
-
21
-
22
-
23
-
24
-
25
-
26
-
27
-
28
-
29
-
30
-
31
-
32
-
33
-
34
-
35
-
36
-
37
-
38
-
39
-
40
-
41
-
42
-
43
-
44
 |
 |