Panasonic PT-D6000ULK Functional Instructions - Page 24
Raster Position, English - 24
 |
UPC - 791871111871
View all Panasonic PT-D6000ULK manuals
Add to My Manuals
Save this manual to your list of manuals |
Page 24 highlights
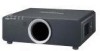
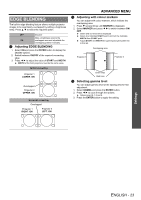
ADVANCED MENU Q Adjusting brightness around borderline of the image area You can adjust brightness around borderline of the image area to minimise the difference between the overlapping area and the image. Select BRIGHT ADJUST and press the ENTER button. Press F G to select a colour, and I H to change the value. BRIGHT INSIDE BRIGHT OUTSIDE OUTSIDE AREA INTERLOCKED: ON Adjust WHITE only. INTERLOCKED: OFF Adjust RED, GREEN and BLUE individually. Setting range: 0 to +255 INTERLOCKED: ON Adjust WHITE only. INTERLOCKED: OFF Adjust RED, GREEN and BLUE individually. Setting range: 0 to +255 If, after the BRIGHT INSIDE adjustment, only the vicinity of the borders of the areas where the pictures overlap and where the pictures do not overlap becomes bright, proceed to adjust the width of connecting side. Projection range Edge blending width (right) Bright adjustment (right) Marker BRIGHT INSIDE BRIGHT OUTSIDE NOTE: • Alternatively, if only the vicinity of the borders has brightened as a result of the width adjustments, proceed with the BRIGHT OUTSIDE adjustment. • When a rear screen or screen with a high gain is used, the joints may appear to be discontinuous depending on the viewing position. RASTER POSITION When there is gap between the image area and the projecting area, you can move the image inside of the projecting area. VERTICAL HORIZON Press F G to move the image up or down. Press I H to move the image to the left or right. Settings ENGLISH - 24
-
 1
1 -
2
-
3
-
4
-
5
-
6
-
7
-
8
-
9
-
10
-
11
-
12
-
13
-
14
-
15
-
16
-
17
-
18
-
 19
19 -
 20
20 -
 21
21 -
 22
22 -
 23
23 -
 24
24 -
 25
25 -
 26
26 -
 27
27 -
 28
28 -
 29
29 -
30
-
31
-
32
-
33
-
34
-
35
-
36
-
37
-
38
-
39
-
40
-
41
-
42
-
43
-
44
-
45
-
46
-
47
-
48
-
49
-
50
-
51
-
52
 |
 |
