Panasonic PT-D6000ULK Functional Instructions - Page 26
Auto Setup, Dvi-d In, Sdi In, On-screen Display, Display Option Menu, Dvi Edid, Dvi Signal Level
 |
UPC - 791871111871
View all Panasonic PT-D6000ULK manuals
Add to My Manuals
Save this manual to your list of manuals |
Page 26 highlights
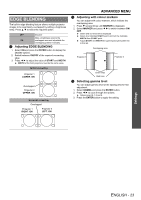
Settings DISPLAY OPTION menu AUTO SETUP You can change the AUTO SETUP feature for specific signals. Press I H to cycle through the options and press the ENTER button to perform the AUTO SETUP. DEFAULT WIDE USER For 4:3 or 5:4 signals Applicable resolution: 640 x 400, 640 x480, 800 x 600, 832 x 624, 960 x 720, 1 024 x 768, 1 152 x 864, 1 152 x 870, 1 280 x 960, 1 280 x 1 024, 1 600 x 1 200, 1 400 x 1 050 For wide signals Applicable resolution: 720 x 400, 848 x 480, 1 280 x 720, 1 024 x 600, 1 120 x 750, 1 440 x 900, 1 680 x 1 050 For specific resolution signals Select the required MODE and change the DISPLAY DOTS value by pressing I H. DVI-D IN NOTE: • The DVI-D IN setting for the best quality depends on the output equipment. Refer the instructions of the connected equipment. • DVI signal is very sensitive, and malfunction may occur or other problems could be encountered with some DVI equipment. J DVI EDID You can switch the EDID setting and signal level for variable DVI signals. EDID3 EDID1 EDID2(PC) Switch between fine settings for a moving image and for a still image. Fine setting for mainly a moving image, such as signals from a DVD player. Fine setting for mainly a still image, such as computer. J DVI SIGNAL LEVEL 0-255:PC 16-235 (PC scale) For connecting to a computer via DVI-D IN terminal (TV scale) For connecting to AV equipment via DVI-D IN terminal, such as a DVI - HDMI conversion cable connection SDI IN (PT-DZ6710E only) You can select signal amplitude type. 64-940 4-1019 Normal setting For when grey colour is too close to black ON-SCREEN DISPLAY J OSD POSITION You can change the displaying position of the main menu. Press I H to cycle through the options. 1 Upper left 2 Left 3 Lower left 4 Upper centre 5 Centre 6 Lower centre 7 Upper right 8 Right 9 Lower right J OSD DESIGN You can change the background colour of the menu. Press I H to select the required option. 1 Yellow 2 Blue 3 White 4 Green 5 Pink 6 Brown J OSD MEMORY The current menu cursor position will be retained temporarily unless the projector switched off. ON OFF Memorise the menu cursor position. Reset the cursor position. J INPUT GUIDE The name of current selected input terminal will be displayed where the position that is selected in OSD POSITION. ON OFF Displays the current selected input terminal. Deactive J WARNING MESSAGE You can prevent the display of waning messages. ON OFF All of the warning messages will be displayed. None of the warning messages will be displayed. NOTE: • When the WARNING MESSAGE is set to OFF, use the projector with utmost care due to none of the warning messages will be displayed. NOTE: • Available with YPBPR or RGB of HD-SDI signal. • Usually 64-940 setting is recommended. ENGLISH - 26
-
 1
1 -
2
-
3
-
4
-
5
-
6
-
7
-
8
-
9
-
10
-
11
-
12
-
13
-
14
-
15
-
16
-
17
-
18
-
19
-
20
-
 21
21 -
 22
22 -
 23
23 -
 24
24 -
 25
25 -
 26
26 -
 27
27 -
 28
28 -
 29
29 -
 30
30 -
 31
31 -
32
-
33
-
34
-
35
-
36
-
37
-
38
-
39
-
40
-
41
-
42
-
43
-
44
-
45
-
46
-
47
-
48
-
49
-
50
-
51
-
52
 |
 |
