Pfaff creative sensation Owner's Manual - Page 98
Remove the, embroidery unit, Attaching the, Dynamic spring foot, for embroidery
 |
View all Pfaff creative sensation manuals
Add to My Manuals
Save this manual to your list of manuals |
Page 98 highlights
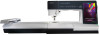
Remove the embroidery unit 1. To store the embroidery unit in the embroidery case, move the embroidery arm to park position by selecting park position on the screen in either Embroidery edit or Embroidery stitch-out. 2. Press the button at the left, underneath the embroidery unit (A) and slide the unit to the left to remove it. 3. The cover of the socket closes automatically. 4. Store the embroidery unit in the original A packing material, place in the soft carrying bag. Attaching the Dynamic spring foot 1 for embroidery 1. Disengage the IDT™ system (B). Remove the D standard presser foot (C). Carefully loosen the B screw (D) until the cross-hole (E) is accessible. E C 2 2. Squeeze the embroidery foot gently together and guide the pin of the foot into the cross-hole (E) of the presser foot holder as far as it will go. The arm on the foot should be placed behind E the needle screw. Embroidery Mode - Preparations 3. Tighten the screw (D). 3 D To remove the embroidery foot loosen the screw (D), squeeze the embroidery foot together and pull it out to the right. Tighten the screw (D). 7:4
-
 1
1 -
2
-
3
-
4
-
5
-
6
-
7
-
8
-
9
-
10
-
11
-
12
-
13
-
14
-
15
-
16
-
17
-
18
-
19
-
20
-
21
-
22
-
23
-
24
-
25
-
26
-
27
-
28
-
29
-
30
-
31
-
32
-
33
-
34
-
35
-
36
-
37
-
38
-
39
-
40
-
41
-
42
-
43
-
44
-
45
-
46
-
47
-
48
-
49
-
50
-
51
-
52
-
53
-
54
-
55
-
56
-
57
-
58
-
59
-
60
-
61
-
62
-
63
-
64
-
65
-
66
-
67
-
68
-
69
-
70
-
71
-
72
-
73
-
74
-
75
-
76
-
77
-
78
-
79
-
80
-
81
-
82
-
83
-
84
-
85
-
86
-
87
-
88
-
89
-
90
-
91
-
92
-
 93
93 -
 94
94 -
 95
95 -
 96
96 -
 97
97 -
 98
98 -
 99
99 -
 100
100 -
 101
101 -
 102
102 -
 103
103 -
104
-
105
-
106
-
107
-
108
-
109
-
110
-
111
-
112
-
113
-
114
-
115
-
116
-
117
-
118
-
119
-
120
-
121
-
122
-
123
-
124
-
125
-
126
-
127
-
128
-
129
-
130
-
131
-
132
-
133
-
134
-
135
-
136
-
137
-
138
-
139
-
140
-
141
-
142
-
143
-
144
-
145
-
146
-
147
-
148
-
149
-
150
-
151
-
152
-
153
-
154
-
155
-
156
-
157
-
158
-
159
-
160
-
161
-
162
-
163
-
164
 |
 |
