Samsung CLP 600N User Manual (ENGLISH) - Page 17
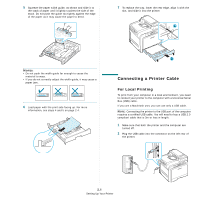
Connecting a Printer Cable, For Local Printing - printing light
 |
UPC - 635753703016
View all Samsung CLP 600N manuals
Add to My Manuals
Save this manual to your list of manuals |
Page 17 highlights
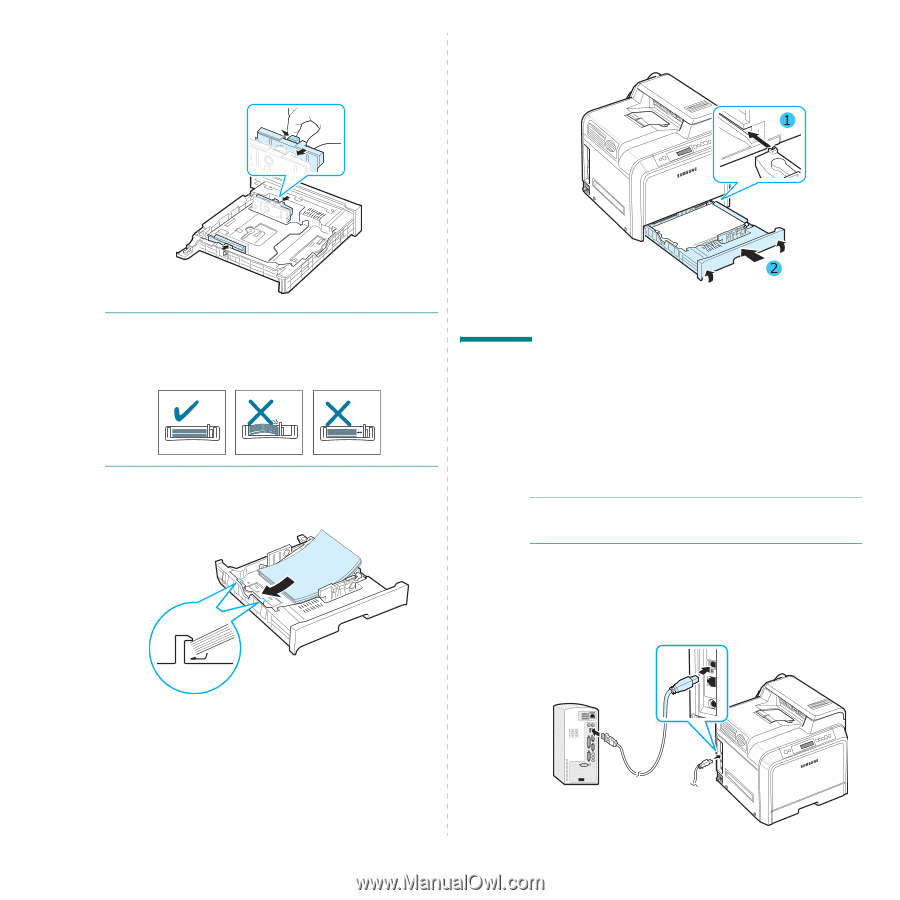
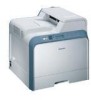
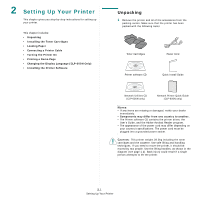
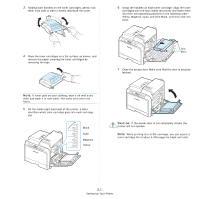
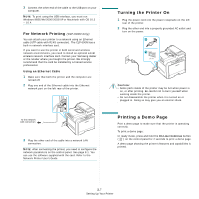
5 Squeeze the paper width guide, as shown and slide it to the stack of paper until it lightly touches the side of the stack. Do not push the guide too tightly against the edge of the paper as it may cause the paper to bend. 7 To replace the tray, lower the rear edge, align it with the slot, and slide it into the printer. NOTES: • Do not push the width guide far enough to cause the material to warp. • If you do not correctly adjust the width guide, it may cause a paper jam. 6 Load paper with the print side facing up. For more information, see steps 4 and 5 on page 2.4. Connecting a Printer Cable For Local Printing To print from your computer in a local environment, you need to connect your printer to the computer with a Universal Serial Bus (USB) cable. If you are a Macintosh user, you can use only a USB cable. NOTE: Connecting the printer to the USB port of the computer requires a certified USB cable. You will need to buy a USB 2.0 compliant cable that is 3m or less in length. 1 Make sure that both the printer and the computer are turned off. 2 Plug the USB cable into the connector on the left rear of the printer. 2.6 Setting Up Your Printer
-
 1
1 -
2
-
3
-
4
-
5
-
6
-
7
-
8
-
9
-
10
-
11
-
 12
12 -
 13
13 -
 14
14 -
 15
15 -
 16
16 -
 17
17 -
 18
18 -
 19
19 -
 20
20 -
 21
21 -
 22
22 -
23
-
24
-
25
-
26
-
27
-
28
-
29
-
30
-
31
-
32
-
33
-
34
-
35
-
36
-
37
-
38
-
39
-
40
-
41
-
42
-
43
-
44
-
45
-
46
-
47
-
48
-
49
-
50
-
51
-
52
-
53
-
54
-
55
-
56
-
57
-
58
-
59
-
60
-
61
-
62
-
63
-
64
-
65
-
66
-
67
-
68
-
69
-
70
-
71
-
72
-
73
-
74
-
75
-
76
-
77
-
78
-
79
-
80
-
81
-
82
-
83
-
84
-
85
-
86
-
87
-
88
-
89
-
90
-
91
-
92
-
93
-
94
-
95
-
96
-
97
-
98
-
99
-
100
-
101
-
102
-
103
-
104
-
105
-
106
-
107
-
108
-
109
-
110
-
111
-
112
-
113
-
114
-
115
 |
 |