Samsung CLP 600N User Manual (ENGLISH) - Page 68
Installing Printer Options, Align the connector on the network interface card with
 |
UPC - 635753703016
View all Samsung CLP 600N manuals
Add to My Manuals
Save this manual to your list of manuals |
Page 68 highlights
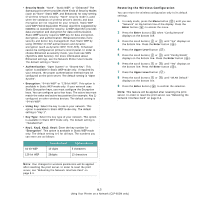
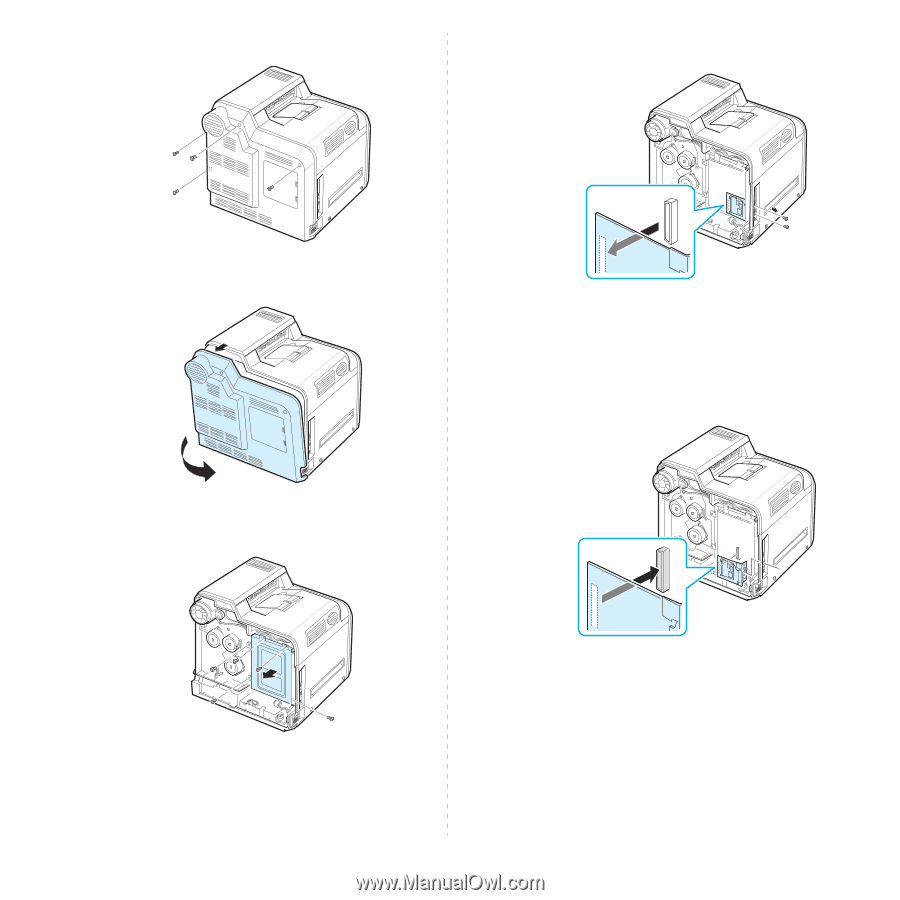
2 Remove the four screws on the back of the printer. 5 To remove an existing wired network interface card, remove the two screws and the card. 3 Remove the control board cover from the printer. 6 Separate the wired/wireless network card antenna from the card itself. 7 Align the connector on the network interface card with the connector on the control board. Make sure that the jacks on the card go through the holes. Push the card firmly into the connector on the control board until it is completely and securely seated. 4 Remove the five screws holding the metal plate in place, and then remove the metal cover, as shown below. 9.3 Installing Printer Options
-
 1
1 -
2
-
3
-
4
-
5
-
6
-
7
-
8
-
9
-
10
-
11
-
12
-
13
-
14
-
15
-
16
-
17
-
18
-
19
-
20
-
21
-
22
-
23
-
24
-
25
-
26
-
27
-
28
-
29
-
30
-
31
-
32
-
33
-
34
-
35
-
36
-
37
-
38
-
39
-
40
-
41
-
42
-
43
-
44
-
45
-
46
-
47
-
48
-
49
-
50
-
51
-
52
-
53
-
54
-
55
-
56
-
57
-
58
-
59
-
60
-
61
-
62
-
 63
63 -
 64
64 -
 65
65 -
 66
66 -
 67
67 -
 68
68 -
 69
69 -
 70
70 -
 71
71 -
 72
72 -
 73
73 -
74
-
75
-
76
-
77
-
78
-
79
-
80
-
81
-
82
-
83
-
84
-
85
-
86
-
87
-
88
-
89
-
90
-
91
-
92
-
93
-
94
-
95
-
96
-
97
-
98
-
99
-
100
-
101
-
102
-
103
-
104
-
105
-
106
-
107
-
108
-
109
-
110
-
111
-
112
-
113
-
114
-
115
 |
 |
Installing Printer Options
9.
3
2
Remove the four screws on the back of the printer.
3
Remove the control board cover from the printer.
4
Remove the five screws holding the metal plate in place,
and then remove the metal cover, as shown below.
5
To remove an existing wired network interface card,
remove the two screws and the card.
6
Separate the wired/wireless network card antenna from
the card itself.
7
Align the connector on the network interface card with the
connector on the control board. Make sure that the jacks
on the card go through the holes. Push the card firmly into
the connector on the control board until it is completely
and securely seated.