Samsung CLP 600N User Manual (ENGLISH) - Page 99
Using a Overlay, Create Overlay, Overlay List, Extras, Overlay, Load Overlay
 |
UPC - 635753703016
View all Samsung CLP 600N manuals
Add to My Manuals
Save this manual to your list of manuals |
Page 99 highlights
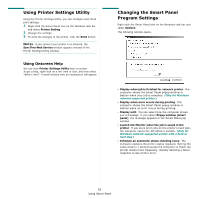
4 In the Edit Overlay window, click Create Overlay. 5 In the Create Overlay window, type a name in the File name box. Select the destination path, if necessary. (The default is C:\Formover). Using a Page Overlay After an overlay has been created, it is ready to be printed with your document. To print an overlay with a document: 1 Create or open the document you want to print. 2 To change the print settings from your software application, access printer properties. See "Printing a Document" on page 12. 3 Click the Extras tab. 4 Select the desired overlay from the Overlay drop-down list box. 5 If the overlay file you want does not appear in the Overlay list, click Edit button and Load Overlay, and select the overlay file. 6 Click Save. The name appears on the Overlay List box. 7 Click OK or Yes to finish creating. The file is not printed. Instead it is stored on your computer hard disk drive. NOTE: The overlay document size must be the same as the documents you print with the overlay. Do not create an overlay with a watermark. If you have stored the overlay file you want to use in an external source, you can also load the file when you access the Load Overlay window. After you select the file, click Open. The file appears in the Overlay List box and is available for printing. Select the overlay from the Overlay List box. 24 Advanced Printing
-
 1
1 -
2
-
3
-
4
-
5
-
6
-
7
-
8
-
9
-
10
-
11
-
12
-
13
-
14
-
15
-
16
-
17
-
18
-
19
-
20
-
21
-
22
-
23
-
24
-
25
-
26
-
27
-
28
-
29
-
30
-
31
-
32
-
33
-
34
-
35
-
36
-
37
-
38
-
39
-
40
-
41
-
42
-
43
-
44
-
45
-
46
-
47
-
48
-
49
-
50
-
51
-
52
-
53
-
54
-
55
-
56
-
57
-
58
-
59
-
60
-
61
-
62
-
63
-
64
-
65
-
66
-
67
-
68
-
69
-
70
-
71
-
72
-
73
-
74
-
75
-
76
-
77
-
78
-
79
-
80
-
81
-
82
-
83
-
84
-
85
-
86
-
87
-
88
-
89
-
90
-
91
-
92
-
93
-
 94
94 -
 95
95 -
 96
96 -
 97
97 -
 98
98 -
 99
99 -
 100
100 -
 101
101 -
 102
102 -
 103
103 -
 104
104 -
105
-
106
-
107
-
108
-
109
-
110
-
111
-
112
-
113
-
114
-
115
 |
 |
