Samsung RF4289HARS Quick Guide (easy Manual) (ver.1.0) (English) - Page 44
The All-Day schedule is to be indicated in the circular - update
 |
UPC - 036725560529
View all Samsung RF4289HARS manuals
Add to My Manuals
Save this manual to your list of manuals |
Page 44 highlights
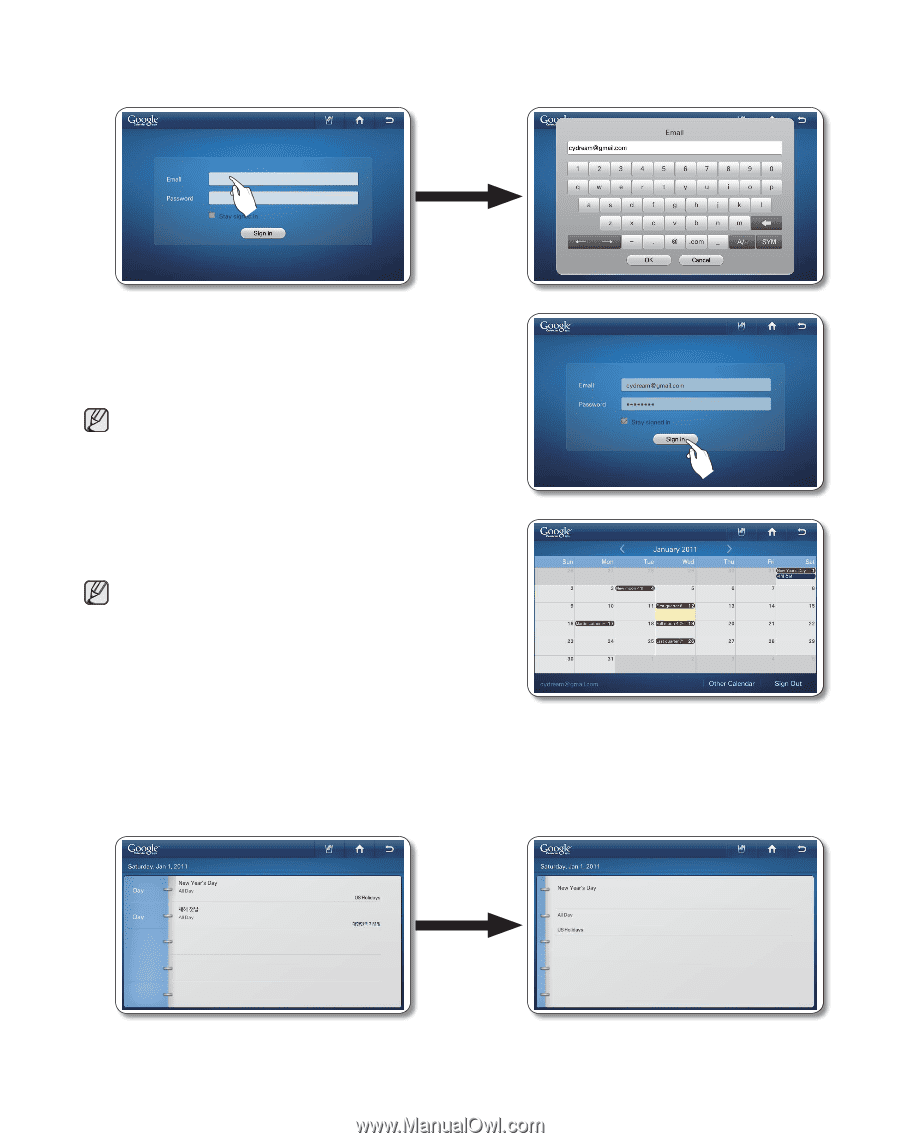
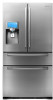
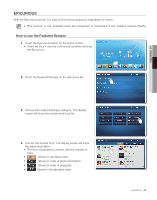
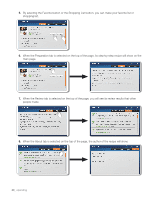
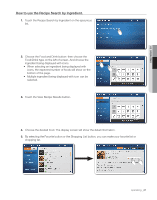
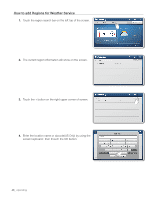
2. Choose the Email and Password input box: then enter the Google account ID and password by using the screen keyboard. 3. Touch the Sign in button. • When checking on the 'Stay signed in' box, the account will be stored for future log-in. • When you do not have a Google account, you can get one at http://calendar.google.com. • In the Email section, enter the Google account ID such as [email protected]. 4. To check the schedule, select the date to check. The display screen will show the daily schedule of selected day. • The schedule made in the Google Calender is not to be modified or erased through the screen. • Each schedule is to appear in accordance with the display color of the related Calender. • The All-Day schedule is to be indicated in the circular button and schedules with a starting time is to be displayed in front of the content in the 24-hour notation. • Choose the left / right direction arrows to check the Monthly Schedule. • When there are more than 4 events within a day, it displays the increase by means of "+1 more". • The schedule is to be updated every 30 minutes. 5. Choose the schedule you want to check. The selected schedule will appear on the screen. 44_ operating
-
 1
1 -
2
-
3
-
4
-
5
-
6
-
7
-
8
-
9
-
10
-
11
-
12
-
13
-
14
-
15
-
16
-
17
-
18
-
19
-
20
-
21
-
22
-
23
-
24
-
25
-
26
-
27
-
28
-
29
-
30
-
31
-
32
-
33
-
34
-
35
-
36
-
37
-
38
-
 39
39 -
 40
40 -
 41
41 -
 42
42 -
 43
43 -
 44
44 -
 45
45 -
 46
46 -
 47
47 -
 48
48 -
 49
49 -
50
-
51
-
52
-
53
-
54
-
55
-
56
-
57
-
58
-
59
-
60
-
61
-
62
-
63
-
64
-
65
-
66
-
67
-
68
-
69
-
70
-
71
-
72
-
73
-
74
-
75
-
76
-
77
-
78
-
79
-
80
-
81
-
82
-
83
-
84
-
85
-
86
 |
 |