Sharp LC-90LE745U Operation Manual - Page 35
System Options, View Option, Terminal Setting
 |
View all Sharp LC-90LE745U manuals
Add to My Manuals
Save this manual to your list of manuals |
Page 35 highlights
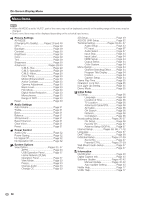
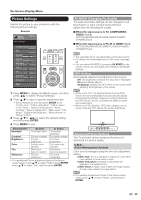
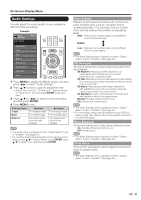
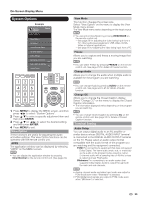
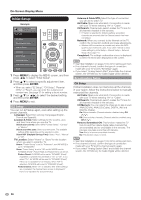
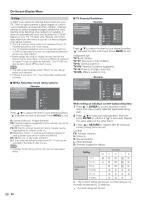
On-Screen Display Menu System Options Example System Options System Options Menu View Option 3D Setup AQUOS LINK Setup Terminal Setting Menu Design Operation Lock Out [Off] Icon Light Up Setting [On] Demo Mode View Mode This function changes the screen size. Select "View Option" on the menu to display the View Mode menu screen. The View Mode menu varies depending on the input source. • You can select View Mode by pressing VIEW MODE on the remote control unit. -See page 26 for adjusting the video being input from a TV, other audiovisual equipment, USB-Video, DLNAVideo or Internet applications. -See page 66 for adjusting the video being input from a PC. Freeze Allows you to capture and freeze a moving image that you are watching. • You can select Freeze by pressing FREEZE on the remote control unit. See page 23 for details of Freeze function. Change Audio Allows you to change the audio when multiple audio is available for the program you are watching. 1 Press MENU to display the MENU screen, and then press c/d to select "System Options". 2 Press a/b to select a specific adjustment item and then press ENTER. 3 Press a/b (or c/d) to select the desired setting, and then press ENTER. 4 Press MENU to exit. View Option These functions are useful for adjusting the audio and video settings. The View Option functions can be operated with the remote control unit. APPS The application window can be displayed by selecting "APPS" on the MENU screen. • You can display the application window by pressing SmartCentral on the remote control unit. (See page 24.) • You can change Audio by pressing AUDIO on the remote control unit. See pages 24 to 25 for details of Audio function. Change CC Allows you to change the Closed Caption display. Select "Change CC" on the menu to display the Closed Caption information. • The information displayed varies depending on the program you are watching. • You can change Closed Caption by pressing CC on the remote control unit. See page 25 for details of Closed Caption function. Terminal Setting Audio Setup You can output digital audio to an AV amplifier or similar device whose DIGITAL AUDIO INPUT terminal is connected to the DIGITAL AUDIO OUTPUT terminal on the TV. Please select an audio output format compatible with the audio format of the program you are watching and the equipment connected. PCM: For connecting to equipment that does not support Dolby Digital. The same audio (main, sub, or main/sub) as the audio of the program being viewed is output. 2-channel audio with a sampling rate of 48 kHz or less is output as linear PCM audio. Bitstream: For connecting to an audio system that supports Dolby Digital. Audio is output through both the main and sub channels. • Analog channel audio and video input audio are output in PCM mode even when "Bitstream" is selected. • PCM digital input signals are output in PCM mode even when "Bitstream" is selected. 33
-
 1
1 -
2
-
3
-
4
-
5
-
6
-
7
-
8
-
9
-
10
-
11
-
12
-
13
-
14
-
15
-
16
-
17
-
18
-
19
-
20
-
21
-
22
-
23
-
24
-
25
-
26
-
27
-
28
-
29
-
 30
30 -
 31
31 -
 32
32 -
 33
33 -
 34
34 -
 35
35 -
 36
36 -
 37
37 -
 38
38 -
 39
39 -
 40
40 -
41
-
42
-
43
-
44
-
45
-
46
-
47
-
48
-
49
-
50
-
51
-
52
-
53
-
54
-
55
-
56
-
57
-
58
-
59
-
60
-
61
-
62
-
63
-
64
-
65
-
66
-
67
-
68
-
69
-
70
-
71
-
72
-
73
-
74
-
75
-
76
-
77
-
78
-
79
-
80
-
81
-
82
-
83
-
84
-
85
-
86
-
87
-
88
-
89
-
90
-
91
-
92
-
93
-
94
-
95
-
96
-
97
-
98
 |
 |