Singer 7470 Confidence Instruction Manual - Page 34
². Starting To Sew
 |
View all Singer 7470 Confidence manuals
Add to My Manuals
Save this manual to your list of manuals |
Page 34 highlights
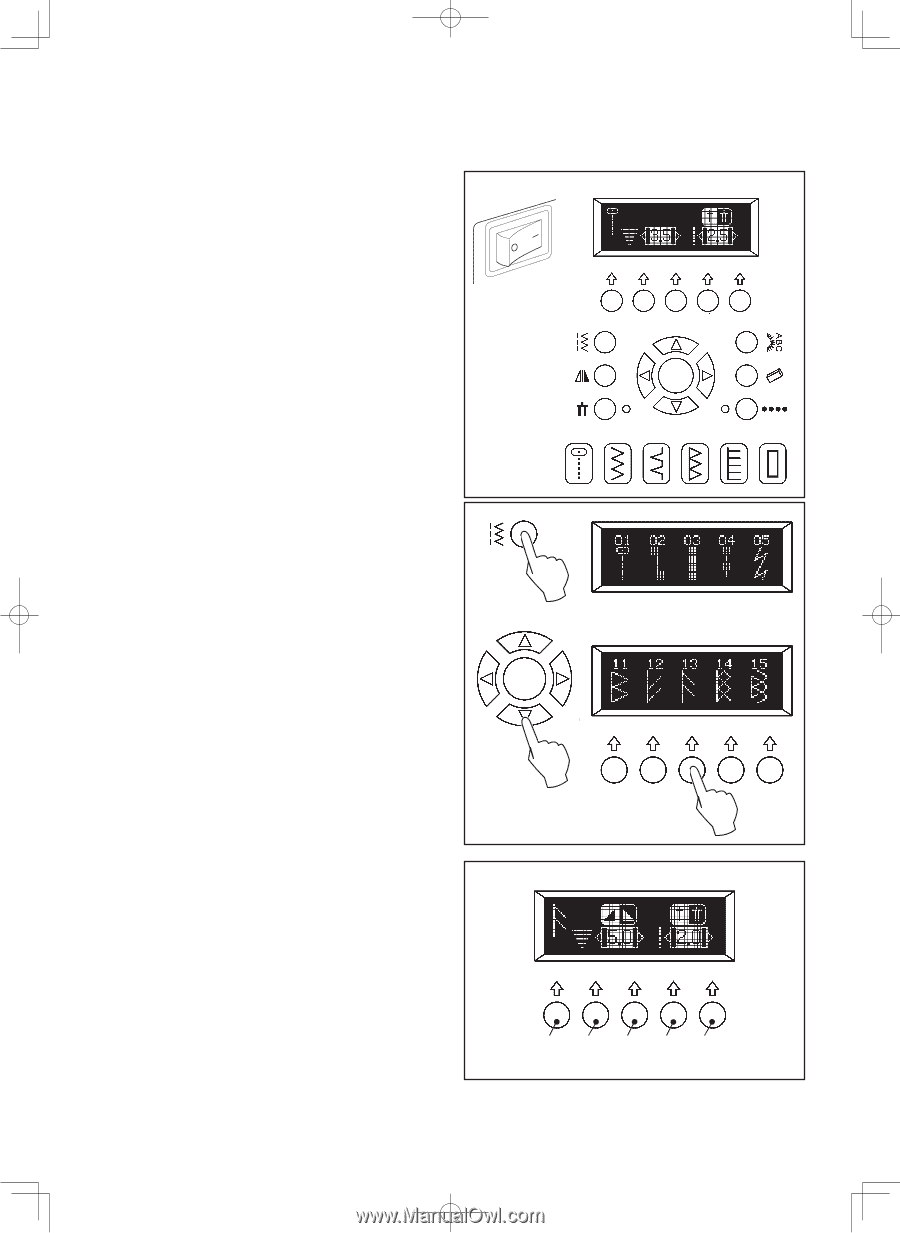
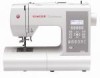
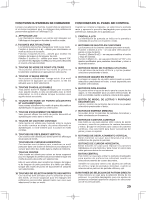
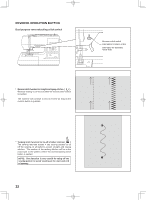
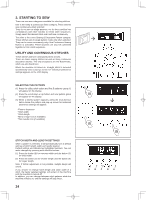
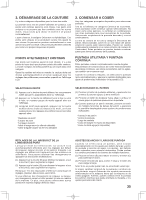
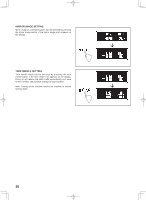
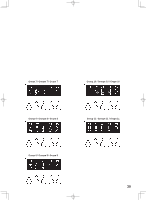
2. STARTING TO SEW There are two main categories available for selecting stitches. One is the Utility & Continuous Stitch category. These stitches sew continuously when selected. They do not sew as single patterns, nor do they combine into combinations with other stitches to create stitch sequences. Simply select the desired stitch and it will sew continuously. The other is the Letter Sewing & Decorative Pattern category. These stitches sew in single pattern mode only when selected. They can be sewn continuously only if the Continuous Sewing Button is activated. These stitches can also be combined together to form stitch sequences. UTILITY AND CONTINUOUS STITCHES These stitches will sew continuously when chosen. There are basic sewing stitches as well as many continuous decorative stitches. The only exceptions are the Buttonholes, which are also found here. When the machine is turned on, straight stitch is selected automatically and a pop-up screen for individual preference settings appears on the LCD display. SELECTING THE PATTERN (1) Press the utility stitch button and first 5 patterns (group 1) will appear on the display. (2) Press the scroll down or up button and new pattern group will appear on the display. (3) When a desired pattern appears, press the multi-function button below the pattern and pop-up screen for individual preference settings will appear: *Pattern illustration *Stitch width *Stitch length *Mirror image icon (if available) *Twin needle icon (if available) STITCH WIDTH AND LENGTH SETTINGS When a pattern is selected, it will automatically sew at default settings of stitch length, width and needle position. Default settings are indicated as highlighted numbers. You can make changes by pressing multi-function buttons: (1) Press the button (B) for narrower width and the button (C) for wider width. (2) Press the button (D) for shorter length and the button (E) for longer length. Note: If further adjustment is not possible, multiple beeps will sound. If you choose to change stitch length and stitch width of a stitch, the newly selected settings will remain in the machine until the machine is turned off. In addition, you can change between stitch patterns while the machine remains on, and the settings will stay intact. 34 (1) (2) (3) ABCDE
-
 1
1 -
2
-
3
-
4
-
5
-
6
-
7
-
8
-
9
-
10
-
11
-
12
-
13
-
14
-
15
-
16
-
17
-
18
-
19
-
20
-
21
-
22
-
23
-
24
-
25
-
26
-
27
-
28
-
 29
29 -
 30
30 -
 31
31 -
 32
32 -
 33
33 -
 34
34 -
 35
35 -
 36
36 -
 37
37 -
 38
38 -
 39
39 -
40
-
41
-
42
-
43
-
44
-
45
-
46
-
47
-
48
-
49
-
50
-
51
-
52
-
53
-
54
-
55
-
56
-
57
-
58
-
59
-
60
-
61
-
62
-
63
-
64
-
65
-
66
-
67
-
68
-
69
-
70
-
71
-
72
-
73
-
74
-
75
-
76
-
77
-
78
-
79
-
80
-
81
-
82
-
83
-
84
-
85
-
86
-
87
-
88
-
89
-
90
-
91
-
92
-
93
-
94
 |
 |