Sony DCR DVD205 Operating Guide
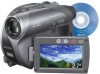
Sony DCR DVD205 - 1MP DVD Handycam Camcorder Manual
 |
UPC - 027242691254
View all Sony DCR DVD205 manuals
Add to My Manuals
Save this manual to your list of manuals |
Sony DCR DVD205 manual content summary:
- Sony DCR DVD205 | Operating Guide - Page 1
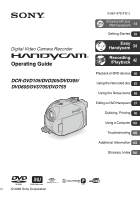
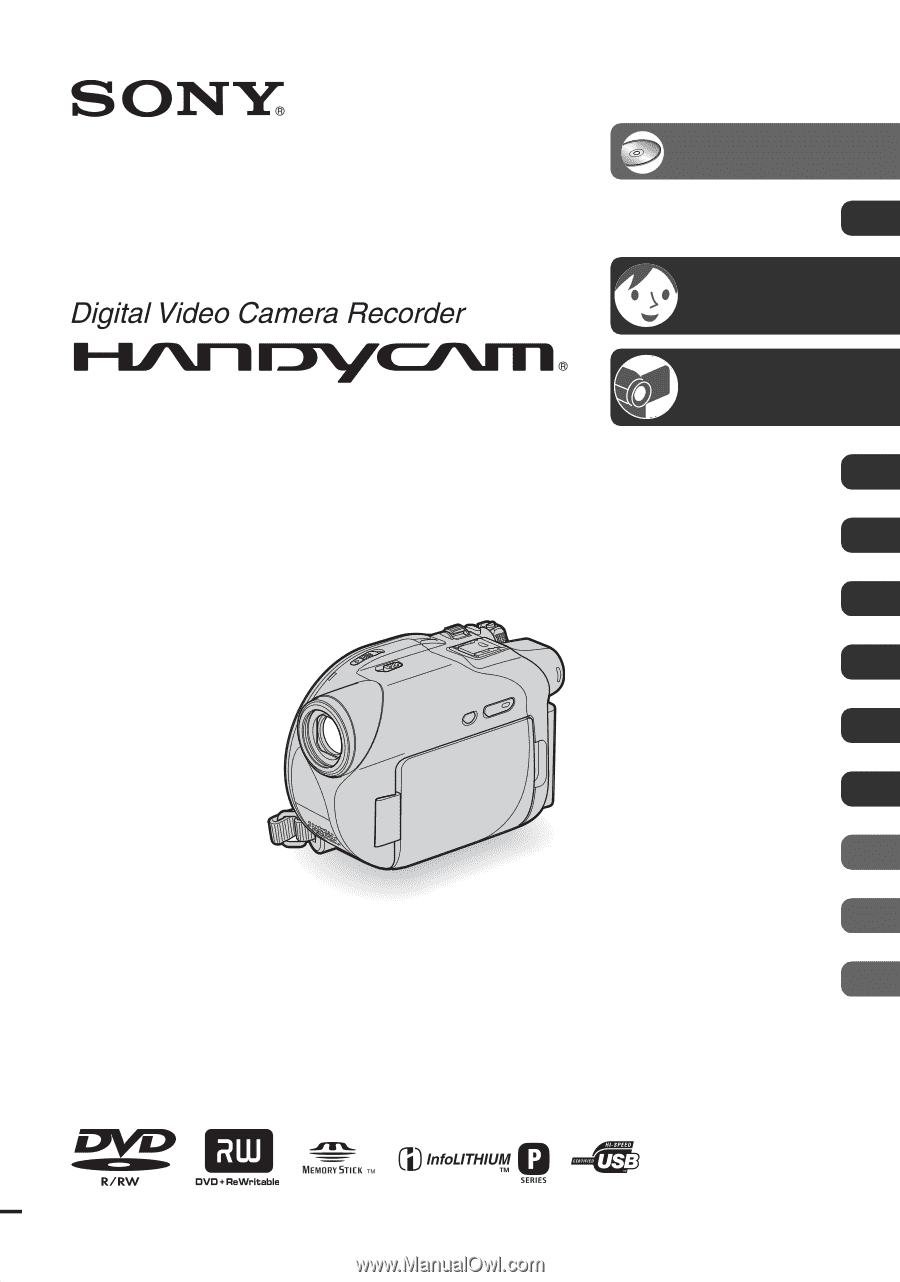
Operating Guide DCR-DVD105/DVD205/DVD305/ DVD605/DVD705/DVD755 2-661-370-11(1) Enjoying with your DVD Handycam 14 Getting Started 20 Easy Handycam 34 Recording /Playback 42 Playback on DVD devices 56 Using the Recorded disc 63 Using the Setup items 66 Editing on DVD Handycam 87 Dubbing, - Sony DCR DVD205 | Operating Guide - Page 2
magnitude to constitute a risk of electric shock to persons. This symbol is intended to alert the user to the presence of important operating and maintenance (servicing) instructions in the literature accompanying the appliance. 2 - Sony DCR DVD205 | Operating Guide - Page 3
operate from battery power, or other sources, refer to the operating instructions. Polarization This set may be equipped with a polarized ac power cord plugs, receptacles, and the point where the cord exits from the appliance. Accessories Do not place the set on an unstable cart, stand, tripod, - Sony DCR DVD205 | Operating Guide - Page 4
cable system. This will prevent damage to the set due to lightning and power-line surges. Service Damage Requiring Service Unplug the set from the wall outlet and refer servicing to qualified service operating instructions. Adjust only those controls that are specified in the operating instructions. - Sony DCR DVD205 | Operating Guide - Page 5
batteries. Owner's Record The model and serial numbers are located on the bottom. Record the serial number in the space provided below. Refer to these numbers whenever you call upon your Sony dealer regarding this product. Model No. DCR-DVD Serial No. Model No. AC this manual could the instructions, - Sony DCR DVD205 | Operating Guide - Page 6
interface cable must be Rules. "Battery pack" guides. - "Operating Guide" (This manual) - "First Step Guide" for using your camcorder with the computer connected (stored on the supplied CD-ROM)* * The DCR-DVD105/DVD205/DVD605/ DVD705 do not include "First Step Guide" because they do not support - Sony DCR DVD205 | Operating Guide - Page 7
25) or the ACCESS lamp (p.29) is on: - to remove the battery pack or AC Adaptor from the camcorder. - to apply mechanical shock or vibration to the camcorder. • Before connecting your camcorder to another device with a USB cable etc., be sure to insert the connector plug in the proper direction. If - Sony DCR DVD205 | Operating Guide - Page 8
what you see. • Design and specifications of recording media and accessories are subject to change without notice. • The illustrations used on this manual are based on the model DCR-DVD305. • Disc in this Operating Guide refers to 8cm DVD discs. • Available operations depend on the disc used. The - Sony DCR DVD205 | Operating Guide - Page 9
9 - Sony DCR DVD205 | Operating Guide - Page 10
Contents Enjoying with your DVD Handycam What you can do with your DVD Handycam 14 Choosing a disc 16 Using your DVD Handycam 18 Getting Started Step 1: Checking supplied items 20 Step 2: Charging the battery pack 21 Step 3: Turning the power on, and holding your camcorder 25 Step 4: Adjusting - Sony DCR DVD205 | Operating Guide - Page 11
playback To check the remaining battery To turn off the Review/Review deleting 50 Indicators displayed during recording/playback 51 Remote Commander (DCR-DVD305/DVD755 53 Playing the picture on a TV 54 Playback on DVD devices Making the disc compatible with playback on DVD devices or DVD - Sony DCR DVD205 | Operating Guide - Page 12
Settings while recording on a disc or other basic settings (REC MODE/LCD/VF SET/USB SPEED, etc.) TIME/LANGU 84 (CLOCK SET/AREA SET/LANGUAGE, etc.) Customizing Personal Menu 85 Editing on DVD Handycam Copying the still images (DCR-DVD305/DVD755 87 Deleting still images from the "Memory Stick Duo - Sony DCR DVD205 | Operating Guide - Page 13
Troubleshooting Troubleshooting 109 Warning indicators and messages 127 Additional Information Using your camcorder abroad 132 About the disc 134 About the "Memory Stick" (DCR-DVD305/DVD755 135 About the "InfoLITHIUM" battery pack 137 Maintenance and precautions 139 Specifications 143 - Sony DCR DVD205 | Operating Guide - Page 14
Enjoying with your DVD Handycam What you can do with your DVD Handycam Your DVD Handycam records image data on 8cm DVD*. It is can be recorded on the disc or "Memory Stick Duo." • Some models may not support recording onto a"Memory Stick Duo." You can find a scene quickly using a VISUAL INDEX - Sony DCR DVD205 | Operating Guide - Page 15
DVD Handycam to a computer • Some models may not support a computer connection. High-speed image transfer (p.103) Image data can be quickly transferred to a computer without requiring playback. Computers with Hi-Speed USB (USB 2.0) provide even faster image transfer. Using the supplied software - Sony DCR DVD205 | Operating Guide - Page 16
DVD Handycam (deleting and rearranging the order of images). A finalized disc can be played back in DVD devices that support Creating the DVD menu when you finalize the disc (59) z z - z *1Refer to the instruction manual of your DVD device to see whether it supports the VR mode of DVD-RW. - Sony DCR DVD205 | Operating Guide - Page 17
also contains still images. Disc use For reliability durability of recording /playback, we recommend that you use Sony discs or discs with an * (for VIDEO CAMERA) mark for your DVD Handycam. • Using a disc other than above may cause the unsatisfactory recording/playback or you may not be able - Sony DCR DVD205 | Operating Guide - Page 18
.) recorded image. You can delete or edit You can only delete the a recorded image images you have just anytime (p.90). recorded (p.50). 3Viewing on your DVD Handycam (See pages 38 and 44) You can also connect it to a TV for viewing (p.54). Continued on the right page 18 - Sony DCR DVD205 | Operating Guide - Page 19
To view a disc recorded on your DVD Handycam on other DVD devices, you need to finalize it first. DVD device / DVD recorder Finalize DVD drive • The less the recording compatibility with any DVD device is not guaranteed. Refer to the instruction manual supplied with your DVD device or consult your - Sony DCR DVD205 | Operating Guide - Page 20
-type lithium battery is already installed. CD-ROM "Picture Package Ver.1.8.1" (1) (p.103) (For DCR-DVD305/DVD755) CD-ROM "Nero Express 6" (1) (p.103) (For DCR-DVD105/DVD205/ DVD605/DVD705) Use when copying a disc recorded with your camcorder onto a 12cm DVD. Operating Guide (This manual) (1) To - Sony DCR DVD205 | Operating Guide - Page 21
excess force may lead to camcorder malfunction such as deterioration in battery pack performance or difficulty in removing the battery pack. POWER switch CHG lamp DC IN jack cover DC plug Battery DC IN jack Power cord To the wall outlet AC Adaptor 1 Slide the battery pack in the direction of - Sony DCR DVD205 | Operating Guide - Page 22
battery is fully charged. Disconnect the AC Adaptor from the DC IN jack on your camcorder. • Disconnect the AC Adaptor holding both your camcorder and the DC plug. To remove the battery you use a fully charged battery pack. For DCR-DVD105/DVD605 Battery pack Continuous Typical recording recording - Sony DCR DVD205 | Operating Guide - Page 23
viewfinder while the LCD panel is closed. Playback time Approximate time (min.) available when you use a fully charged battery pack. For DCR-DVD105/DVD605 Battery pack LCD screen LCD screen opened* closed NP-FP50 (supplied) 105 120 NP-FP70 225 255 NP-FP71 270 300 NP-FP90 400 455 For - Sony DCR DVD205 | Operating Guide - Page 24
Step 2: Charging the battery pack (continued) On the AC Adaptor • Connect the AC Adaptor to an easily accessible wall outlet close by. If any trouble occurs while using the adaptor, immediately shut off the power by disconnecting the plug from the wall outlet. • Do not use the AC Adaptor placed in a - Sony DCR DVD205 | Operating Guide - Page 25
the LCD screen for a few seconds. POWER switch Lens cap 3 Hold your camcorder correctly. Getting Started 1 Remove the lens cap by pressing both knobs on the if you leave your camcorder without any operation attempted for approximately 5 minutes, to save battery power. ([A.SHUT OFF], p.84). 25 - Sony DCR DVD205 | Operating Guide - Page 26
last longer (For DCR-DVD205/DVD305/DVD705/ DVD755) Press and hold DISP/BATT INFO for a few seconds until appears. This setting is practical when you use your camcorder in bright conditions or you want to save battery power. The recorded picture will not be affected by the setting. To cancel - Sony DCR DVD205 | Operating Guide - Page 27
panel You can play back recorded pictures (p.38, 44), or change the settings (p.66) using the touch panel. Touch the buttons displayed on the screen. Support the rear of the LCD panel with the palm of your left hand. Then, touch the buttons displayed on the screen. Touch the button on - Sony DCR DVD205 | Operating Guide - Page 28
set the date and time, the [CLOCK SET] screen appears every time you turn on your camcorder or slide the POWER switch. • If you do not use your camcorder for about 3 months, the built-in rechargeable battery gets discharged and the date and time settings may be cleared from the memory. In that - Sony DCR DVD205 | Operating Guide - Page 29
a disc or a "Memory Stick Duo" Inserting a disc A new 8cm DVD-R, DVD-RW, or DVD+RW is required for recording (p.16). • Remove dust or fingerprints from the disc beforehand, using the cleaning cloth supplied with your camcorder (p.134). Disc cover OPEN switch Pickup lens ACCESS lamp (Disc) POWER - Sony DCR DVD205 | Operating Guide - Page 30
• During Easy Handycam operation (p.34), [Format DVD devices if you finalize it. xVR mode You can edit, delete pictures, or divide movies on your camcorder (p.90). However, the disc can be played back only on DVD devices that support DVD-RW/ DVD+RW. • Do not remove the battery pack or disconnect the AC - Sony DCR DVD205 | Operating Guide - Page 31
Stick Duo" after step 2. • When the ACCESS lamp is lit or flashing, your camcorder is reading/writing data. Do not shake or knock your camcorder, turn the power off, eject the "Memory Stick Duo," or remove the battery pack. Otherwise, image data may be damaged. • Make sure that the "Memory Stick - Sony DCR DVD205 | Operating Guide - Page 32
pictures with [TV TYPE] set to [4:3], pictures may appear rough depending on subjects. To play back images on a DVD device or a DVD recorder The way you see pictures on the TV screen may differ depending on your device. For details, refer to the instruction manuals supplied with the devices you use. - Sony DCR DVD205 | Operating Guide - Page 33
the POWER switch to light up the (Still) lamp. The image size ratio changes to 4:3. 2 Select the recording media for still images (For DCR-DVD305/ DVD755). 1 Touch t [STILL MEDIA]. 2 Select the recording media for still images and touch . • The default setting is [MEMORY STICK]. 3 Press WIDE - Sony DCR DVD205 | Operating Guide - Page 34
BATT/INFO (For DCR-DVD205/DVD305/DVD705/DVD755)(p.49) • Review/Review deleting (p.50) To cancel Easy Handycam Press EASY again. disappears on the screen. • If you turn off the power without canceling Easy Handycam operation, your camcorder turns on in Easy Handycam operation automatically when - Sony DCR DVD205 | Operating Guide - Page 35
Easy Handycam - using your camcorder with automatic settings 35 - Sony DCR DVD205 | Operating Guide - Page 36
Recording with ease DCR-DVD105/ DVD605: Slide the POWER switch in the direction of the arrow while pressing the green button only when the POWER switch is to record on the disc when: - you turn off the power, then turn it on again. - you remove a disc from your camcorder, then insert it again. 36 - Sony DCR DVD205 | Operating Guide - Page 37
appears on the LCD screen. Easy Handycam - using your camcorder with automatic settings Still images 1 Slide the POWER switch A in the direction of the arrow to light up the lamp. (Still) 2 Select the recording destination for still images (For DCR-DVD305/DVD755). 1 Touch [SETUP] t [STILL - Sony DCR DVD205 | Operating Guide - Page 38
appears on the LCD screen. Previous 6 pictures Next 6 pictures Disc type DVD-RW recording format Appears with the image on each of the tab that disc. 3 tab: Displays the still images on the "Memory Stick Duo" (For DCR-DVD305/DVD755). • It may take some time to display the VISUAL INDEX screen. - Sony DCR DVD205 | Operating Guide - Page 39
Easy Handycam operation (p.34). [Easy Handycam operation ON.] appears, then appears on the LCD screen. Easy Handycam - using your camcorder with Go to the VISUAL INDEX screen Previous/Next "Memory Stick Duo" (For DCR-DVD305/DVD755): Touch tab and the still image to be played back. Slide - Sony DCR DVD205 | Operating Guide - Page 40
finalize a DVD-RW (VIDEO mode)/DVD+RW, you cannot record additional material on the disc during Easy Handycam operation. Cancel Easy Handycam operation, then follow the steps shown on page 63. Preparation for finalizing a disc 1 Place your camcorder in a stable position. Connect the AC Adaptor to - Sony DCR DVD205 | Operating Guide - Page 41
the AC adaptor during finalizing. • The shorter the amount of material recorded, the longer it takes for finalizing. Completed a disc Remove the disc from your camcorder. Enjoy watching images on the DVD device or DVD drive, etc. Refer also to the instruction manuals supplied with the DVD device - Sony DCR DVD205 | Operating Guide - Page 42
Recording/Playback Recording Remove the lens cap. DCR-DVD105/DVD605: START/STOP B Movies 1 Slide the POWER switch in the direction of the arrow to light up the (Movie) lamp. PHOTO POWER switch START/STOP A - Sony DCR DVD205 | Operating Guide - Page 43
(For DCR-DVD305/ Review/Review deleting) See page 50. • If the ACCESS lamp is on after recording is finished, it means data is still being written onto the disc or "Memory Stick Duo" (For DCRDVD305/DVD755). Do not apply shock or vibration to your camcorder, and do not disconnect the battery or AC - Sony DCR DVD205 | Operating Guide - Page 44
POWER switch to turn on your camcorder. 2 Press PLAY/EDIT A (or B). The VISUAL INDEX screen appears on the LCD screen. Previous 6 pictures Next 6 pictures Disc type DVD-RW recording format Appears with the image STANDARD SET not to play back the movie and make the battery last longer (p.83). 44 - Sony DCR DVD205 | Operating Guide - Page 45
it approximately 10 times* faster. * Approximately 8 times faster using a DVD+RW • When you touch a movie marked with i, you can play (p.49) Go to the VISUAL INDEX screen Previous/ Next "Memory Stick Duo" (For DCR- DVD305/DVD755) : Touch tab and the still image to be played back. Slide - Sony DCR DVD205 | Operating Guide - Page 46
to zoom to a level greater than the following: (optical zoom) DCR-DVD105/DVD605 20 × DCR-DVD205/DVD305/ DVD705/DVD755 12 × To record sound with more presence (5.1ch surround recording) (For DCRDVD305/DVD755 2 Your camcorder has Dolby Digital 5.1 Creator installed for recording 5.1ch surround - Sony DCR DVD205 | Operating Guide - Page 47
camcorder. • If your supplied microphone is lost or damaged, contact your Sony dealer or local authorized Sony service facility. You must also leave your camcorder objects. • Remove the conversion lens (optional). • Adjust the focus manually ([FOCUS], p.72) when it is hard to focus automatically. • - Sony DCR DVD205 | Operating Guide - Page 48
Functions used for recording/playback, etc. (continued) DCR-DVD305/DVD755: DCR-DVD205/DVD705: DCR-DVD105/DVD605: 48 To record in mirror mode 0 Open the LCD screen 0 90 degrees to the camcorder (1), then rotate it 180 degrees to the lens side (2). • A mirror-image of the subject appears on the LCD - Sony DCR DVD205 | Operating Guide - Page 49
102). 8 Remote sensor (For DCR-DVD305/ DVD755) Point the Remote Commander (p.53) towards the remote sensor to operate your camcorder. qa Speaker Sounds come out from the speaker while playing back. • For how to adjust the volume, see page 45. Remaining battery (approx.) Recording capacity (approx - Sony DCR DVD205 | Operating Guide - Page 50
still images recorded on the "Memory Stick Duo" until turning off the power after finishing recording (For DCR-DVD305/DVD755). Data once recorded on DVD-Rs cannot be deleted. 1 Press during the review. Movie Touch to display below function buttons. : Return to the beginning of the viewing movie - Sony DCR DVD205 | Operating Guide - Page 51
. Recording still images Recording/Playback 1 Remaining battery (approx.) (49) 2 Recording mode ( Recording format of a DVD-RW (16) 7 Remaining recordable time of the movie (approx.) (83) 8 Review button (50) folder (only for "Memory Stick Duo")(For DCR-DVD305/DVD755) wa Data file name ws VISUAL INDEX - Sony DCR DVD205 | Operating Guide - Page 52
127) Bottom Indicator 9 . n Meaning Picture effect (78) Digital effect (78) Manual focus (72) PROGRAM AE (70) Backlight (47) White balance (71) WIDE time is recorded automatically on the disc and "Memory Stick Duo" (DCR-DVD305/DVD755). They are not displayed while recording. However, you can - Sony DCR DVD205 | Operating Guide - Page 53
Recording/Playback Remote Commander (DCR-DVD305/DVD755) Remove the insulation sheet before V, then press ENTER to enter. • Point the Remote Commander towards the remote sensor to operate your camcorder (p.49). • When no commands have been sent from the Remote Commander in a certain period, the - Sony DCR DVD205 | Operating Guide - Page 54
to the input jack of TV or VCR using A/V connecting cable 1 or A/V connecting cable with S VIDEO 2. Connect your camcorder to the wall outlet using the supplied AC Adaptor for this operation (p.21). Refer also to the instruction manuals supplied with the devices to be connected. A/V jack (Yellow - Sony DCR DVD205 | Operating Guide - Page 55
, set [TV TYPE] to [4:3]. When your TV is monaural (When your TV has only one audio input jack) Connect the yellow plug of the A/V connecting cable to the video input jack and connect the white (left channel) or the red (right channel) plug to the audio input jack of your TV - Sony DCR DVD205 | Operating Guide - Page 56
Making the disc compatible with playback on DVD devices or DVD drives (Finalizing) Finalizing makes the recorded DVD compatible for playback with DVD devices and DVD drives of computers. • Playback compatibility with any DVD device is not guaranteed. The following settings are available before - Sony DCR DVD205 | Operating Guide - Page 57
To add recordings to a finalized disc (p.63) Recordings cannot be added. Unfinalize the disc. Recordings can be added as usual. When the DVD menu or Photomovie has been created, a confirmation screen prompts you to confirm that you wish to add a recording. Make a new recording To play back - Sony DCR DVD205 | Operating Guide - Page 58
goes off. Finalizing restarts when you connect the AC Adaptor and turn on your camcorder again. You cannot remove the disc until the finalizing operation is completed. 6 Touch , when [Completed.] appears. • When using a DVD-R/DVD-RW (VIDEO mode)/ DVD+RW, Z flashes after finalizing is completed on - Sony DCR DVD205 | Operating Guide - Page 59
are deleted from the end. 3 Select the type of a character, then touch the desired character. Select [NO MENU] if you do not create a DVD menu. 3 Touch t [END]. To change a Photomovie setting 1 Touch [PHOTOMOVIE]. 2 Touch [YES]. Select [NO] if you do not create a Photomovie. 3 Touch t [END]. • It - Sony DCR DVD205 | Operating Guide - Page 60
may be disabled on some DVD devices. • Still images are played back as a Photomovie swapping images in every 3 seconds. • DVD devices that support subtitles can display the recording date and time where the subtitles normally appear(p.84). Refer also to the instruction manual of your DVD device. 60 - Sony DCR DVD205 | Operating Guide - Page 61
DVD drive that supports 8cm discs, and a DVD playback instruction manuals of your computer. • You cannot play back or edit movies that have been copied from the disc to the hard disc of your computer. For details on how to import movies, refer to the "First Step Guide" in the supplied CDROM (For DCR - Sony DCR DVD205 | Operating Guide - Page 62
Playing back a disc on a computer with a DVD drive installed (continued) The date the disc was x Movies DVD-R/DVD-RW (VIDEO mode)/DVD+RW: VIDEO_TS folder DVD-RW (VR mode): DVD_RTAV folder x Still images DCIM\100MSDCF folder The folder for data for DVD-Rs/DVD-RWs (VIDEO mode)/DVD+RWs when - Sony DCR DVD205 | Operating Guide - Page 63
DVD-RW (VIDEO mode) disc (Unfinalizing) 1 Connect the AC Adaptor to the DC IN jack on your camcorder, then connect the power cord to the wall outlet. 2 Slide the POWER switch to turn on your camcorder. 3 Insert the finalized disc into your camcorder. 4 Touch t [SETUP]. 5 For DCR-DVD105/DVD205 - Sony DCR DVD205 | Operating Guide - Page 64
disc. Proceed to step 6. 5 Select the recording format for a DVD-RW, touch ,then proceed to step 7. 3 Insert the disc to be formatted into your camcorder. 4 For DCR-DVD105/DVD205/ DVD605/DVD705: Touch t [FORMAT]. For DCR-DVD305/DVD755: Touch t [ FORMAT]. xDVD-RW Select the recording format - Sony DCR DVD205 | Operating Guide - Page 65
+RW. Format the disc again to change the aspect ratio. • During the Easy Handycam operation (p.34), the screen in step 5 does not appear even if you insert a DVD-RW in your camcorder. Proceed to step 7. • You cannot format a disc that has been protected on other devices. Cancel the protection with - Sony DCR DVD205 | Operating Guide - Page 66
Using the Setup items Using the Setup items 1 Slide the POWER switch in the direction of the arrow to light up the respective lamp. MODE ON : Settings for movies : Settings for still images Slide the POWER switch while pressing the green button in the center only when the POWER switch is in the - Sony DCR DVD205 | Operating Guide - Page 67
not to change the setting, touch to return to the previous screen. x To change the setup items during Easy Handycam operation does not appear during Easy Handycam operation (p.34). 1 Touch [SETUP]. Available setup items appear. 2 Select the desired item. 3 Customize the item. Touch after finishing - Sony DCR DVD205 | Operating Guide - Page 68
D. EFFECT PICT. EFFECT REC CTRL *2 USB SELECT *2 DEMO MODE z - z - z - - - - - z - DISC SET *5 / MEDIA SET *2 (p.79) FORMAT *5 / FORMAT *2 z z FINALIZE z z UNFINALIZE z z DISC TITLE z z FORMAT *2 - z 68 PLAY/EDIT Easy Handycam - AUTO - AUTO - AUTO - AUTO - ON - Sony DCR DVD205 | Operating Guide - Page 69
The setting values before Easy Handycam operation are maintained. *2 DCR-DVD305/DVD755 *3 DCR-DVD105/DVD605 *4 DCR-DVD205/DVD305/DVD705/DVD755 *5 DCR-DVD105/DVD205/DVD605/DVD705 *6 [USB SELECT] appears automatically when your camcorder is connected to a computer or other device with a USB cable. 69 - Sony DCR DVD205 | Operating Guide - Page 70
. This setting also prevents your camcorder from focusing on glass or metal mesh in windows that comes in between the camcorder and the subject. • Items If you set [SPOT METER], [EXPOSURE] is automatically set to [MANUAL]. • The setting returns to [AUTO] when you set the POWER switch to OFF (CHG) - Sony DCR DVD205 | Operating Guide - Page 71
fixing the exposure to that of the wall side of the room. 1 Touch [MANUAL]. appears. 2 Adjust the exposure by touching /. 3 Touch . To return the [AUTO]. • When you have changed the battery pack while [AUTO] is selected, or you bring your camcorder outdoors from inside the house while using fixed - Sony DCR DVD205 | Operating Guide - Page 72
in step 1. • If you set [SPOT FOCUS], [FOCUS] is automatically set to [MANUAL]. • The setting returns to [AUTO] when you set the POWER switch to OFF ( FLASH SET (DCR-DVD305/ DVD755) You can set this function when you use an external flash (optional) that is compatible with your camcorder. Attach the - Sony DCR DVD205 | Operating Guide - Page 73
the focus manually ([FOCUS], p.72) when it is hard to focus automatically. • The shutter speed of your camcorder changes depending also use the self-timer with START/ STOP on the Remote Commander (p.53) (For DCR-DVD305/DVD755). SELF-TIMER The self-timer starts recording a still image after about 10 - Sony DCR DVD205 | Operating Guide - Page 74
zoom level in case you want to zoom greater than optical zoom magnification listed as below: DCR-DVD105/DVD605 DCR-DVD205/DVD305/ DVD705/DVD755 (optical zoom) 20 × 12 × While recording on a disc. . - when you toggle between 16:9 (wide) and 4:3 while recording on a DVD-R/DVD-RW (VIDEO mode). - Sony DCR DVD205 | Operating Guide - Page 75
DVD player or a DVD recorder, the way you see pictures on the TV screen may differ depending on your player. For details, refer to the instruction manuals supplied with the devices you are using. When you connect your camcorder on selecting setup items. BURST (DCR-DVD205/ DVD305/DVD705/DVD755) You - Sony DCR DVD205 | Operating Guide - Page 76
• The image size of DCR-DVD105/DVD605 is set to [VGA (0.3M)]( ). Number of still images recordable on a "Memory Stick Duo" (approx.) (For DCR-DVD305/DVD755) 1.0M 0.7M ] • When using the "Memory Stick Duo" made by Sony Corporation. The number of recordable still images varies depending on the - Sony DCR DVD205 | Operating Guide - Page 77
FILE NO. B SERIES Assigns numbers to files in sequence even if the disc or "Memory Stick Duo" (For DCR-DVD305/DVD755 ) is changed. RESET Resets the file numbering to 0001 each time the disc or "Memory Stick Duo" (For DCRDVD305/DVD755 ) is changed. PICT. - Sony DCR DVD205 | Operating Guide - Page 78
pastel drawing. MOSAIC Picture appears mosaic-patterned. REC CTRL (DCR-DVD305/ DVD755) See page 98. USB SELECT (DCR-DVD305/ DVD755) You can view pictures on a computer when connecting your camcorder to your computer with the USB cable or connect to the PictBridge compliant printer (p.100). COMPUTER - Sony DCR DVD205 | Operating Guide - Page 79
camcorder to another device with the USB cable. - when connecting your camcorder to another device with the USB cable on the playback screen. • For the detail of a computer connection, see "First Step Guide setup items. FORMAT (DCR-DVD105/DVD205/ DVD605/DVD705)/ FORMAT (DCR-DVD305/ DVD755) See page - Sony DCR DVD205 | Operating Guide - Page 80
(DCR-DVD105/DVD205/ DVD605/DVD705) / MEDIA SET (DVD305/DVD755) (continued) FORMAT (DCR-DVD305 or other basic settings (REC MODE/LCD/VF SET/USB SPEED, etc.) The default settings are marked with B. , this value is applied for both sides. • Your camcorder has a VBR encoding system (p.17) so when you - Sony DCR DVD205 | Operating Guide - Page 81
the POWER switch to OFF (CHG) for more than 12 hours. MICREF LEVEL (DCR-DVD205/ DVD305/DVD705/DVD755) You can select the microphone level for recording sound. Select connect your camcorder to AC Adaptor, [BRIGHT] is automatically selected for the setting. • When you select [BRIGHT], battery life is - Sony DCR DVD205 | Operating Guide - Page 82
DISPLAY (For DCR-DVD105/ DVD605)/VF DISP] does not appear. TV TYPE (DCR-DVD205/DVD305/ DVD705/DVD755) See page 54. USB SPEED (DCR-DVD305/ DVD755) You can select data code is displayed on the TV screen if you connect your camcorder to a TV. • The indicator toggles through the following sequences - Sony DCR DVD205 | Operating Guide - Page 83
screen are played back in sequence. • Set to [OFF] to conserve battery power. • Playback for the movie stops after repeating 5 times. REMAINING B (DCR-DVD305/DVD755) The default setting is [ON] so that you can use the supplied Remote Commander (p.53). • Set to [OFF] to prevent your camcorder from - Sony DCR DVD205 | Operating Guide - Page 84
your camcorder to a wall outlet, [A.SHUT OFF] is automatically set to [NEVER]. SUB-T DATE Set to [ON] (the default setting) to display the recording date and time when you play back a disc on a DVD device with a subtitle display function. Also refer to the instruction manual of your DVD device - Sony DCR DVD205 | Operating Guide - Page 85
Customizing Personal Menu You can add desired setup items to Personal Menu, and customize Personal Menu settings. This is convenient if you add frequently used setup items to Personal Menu. Adding a setup item You can add up to 27 setup items for (Movie), (Still) or PLAY/EDIT. Delete a less - Sony DCR DVD205 | Operating Guide - Page 86
Customizing Personal Menu (continued) Arranging the order of setup items displayed on Personal Menu 1 Touch t [P-MENU SET UP] t [SORT]. If the desired setup item is not displayed touch / . 2 Touch the setup item you want to move. 3 Touch / to move the setup item to the desired place. 4 Touch - Sony DCR DVD205 | Operating Guide - Page 87
Editing on DVD Handycam Copying the still images (DCR-DVD305/DVD755) You can dub recorded still images from a "Memory Stick Duo" to a disc or from a disc to a "Memory Stick Duo." • Use the AC Adaptor as power source to prevent your camcorder from running out of power during operation during copying - Sony DCR DVD205 | Operating Guide - Page 88
Copying the still images (DCR-DVD305/DVD755) (continued) Copying the still images on the DVD to "Memory Stick Duo" Make sure to insert the recorded DVD and "Memory Stick Duo" into your camcorder. 1 Slide the POWER switch to turn on your camcorder and press PLAY/EDIT. 2 Touch tab, then [EDIT]. 3 - Sony DCR DVD205 | Operating Guide - Page 89
(DCR-DVD305/DVD755) Make sure to insert the recorded "Memory Stick Duo" into your camcorder. 1 Slide the POWER switch to turn on your camcorder and still images in the "Memory Stick Duo," format it (p.80). Editing on DVD Handycam 4 Touch [DELETE]. 5 Touch the still image to be deleted. The - Sony DCR DVD205 | Operating Guide - Page 90
the original data Using DVD-RWs recorded inVR mode, you can delete pictures or divide movies on the disc with your camcorder. Make sure to insert the recorded disc into your camcorder. Original Glossary (p.147) Deleting images 1 Slide the POWER switch to turn on your camcorder and press PLAY/EDIT - Sony DCR DVD205 | Operating Guide - Page 91
the recorded disc into your camcorder. • Do not remove the battery pack or the AC Adaptor from your camcorder while editing the Playlist. It displayed. 4 Select the scene to be added to the Playlist. Editing on DVD Handycam The selected scene is marked with . Press and hold the image on the LCD - Sony DCR DVD205 | Operating Guide - Page 92
movie may be lower than that of the original still images. Erasing unnecessary scenes from the Playlist 1 Slide the POWER switch to turn on your camcorder and press PLAY/EDIT. 2 Touch t [EDIT]. The selected scene is marked with . Press and hold the image on the LCD screen to confirm the image - Sony DCR DVD205 | Operating Guide - Page 93
a movie within the Playlist 1 Slide the POWER switch to turn on your camcorder and press PLAY/EDIT. 2 Touch t [EDIT]. 3 Touch [DIVIDE]. 4 the point where you touch and the actual dividing point, as your camcorder selects the dividing point based on half-second increments. 6 Touch t - Sony DCR DVD205 | Operating Guide - Page 94
. • It may take more time to create a Photomovie as more still images are recorded on the disc. • Still images which are not compatible with your camcorder, such as ones shot with a digital still camera and then copied to a computer can not be converted from still images to a Photomovie. 94 - Sony DCR DVD205 | Operating Guide - Page 95
Editing on DVD Handycam 95 - Sony DCR DVD205 | Operating Guide - Page 96
your camcorder to the wall outlet using the supplied AC Adaptor for this operation (p.21). Refer also to the instruction manuals supplied with the devices to be connected. A/V jack (Yellow) (White) (Red) IN S VIDEO VIDEO AUDIO VCRs or DVD recorders : Video/Signal flow 1 A/V connecting cable - Sony DCR DVD205 | Operating Guide - Page 97
with the A/V connecting cable (supplied) 1 or the A/V connecting cable with S VIDEO (optional) 2. • Connect your camcorder to the input jacks of a VCR or DVD device. 5 Start the playback on your camcorder, and record it on the recording device. Refer to the instruction manuals supplied with your - Sony DCR DVD205 | Operating Guide - Page 98
a TV or VCR/DVD device (DCR-DVD305/DVD755) You can record pictures or TV programs from a VCR, TV or DVD device onto a disc using your camcorder. Connect your camcorder to the wall outlet using the supplied AC Adaptor for this operation (p.21). Refer also to the instruction manuals supplied with the - Sony DCR DVD205 | Operating Guide - Page 99
to the TV or VCR/DVD device with the A/V connecting cable (supplied) 1 or the A/V connecting cable with S VIDEO (optional) 2. • Connect your camcorder to the output jacks of a TV or VCR/DVD device. 2 If you are recording from a VCR/ DVD device, insert the cassette or disc into the playback device - Sony DCR DVD205 | Operating Guide - Page 100
to be printed. 2 Connect the (USB) jack of your camcorder to the printer using the USB cable (supplied). The [USB SELECT] screen appears on the LCD screen 3 in "Connect your camcorder to the printer." SET EXEC The still image appears. • Refer also to the instruction manual for the printer to be - Sony DCR DVD205 | Operating Guide - Page 101
Stick Duo" from your camcorder. • If the printer stops working, disconnect the USB cable (supplied), turn the support the date printing function. Refer to your printer's instruction manual for details. • We cannot guarantee the printing of images recorded with a device other than your camcorder - Sony DCR DVD205 | Operating Guide - Page 102
Interface Shoe (For DCR-DVD305/DVD755) The Active Interface Shoe supplies power to optional accessories such as a video light, a flash, or a microphone. The accessory can be turned on or off as you operate the POWER switch on your camcorder. Refer also to the instruction manual supplied with your - Sony DCR DVD205 | Operating Guide - Page 103
When copying a disc to the 12cm DVD You can copy the disc recorded with your camcorder to the 12cm DVD. Using a Computer (DCR-DVD305/DVD755) • The CD-ROM (supplied) includes the following software. - USB Driver - Picture Package Ver.1.8.1 - Nero Express 6 - "First Step Guide" What you can do with - Sony DCR DVD205 | Operating Guide - Page 104
to the "First Step Guide" on your computer ( colors), DirectDraw display driver capability (this product will not operate correctly at 800 × 600 dots or less, and 256 colors or less.) Others: (USB) port (this your camcorder with the USB cable instead of using the Memory Stick slot on the computer. - Sony DCR DVD205 | Operating Guide - Page 105
the computer, a message appears notifying you that "First Step Guide", cannot be installed automatically with the InstallShield Wizard. In such a case, manually copy "First Step Guide" to your computer according to the message's instructions. 5 Select the language for the application to be installed - Sony DCR DVD205 | Operating Guide - Page 106
, then click [Next]. 11Click [Next], then follow the on- screen instructions to install the "First Step Guide." Depending on the computer, this screen may not be displayed. In such a case, skip to step 12. 8 Select where to save the software, then click [Next]. 12Click [Next], then follow the on - Sony DCR DVD205 | Operating Guide - Page 107
if installed by step 11) appear on the desktop. • For connecting your camcorder to the computer, see "First Step Guide" in the supplied CD-ROM. • If you have any questions about PicturePackage, see "For inquires about this software" (p.108). Using a Macintosh computer You can copy the still images - Sony DCR DVD205 | Operating Guide - Page 108
pdf". To view the PDF, Adobe Reader is needed. If it is not installed on your computer, you can download it from the Adobe Systems web page: http://www.adobe.com/ For inquires about this software Pixela User Support the respective owners thereof. License of Picture Package by Sony Corporation would - Sony DCR DVD205 | Operating Guide - Page 109
table to troubleshoot the problem. If the problem persists, remove the power source and contact your Sony dealer. Overall operations/Easy Handycam The camcorder does not operate even when the power is set to on. • Disconnect the AC Adaptor from the wall outlet or remove the battery pack, then - Sony DCR DVD205 | Operating Guide - Page 110
(p.21). The CHG (charge) lamp flashes while the battery pack is being charged. • Attach the battery pack to the camcorder correctly (p.21). If the problem persists, disconnect the AC Adaptor from the wall outlet and contact your Sony dealer. The battery pack may be damaged. The power turns off - Sony DCR DVD205 | Operating Guide - Page 111
on the LCD screen. • This occurs if you disconnect the AC Adaptor from the wall outlet or remove the battery pack without turning off the power first. This is not a malfunction. You cannot turn the LCD backlight off. • During Easy Handycam operation (p.34), you cannot turn the LCD backlight on/off - Sony DCR DVD205 | Operating Guide - Page 112
Troubleshooting (continued) Disc The disc cannot be removed. • Make sure the power source (battery pack or AC Adaptor) is connected correctly (p.21). • Remove the battery pack from the camcorder, then attach it again (p.22). • Attach a charged battery pack to the camcorder (p.21). • The disc is - Sony DCR DVD205 | Operating Guide - Page 113
supported on your camcorder (p.135). The data file name flashes. • The file is damaged. • The file format is not supported on your camcorder new disc or format the disc (DVD-RW/DVD+RW only, p.64). Or delete the unnecessary images (p.90). • The DVD-RW (VIDEO mode)/DVD+RW has been finalized. Make a - Sony DCR DVD205 | Operating Guide - Page 114
Troubleshooting (continued) The external flash (optional) does not work (For DCR- and the point that the recorded movie starts/stops. • On your camcorder, there may be a slight time difference between the point where aspect ratio of a DVD+RW disc cannot be changed. Format the disc again to change the - Sony DCR DVD205 | Operating Guide - Page 115
when you set [EXPOSURE] to [MANUAL] (p.71) or select [SPOT METER] (p.70). • The back light function does not work during Easy Handycam operation. Cancel Easy Handycam operation (p.34). A vertical band lamp with [PORTRAIT] or [SPORTS]. Cancel [PROGRAM AE] in this case (p.70). 115 Troubleshooting - Sony DCR DVD205 | Operating Guide - Page 116
Troubleshooting (continued) Black bands appear when you record a TV screen or computer screen. • Set [STEADYSHOT] to [OFF] (p.75). Remote Commander (DCR-DVD305/DVD755) The supplied Remote Commander does not function. • Set [REMOTE CTRL] to [ON] (p.83). • Insert a battery into the battery holder - Sony DCR DVD205 | Operating Guide - Page 117
• Finalize the disc (p.56). • A disc recorded in VR mode cannot be played back on a device that does not support VR mode. Check the compatibility in the instruction manual of the playback device. The playback picture is distorted. • Clean the disc using the cleaning cloth (supplied, p.134). " " is - Sony DCR DVD205 | Operating Guide - Page 118
Troubleshooting (continued) You cannot use [PROGRAM AE]. • You cannot use [PROGRAM AE] together with: - NightShot plus - [SUPER NSPLUS] - [COLOR SLOW S] - [OLD MOVIE] • [SPORTS] will not work - Sony DCR DVD205 | Operating Guide - Page 119
with: - [PROGRAM AE] - [PICT. EFFECT] - [WIDE SELECT] (For DCR-DVD105/DVD605) You cannot use [PICT.EFFECT]. • You cannot use [PICT.EFFECT] together AC Adaptor, or when you turn the LCD panel facing out on your camcorder when the POWER switch is set to (movie) or (Still). 119 Troubleshooting - Sony DCR DVD205 | Operating Guide - Page 120
Troubleshooting (continued) Editing for movies and still images on the disc (DVD-RW:VR mode) You cannot edit a DVD-R/DVD-RW (VIDEO mode)/DVD+RW with your camcorder. not correct when connecting your camcorder to the TV. • Set [TV TYPE] depending on your TV (For DCR-DVD205/DVD305/DVD705/DVD755) (p. - Sony DCR DVD205 | Operating Guide - Page 121
You cannot copy the disc to the 12cm DVD. • Use the supplied software, Nero Express 6. Refer to the instruction manual supplied with Nero Express 6 for details. Prints cannot be made using a PictBridge printer (For DCR-DVD305/DVD755). • Your printer may not print images recorded using other devices. - Sony DCR DVD205 | Operating Guide - Page 122
camcorder from the computer. • Disconnect the cable from the computer and camcorder, restart the computer, then connect them again correctly. When editing the images in the disc, the computer does not recognize your camcorder. • Install the Picture Package software (p.105). • Confirm the USB driver - Sony DCR DVD205 | Operating Guide - Page 123
Manager] window appears. 5 Make sure that [SONY DDX-C1002 USB Device] appears in [DVD/CD-ROM drives], [Generic volume] in [Storage volumes], and [USB Mass Storage Device] in [Universal Serial Bus controllers] respectively. When all the devices appear, the USB driver is installed correctly. If any of - Sony DCR DVD205 | Operating Guide - Page 124
Troubleshooting (continued) 4 Double-click [Driver] t [ software Picture Package is not compatible with a Macintosh computer. You cannot view images recorded on your camcorder. • Make sure to insert the connector in the correct direction, then connect the USB cable to the (USB) jack on your camcorder - Sony DCR DVD205 | Operating Guide - Page 125
Picture Package first, then slide the POWER switch on your camcorder to turn on another lamp. You cannot copy the disc to the 12cm DVD using Picture Package. • Use the supplied software, Nero Express 6. Refer to the instruction manual supplied with Nero Express 6 for details. 125 Troubleshooting - Sony DCR DVD205 | Operating Guide - Page 126
Troubleshooting (continued) The "First Step Guide" is not displayed correctly. • Follow the procedure below and refer to "First Step Guide" (FirstStepGuide.pdf). 1 Place the supplied CD-ROM in the disc drive of your computer. 2 Double-click [My Computer]. 3 Right-click [PICTUREPACKAGE] (Disc drive - Sony DCR DVD205 | Operating Guide - Page 127
or local authorized Sony service facility. C:21:00 C:(or E:) ss:ss (Self-diagnosis display) C:04:ss • The battery pack is not an "InfoLITHIUM" battery pack. Use an "InfoLITHIUM" battery pack (p.137). • Connect the DC plug of the AC Adaptor to the DC IN jack of your camcorder securely (p.21). C:13 - Sony DCR DVD205 | Operating Guide - Page 128
flash. • The camcorder is unsteady, so camerashake easily occurs. Hold the camcorder steady with both hands instructions. x Battery Use the "InfoLITHIUM" battery pack. (p.137) Battery level is low. (p.21, 137) Old Battery. Use a new one. (p.137) x Drive Z Drive error. Turn on power again. • A problem - Sony DCR DVD205 | Operating Guide - Page 129
format code from your camcorder. Formatting the disc may enable you to use the disc on your camcorder (DVD-RW/ DVD+RW only) (p.64). Data error. • An error occurred during reading or writing the disc. Access error. • An error occurred during reading or writing the disc. Troubleshooting 129 - Sony DCR DVD205 | Operating Guide - Page 130
exceeding 999MSDCF. You cannot create or delete created folders using your camcorder. • You will have to format the "Memory Stick Duo" DVD. (p.31, 37, 43) x PictBridge compliant printer Check the connected device. • Switch off the printer and switch it on again, then disconnect the USB cable - Sony DCR DVD205 | Operating Guide - Page 131
34) Cannot cancel Easy Handycam with USB connected. (p.34) Invalid during Easy Handycam operation. (p.34) No recording in Easy Handycam operation. (p.34) • The DVD+RW has been finalized. Make a disc to be able to record additional scenes (p.63). x Other E Please connect AC adaptor. • You are trying - Sony DCR DVD205 | Operating Guide - Page 132
100 V to 240 V, 50/60 Hz range. Use a commercially available AC plug adaptor [a], if necessary, depending on the design of the wall outlet [b]. AC-L25A/L25B [a] [b] On TV color systems Your camcorder is an NTSC system-based camcorder. If you want to view the playback picture on a TV, it must be - Sony DCR DVD205 | Operating Guide - Page 133
Setting to the local time You can easily set the clock to the local time by setting a time difference when using your camcorder abroad. Set [AREA SET] and [DST SET]/[SUMMERTIME] in the TIME/ LANGU. (p.28). World time difference 1 2 3 4 6 8 10 12 13 14 16 17 18 19 20 - Sony DCR DVD205 | Operating Guide - Page 134
About the disc See page 16 for the details of discs which you can use with your camcorder. Notes on use • Hold the disc by its edge while supporting the center hole lightly. Do not touch the recording side (the opposite of the printed side when using a single-sided disc). • Before shooting, be - Sony DCR DVD205 | Operating Guide - Page 135
a standard "Memory Stick." *2 The types of "Memory Stick" that support high speed data transfer. The speed of data transfer varies depending on the Duo," turn the power off on your camcorder, or remove the battery pack for replacement while your camcorder is reading or writing image files on the - Sony DCR DVD205 | Operating Guide - Page 136
System universal standard established by the JEITA (Japan Electronics and Information Technology Industries Association). • On your camcorder, you cannot play back still images recorded on other devices (DCR-TRV900 or DSC-D700/D770) that do not conform to the universal standard. (These models are - Sony DCR DVD205 | Operating Guide - Page 137
your camcorder and an optional AC Adaptor/ charger (optional). The "InfoLITHIUM" battery pack calculates the power consumption according to the operating conditions of your camcorder, and displays the remaining battery time in minutes. Charging the battery pack • Be sure to charge the battery pack - Sony DCR DVD205 | Operating Guide - Page 138
as you use it more and more, and as time passes. When the available battery time is shortened considerably, a probable cause is that the battery pack has reached the end of its life. Please buy a new battery pack. • The battery life varies according to how it is stored, the operating conditions, and - Sony DCR DVD205 | Operating Guide - Page 139
viewfinder or the LCD screen. - Anywhere very humid. • Operate your camcorder on DC 7.2 V (battery pack) or DC 8.4 V (AC Adaptor). • For DC or AC operation, use the accessories recommended in these instruction manual. • Do not let your camcorder get wet, for example, from rain or sea water. If your - Sony DCR DVD205 | Operating Guide - Page 140
the POWER switch to turn on your camcorder and press PLAY/EDIT. 2 Disconnect cables other than that of the AC Adaptor from your camcorder, then remove the disc and "Memory Stick Duo" (For DCR-DVD305/DVD755) from your camcorder. 3 Touch t [SETUP] t STANDARD SET t [CALIBRATION]. . CALIBRATION - Sony DCR DVD205 | Operating Guide - Page 141
recording the date. x Procedures Connect your camcorder to a wall outlet using the AC Adaptor supplied with your camcorder, and leave your camcorder with the POWER switch turned off for more than 24 hours. To change the battery of the Remote Commander (For DCR-DVD305/ DVD755) 1 While pressing on the - Sony DCR DVD205 | Operating Guide - Page 142
other than the CR2025. • When the lithium battery becomes weak, the operating distance of the Remote Commander may shorten, or the Remote Commander may not function properly. In this case, replace the battery with a Sony CR2025 lithium battery. Use of another battery may present a risk of fire or - Sony DCR DVD205 | Operating Guide - Page 143
DCR-DVD105/DVD205/DVD605/DVD705 Dolby Digital 2ch Dolby Digital Stereo Creator DCR-DVD305/DVD755 Dolby Digital 2/5.1ch Dolby Digital 5.1 Creator Video signal NTSC color, EIA standards Usable discs 8cm DVD-R/DVD-RW/DVD+RW Recording format Movie DVD-R: DVD-VIDEO DVD-RW: DVD-VIDEO (VIDEO mode), DVD - Sony DCR DVD205 | Operating Guide - Page 144
.) DCR-DVD105/DVD205/DVD605/DVD705 380 g (13 oz) main unit only 430 g (15 oz) including the NP-FP50 rechargeable battery pack and disc DCR-DVD305/DVD755 400 g (14 oz) main unit only 460 g (1 lb) including the NP-FP50 rechargeable battery pack and disc Supplied accessories See page 20. AC Adaptor AC - Sony DCR DVD205 | Operating Guide - Page 145
(1 5/16 × 3/4 × 1 13/16 in.) (w×h×d) Mass (Approx.) 40 g (1.5 oz) Operating temperature 0°C to + 40°C (32°F to 104°F) Type Li-ion Design and specifications are subject to change without notice. 145 Additional Information - Sony DCR DVD205 | Operating Guide - Page 146
which only reproduces movement of sound from side to side. x 8cm disc A disc with a diameter of 8cm. You can use 8cm discs with DVD Handycam. x Disc title The title (name) given to a recorded disc. x Dolby Digital An audio encoding (compression) system developed by Dolby Laboratories Inc. Sound can - Sony DCR DVD205 | Operating Guide - Page 147
Handycam onto a disc is called an "original." x Photomovie A series of still images (JPEG format) converted and resaved as a movie (MPEG format) on the same disc, which can played back on another DVD device or computer. Create a Photomovie to view still images on a DVD device that does not support - Sony DCR DVD205 | Operating Guide - Page 148
Numerics 16:9 WIDE 32, 64 4:3 32, 64 5.1ch surround recording......46 5.1-channel surround sound 46 8cm DVD 14 A A/V connecting cable 20, 54, 96, 98 A/V jack ...........54, 96, 98, 102 AC Adaptor 20, 21 ACCESS lamp Disc 29 "Memory Stick Duo 31 Active Interface Shoe .........102 Additional - Sony DCR DVD205 | Operating Guide - Page 149
camcorder .........25 HQ 80 I Icon ...... See Display indicators ID1/ID2 54 IMAGE SIZE 76 Index DISPLAY 83 MOVIE PB 83 Index screen display button 51 INDOOR 71 "InfoLITHIUM" battery pack 137 Initialize (Reset 49 Install 105 Picture effect 78 Pixela User Support Center 108 Playback 38, 44 - Sony DCR DVD205 | Operating Guide - Page 150
battery 51 Remaining display Battery 49 Disc 51 "Memory Stick Duo" ....49 Remote Commander 53 Remote sensor 49 RESET 49 Review 50 Review button..... 39, 45, 50 Software 105 SP 80 Speaker 49 Specifications 82, 104 USB cable 20 USB driver 103 USB jack 102 USB SELECT 78 USB SPEED 82 - Sony DCR DVD205 | Operating Guide - Page 151
W Wall outlet 21 Warning indicators 127 Warning messages 127 WHITE BAL. (White balance 71, 118 WHITE FADER 77 Wide angle 46 WIDE SELECT 32, 74 Windows 104 WIPE 77 World time difference.........133 Write-protect tab 135 Z Zoom 46 Zoom lever 46 151 Glossary, Index - Sony DCR DVD205 | Operating Guide - Page 152
- Sony DCR DVD205 | Operating Guide - Page 153
- Sony DCR DVD205 | Operating Guide - Page 154
- Sony DCR DVD205 | Operating Guide - Page 155
Sony Corporation. • "InfoLITHIUM" is a trademark of Sony Corporation. • Picture Package is a trademark of Sony Corporation. • DVD-R, DVD-RW, and DVD Corporation. • Nero 6 and other software products developed by Nero AG are mentioned in each case in this manual. Notes on the License ANY USE - Sony DCR DVD205 | Operating Guide - Page 156
Additional information on this product and answers to frequently asked questions can be found at our Customer Support Website. Printed on 100% recycled paper using US VOC (Volatile Organic Compound)-free vegetable oil based ink. Printed in China
-
 1
1 -
 2
2 -
 3
3 -
 4
4 -
 5
5 -
 6
6 -
 7
7 -
8
-
9
-
10
-
11
-
12
-
13
-
14
-
15
-
16
-
17
-
18
-
19
-
20
-
21
-
22
-
23
-
24
-
25
-
26
-
27
-
28
-
29
-
30
-
31
-
32
-
33
-
34
-
35
-
36
-
37
-
38
-
39
-
40
-
41
-
42
-
43
-
44
-
45
-
46
-
47
-
48
-
49
-
50
-
51
-
52
-
53
-
54
-
55
-
56
-
57
-
58
-
59
-
60
-
61
-
62
-
63
-
64
-
65
-
66
-
67
-
68
-
69
-
70
-
71
-
72
-
73
-
74
-
75
-
76
-
77
-
78
-
79
-
80
-
81
-
82
-
83
-
84
-
85
-
86
-
87
-
88
-
89
-
90
-
91
-
92
-
93
-
94
-
95
-
96
-
97
-
98
-
99
-
100
-
101
-
102
-
103
-
104
-
105
-
106
-
107
-
108
-
109
-
110
-
111
-
112
-
113
-
114
-
115
-
116
-
117
-
118
-
119
-
120
-
121
-
122
-
123
-
124
-
125
-
126
-
127
-
128
-
129
-
130
-
131
-
132
-
133
-
134
-
135
-
136
-
137
-
138
-
139
-
140
-
141
-
142
-
143
-
144
-
145
-
146
-
147
-
148
-
149
-
150
-
151
-
152
-
153
-
154
-
155
-
156
 |
 |
2-661-370-
11
(1)
Operating Guide
DCR-DVD105/DVD205/DVD305/
DVD605/DVD705/DVD755
© 2006 Sony Corporation
Enjoying with your
DVD Handycam
14
Getting Started
20
Easy
Handycam
34
Recording
/Playback
42
Playback on DVD devices
56
Using the Recorded disc
63
Using the Setup items
66
Editing on DVD Handycam
87
Dubbing, Printing
96
Using a Computer
103
Troubleshooting
109
Additional Information
132
Glossary, Index
146