Sony ICD-R100PC ICD-PCLink Software Instructions - Page 31
Transferring sound files one by one, Drag the sound file ICS or WAV file you wish to transfer
 |
View all Sony ICD-R100PC manuals
Add to My Manuals
Save this manual to your list of manuals |
Page 31 highlights
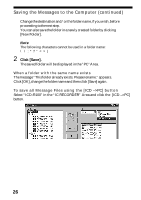
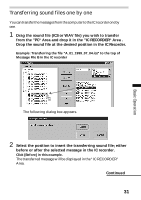
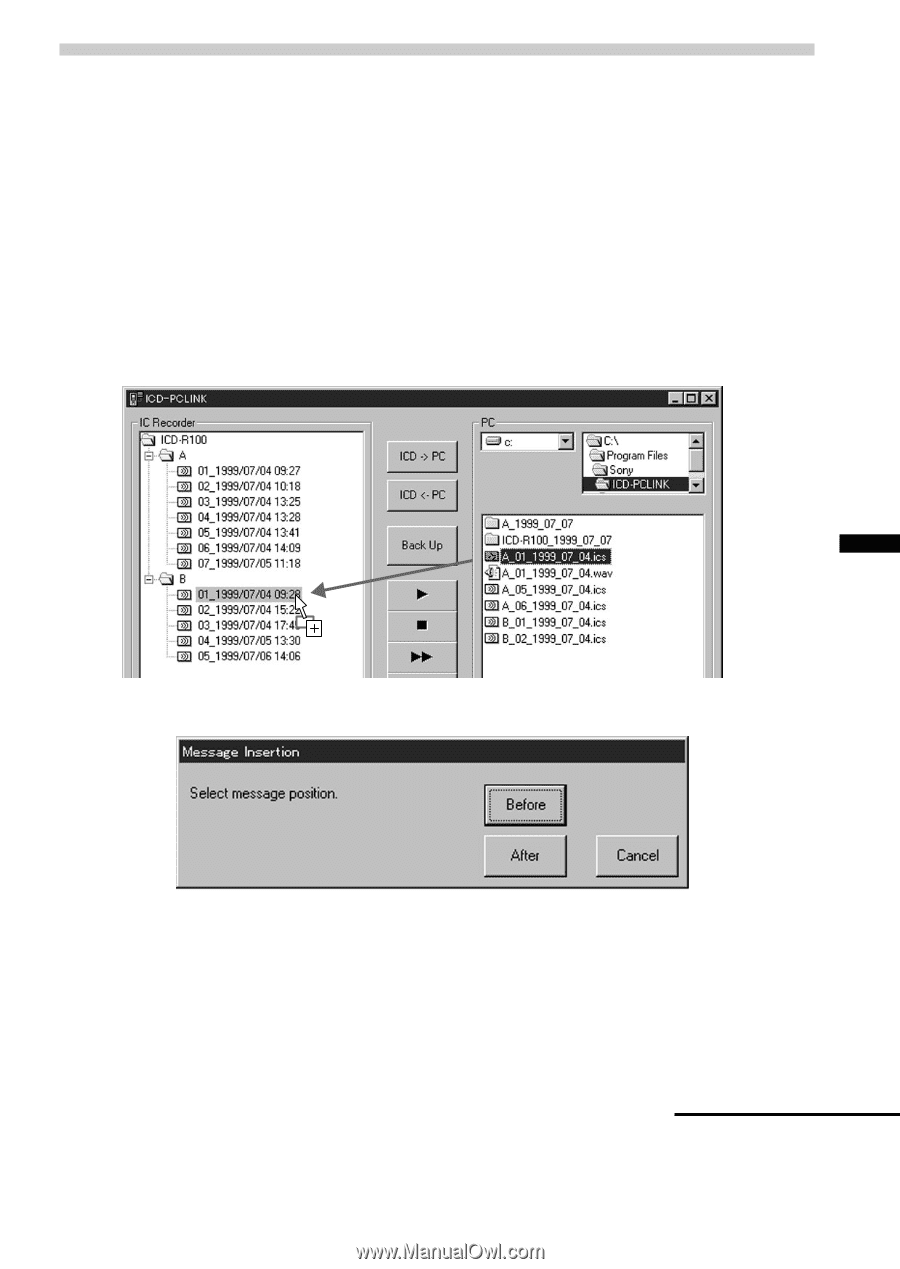
Basic Operation Transferring sound files one by one You can transfer the messages from the computer to the IC recorder one by one. 1 Drag the sound file (ICS or WAV file) you wish to transfer from the "PC" Area and drop it in the "IC RECORDER" Area . Drop the sound file at the desired position in the IC Recorder. Example: Transferring the file "A_01_1999_07_04.ics" to the top of Message File B in the IC recorder The following dialog box appears. 2 Select the position to insert the transferring sound file; either before or after the selected message in the IC recorder. Click [Before] in this example. The transferred message will be displayed in the "IC RECORDER" Area. Continued 31
-
 1
1 -
2
-
3
-
4
-
5
-
6
-
7
-
8
-
9
-
10
-
11
-
12
-
13
-
14
-
15
-
16
-
17
-
18
-
19
-
20
-
21
-
22
-
23
-
24
-
25
-
 26
26 -
 27
27 -
 28
28 -
 29
29 -
 30
30 -
 31
31 -
 32
32 -
 33
33 -
 34
34 -
 35
35 -
 36
36 -
37
-
38
-
39
-
40
-
41
-
42
-
43
-
44
-
45
-
46
-
47
-
48
-
49
-
50
-
51
-
52
-
53
-
54
-
55
-
56
-
57
-
58
-
59
-
60
 |
 |
31
Basic Operation
Transferring sound files one by one
You can transfer the messages from the computer to the IC recorder one by
one.
1
Drag the sound file (ICS or WAV file) you wish to transfer
from the ”PC“ Area and drop it in the ”IC RECORDER“ Area .
Drop the sound file at the desired position in the IC Recorder.
Example: Transferring the file ”A_01_1999_07_04.ics“ to the top of
Message File B in the IC recorder
The following dialog box appears.
2
Select the position to insert the transferring sound file; either
before or after the selected message in the IC recorder.
Click [Before] in this example.
The transferred message will be displayed in the “IC RECORDER”
Area.
Continued