Sony PCV-MXS20 Getting Started Guide
Sony PCV-MXS20 - Vaio Desktop Computer Manual
 |
View all Sony PCV-MXS20 manuals
Add to My Manuals
Save this manual to your list of manuals |
Sony PCV-MXS20 manual content summary:
- Sony PCV-MXS20 | Getting Started Guide - Page 1
VAIO® MX Computer Getting Started Guide PCV-MXS20 - Sony PCV-MXS20 | Getting Started Guide - Page 2
downloading of any materials, data, text, images, video, or audio from any described Web site. Web site information is obtained from various sources and may be inaccurate. Copies of copyrighted information may only be made for legally permissible purposes. Sony, VAIO, SonicStage, and Giga Pocket - Sony PCV-MXS20 | Getting Started Guide - Page 3
, animation, video, audio, music, text and "applets", incorporated into the SONY SOFTWARE), and any copies of the SONY SOFTWARE, are owned by SONY or its suppliers. SONY reserves all rights not specifically granted under this EULA. USE OF SONY SOFTWARE WITH COPYRIGHTED MATERIALS The Sony Software is - Sony PCV-MXS20 | Getting Started Guide - Page 4
communication systems, air traffic control, direct life support machines, or weapons systems, in which the failure of the SONY SOFTWARE could lead to death, personal injury, or severe physical or environmental damage (High Risk Activities). SONY and its suppliers specifically disclaim any express or - Sony PCV-MXS20 | Getting Started Guide - Page 5
SHOULD THE SONY SOFTWARE PROVE DEFECTIVE, YOU (AND NOT SONY OR A SONY AUTHORIZED REPRESENTATIVE) ASSUME THE ENTIRE COST OF ALL NECESSARY SERVICING, REPAIR RELATING TO THIS AGREEMENT. If any part of this Agreement is held invalid or unenforceable, the other parts will remain valid. Should you have - Sony PCV-MXS20 | Getting Started Guide - Page 6
6 - Sony PCV-MXS20 | Getting Started Guide - Page 7
Overview 18 Remote Control Overview 20 Additional System Capabilities 24 Setting Up Your VAIO MX Computer .......29 To Set Up the FM Tuner 29 To Set Up Your Giga Pocket Personal Video Recorder System 31 To Set Up Additional Equipment 38 SonicStage Premium Software 43 Overview of SonicStage - Sony PCV-MXS20 | Getting Started Guide - Page 8
VAIO MX Computer Getting Started Guide Setting Up Giga Pocket For TV Viewing 65 To Set Up TV Viewing 65 Giga Video Recorder 67 Timer Recording Manager 71 Timer Recording Wizard 74 Video Explorer 76 Playlist Builder 79 PicoPlayer 81 CLIÉ Converter 84 Troubleshooting Topics 87 About the VAIO - Sony PCV-MXS20 | Getting Started Guide - Page 9
Contents Internet Electronic Program Guide Service 101 To Set Up Your Internet Electronic Program Guide Service 102 Setting Up a Timer Recording 104 Viewing Your Selected Program Recording Schedule 108 Index 109 9 - Sony PCV-MXS20 | Getting Started Guide - Page 10
VAIO MX Computer Getting Started Guide 10 - Sony PCV-MXS20 | Getting Started Guide - Page 11
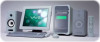
purchase of the Sony VAIO® MX computer! Your new system is a state-of-the-art multimedia computer that incorporates the latest audio, television, Internet, and multimedia storage technologies, into a single, powerful, entertainment package. About the VAIO MX Computer The VAIO® MX computer is a fully - Sony PCV-MXS20 | Getting Started Guide - Page 12
Guide VAIO MX Computer audio capabilities The audio capability of the VAIO MX computer is advanced, implementing the latest technologies such as digital audio playback and recording, Dolby® Digital Surround Sound, an FM tuner scanner, and compatibility with stereo speakers. A special Sony software - Sony PCV-MXS20 | Getting Started Guide - Page 13
of interactive Sony audio and video components that is designed to create, capture, and play back video files derived from television and your own personal videos.* Giga Pocket Personal Video Recorder maintains information about the software and Video Capsules on your computer's drive D, in a folder - Sony PCV-MXS20 | Getting Started Guide - Page 14
VAIO MX Computer Getting Started Guide ❑ Giga Pocket Server - The Giga Pocket Server application runs in the background to support the transfer of data between PicoPlayer users on a network. ❑ PicoPlayer - This Video Capsule player application can be attached to Video Capsules that are exported with - Sony PCV-MXS20 | Getting Started Guide - Page 15
Locating Controls And Connectors Front Panel Overview The front panel of your VAIO® MX computer enables access to the optical drive, MiniDisc drive, Memory Stick®, and PC Card slots. The front panel also provides access to the Universal Serial Bus (USB) and i.LINK® ports to connect your compatible - Sony PCV-MXS20 | Getting Started Guide - Page 16
VAIO MX Computer Getting Started Guide 1 DVD-RW drive Reads data from DVD or CD media. Writes data to a DVD-R, DVD-RW, CD-R, or CD-RW media. 2 MiniDisc drive Plays and records music to and from a MiniDisc media. Supports Net MD protocol for secure music transfers. 3 LCD display screen - Sony PCV-MXS20 | Getting Started Guide - Page 17
or MiniDisc media. 17 Function button Selects the operation mode of the computer. 18 Display button Selects the display mode on the LCD display screen. 19 Volume control buttons Increases or decreases the volume. 20 MagicGate™ Memory Stick® media slot Reads and writes data to and from - Sony PCV-MXS20 | Getting Started Guide - Page 18
VAIO MX Computer Getting Started Guide Back Panel Overview The back panel of your computer contains the ports for supplied and optional accessories. The back panel also provides access to Giga Pocket™ Personal Video Recorder ports and jacks. The icons on the back panel locate and identify the ports - Sony PCV-MXS20 | Getting Started Guide - Page 19
the supplied power cord. 15 VHF/UHF port Connection for a TV coaxial cable (supplied). 16 Line IN jacks (R/L) Connection for an audio device. 17 Line OUT jacks (R/L) Connection for an audio device. 18 Stereo speaker terminals (R/L) Connection for the supplied stereo speakers to the computer. 19 - Sony PCV-MXS20 | Getting Started Guide - Page 20
VAIO MX Computer Getting Started Guide Remote Control Overview The functions of the VAIO® MX Computer can be controlled using the remote control (supplied). The remote control can control the functions for the computer, FM Tuner, MiniDisc player, Memory Stick® media slot, Giga Pocket functions, and - Sony PCV-MXS20 | Getting Started Guide - Page 21
to turn the computer on or off. 2 DVD button Press to control a DVD player. 3 TV/VIDEO button Press to start or stop Giga Video Recorder. Giga Video Recorder is a feature of the Giga Pocket Personal Video Recorder system. 4 Channel number buttons Press to select specific channels. Press - Sony PCV-MXS20 | Getting Started Guide - Page 22
again to enable the monitor to resume. This feature is not available while Giga Pocket features are in use. Sleep button Press to program the computer to automatically enter Stand by mode. Video Rec button Press to start recording with Giga Video Recorder. Video Rec Stop button Press to - Sony PCV-MXS20 | Getting Started Guide - Page 23
Remote Control Overview 8 Audio Select button Continued Press to select audio mode. EQ button Press to adjust your equalizer. Angle button See the Media Bar™ DVD Player software online Help file for more information. Subtitle button See the Media Bar DVD Player software online Help file - Sony PCV-MXS20 | Getting Started Guide - Page 24
VAIO MX Computer Getting Started Guide Additional System Capabilities To use the Memory Stick media slot Your VAIO® MX computer is designed to support the Sony MagicGate™ Memory Stick® media. A Memory Stick media is a compact, portable, and versatile data storage media designed for exchanging and - Sony PCV-MXS20 | Getting Started Guide - Page 25
the slot. 2 Remove the Memory Stick media from the slot carefully. ✍ Sony Memory Stick media do not support AVI file playback. First copy the AVI file to your hard disk drive and then playback the file. Protecting data on Memory Stick media from accidental changes Memory Stick media contain a write - Sony PCV-MXS20 | Getting Started Guide - Page 26
VAIO MX Computer Getting Started Guide To use PC card slot Your computer has a card bus PC card slot that supports Type I or Type II PC (PCMCIA) cards. You do not need to shut down your computer when inserting a PC card. For more information, see the instructions supplied with your PC card. - Sony PCV-MXS20 | Getting Started Guide - Page 27
, push the PC card Eject button on the front panel of the system unit. You may need to extend the Eject button out from the computer before you can eject the card. 5 When the PC card ejects from the PC card slot, remove it by holding the edges and pulling it - Sony PCV-MXS20 | Getting Started Guide - Page 28
VAIO MX Computer Getting Started Guide 28 - Sony PCV-MXS20 | Getting Started Guide - Page 29
Your VAIO MX Computer This section illustrates how to set up the cables and connections for your FM Tuner and the Giga Pocket™ Personal Video Recorder FM radio stations with the FM Tuner built into your computer. To connect the FM antenna wire (supplied) 1 Connect one end of the FM coaxial cable - Sony PCV-MXS20 | Getting Started Guide - Page 30
VAIO MX Computer Getting Started Guide 2 Attach the two wire leads of the FM antenna wire (supplied) to the FM antenna adapter. Connecting the FM antenna wire leads to the FM antenna adapter Wire leads (FM antenna wire) FM antenna adapter 3 Connect the FM coaxial cable (supplied) to the FM - Sony PCV-MXS20 | Getting Started Guide - Page 31
Giga Pocket Personal Video Recorder System Setting up TV connections The best method of connecting your computer system, TV monitor or display, and cable service access, depends on the type of cable connection available in your home. ✍ Your VAIO MX Computer is supplied with certain audio and video - Sony PCV-MXS20 | Getting Started Guide - Page 32
on the rear of your TV monitor or display. To connect in CATV mode (Option 2) TV coaxial cable (optional) Splitter (optional) Cable service access (wall outlet) TV coaxial cable (supplied) R L LINE DVI IN LINE OUT AUDIO S VIDEO/VIDEO VHF/UHF ------ VIDEO 1 INPUT ------ SPEAKER TV coaxial - Sony PCV-MXS20 | Getting Started Guide - Page 33
Set Up Your Giga Pocket Personal Video Recorder System To connect to a standard antenna (air) You can connect your Giga Pocket system to an 2 Connect the TV coaxial cable (supplied) from the combiner/transformer to the VHF/UHF jack on the back panel of your computer. Option 2 1 Connect both ends - Sony PCV-MXS20 | Getting Started Guide - Page 34
with certain audio and video cables. Depending on your in-home cable access, you may require extra cables, adapters or connection equipment not supplied with your computer. Connecting with a cable or satellite set-top box (STB) You can connect your Giga Pocket system to cable service access that - Sony PCV-MXS20 | Getting Started Guide - Page 35
VHF/UHF IN Cable service access (wall outlet) VHF/UHF OUT Set-top box (STB) TV coaxial cable (optional) Splitter (optional) TV coaxial cable (optional) VHF/UHF jack TV coaxial cable (supplied) R L LINE DVI IN LINE OUT AUDIO S VIDEO/VIDEO VHF/UHF ------ VIDEO 1 INPUT ------ SPEAKER VHF - Sony PCV-MXS20 | Getting Started Guide - Page 36
VAIO MX Computer Getting Started Guide Option 2 1 Connect one end of a TV coaxial cable (optional) to your cable service access. Connect the other end to the In jack on the back panel of your set-top box (STB). 2 Connect the TV coaxial cable (supplied) to the Out jack on your STB unit. Connect the - Sony PCV-MXS20 | Getting Started Guide - Page 37
To Set Up Your Giga Pocket Personal Video Recorder System To connect in STB mode (Option 2) Audio cable L/R (supplied) Video cable adapter (supplied) Video cable (supplied) MONITOR R L LINE DVI IN LINE OUT AUDIO S VIDEO/VIDEO AUDIO S VIDEO/VIDEO VHF/UHF ------ VIDEO OUTPUT VIDEO 1 INPUT - Sony PCV-MXS20 | Getting Started Guide - Page 38
VAIO MX Computer Getting Started Guide To Set Up Additional Equipment This section illustrates how to set up various accessories for the Giga Pocket Personal Video Recorder System. Connecting a standard or S-video cable to your computer Your equipment's connection capability may vary from the - Sony PCV-MXS20 | Getting Started Guide - Page 39
Connect to device Video cable (supplied) ✍ Your VAIO MX Computer is supplied with certain audio and video cables. Depending on your in-home cable access, you may require extra cables, adapters or connection equipment not supplied with your computer. Connecting a TV monitor (display) 1 Connect the - Sony PCV-MXS20 | Getting Started Guide - Page 40
adapter Video cable (supplied) (supplied) MONITOR R L LINE DVI IN LINE OUT AUDIO S VIDEO/VIDEO AUDIO S VIDEO/VIDEO VHF/UHF ------ VIDEO OUTPUT VIDEO 1 INPUT ------ SPEAKER Audio cable (L/R) (supplied) EO INPUT L(MONO) R VID VIDEO Connecting a VCR or camcorder Your VAIO® MX computer - Sony PCV-MXS20 | Getting Started Guide - Page 41
the Video cable adapter (supplied) into the video port on the back panel of your computer. 2 Connect the other end of the video cable into the appropriate jack on your VCR or camcorder. To connect a VCR or camcorder (Option 1 pictured) Video cassette recorder (VCR) S-video cable (optional) Audio - Sony PCV-MXS20 | Getting Started Guide - Page 42
VAIO MX Computer Getting Started Guide Setting up the remote control Insert two AA batteries (supplied) into the remote control as shown in the illustration. Inserting batteries into the remote control + - - + ✍ Under normal use, the AA batteries may last up to six months. If your remote - Sony PCV-MXS20 | Getting Started Guide - Page 43
format onto your computer's hard disk drive. You can also download (import) digital audio files from Electronic Music Distribution (EMD) services. The imported data can be played on your computer or transferred to external portable audio devices or media. SonicStage Premium software converts your - Sony PCV-MXS20 | Getting Started Guide - Page 44
VAIO MX Computer Getting Started Guide SonicStage Premium software features The software features enable you to: ❑ Listen to music from different audio sources, such as FM radio stations, audio CDs, or an Electronic Music Distribution (EMD) service. ❑ Import your songs from various audio sources and - Sony PCV-MXS20 | Getting Started Guide - Page 45
. Sign up with an Internet Service Provider (ISP) and configure your computer for Internet access before using EMD services. ❑ An EMD service provider. Consult the provider for information about service. * SonicStage Premium software does not support standard Memory Stick media (blue color). 45 - Sony PCV-MXS20 | Getting Started Guide - Page 46
VAIO MX Computer Getting Started Guide 46 - Sony PCV-MXS20 | Getting Started Guide - Page 47
use of SonicStage Premium software, a dialog box appears and prompts you to register with the Compact Disc Database (CDDB) music service. From this dialog SonicStage Premium software, follow these steps: 1 Select "This is a new CDDB Registration." Click Next. 2 Follow the on-screen instructions to - Sony PCV-MXS20 | Getting Started Guide - Page 48
VAIO MX Computer Getting Started Guide The SonicStage Premium main window appears, enabling you to continue your launch of the SonicStage Premium software. 1 In the software's main window, a dialog box appears. You are prompted to start scanning FM radio station frequencies. Click Yes. Your - Sony PCV-MXS20 | Getting Started Guide - Page 49
audio sources. G MENU button Displays the main menu. H Volume Control button Increase or decrease sound volume when playing back songs from audio connection window. The Internet window enables you to download or listen to audio files from EMD services. M Timer Set button Minimizes or maximizes the - Sony PCV-MXS20 | Getting Started Guide - Page 50
to a specific playlist in the M drive. Audio source is a CD, CD-R or CD-RW inserted into your computer's optical drive. Audio source is a MiniDisc inserted into your computer's MiniDisc drive. Audio source is a MagicGate Memory Stick media inserted into your computer's Memory Stick slot - Sony PCV-MXS20 | Getting Started Guide - Page 51
When you play an audio CD in your computer's optical drive for the first time, you are prompted to select playback options and to check the operation of the drive. Follow the instructions in the dialog boxes, and set up SonicStage Premium software to automatically play your audio CDs and to verify - Sony PCV-MXS20 | Getting Started Guide - Page 52
VAIO MX Computer Getting Started Guide 4 Select the song you wish to play. Click Play on the Playback panel to begin the selected song. ✍ You can double-click on a specific song to automatically begin playback. 5 Click (Stop) on the Playback panel to stop playback. 6 Click (Play) during playback - Sony PCV-MXS20 | Getting Started Guide - Page 53
SonicStage Premium Software Playing songs on your hard disk drive (Playlist) 1 Click (M drive). The Playlist Playback panel appears. 2 Click Show List on the Playback panel to view the Contents panel. The Playlists on your hard disk drive are displayed. You can find a specific Playlist using the - Sony PCV-MXS20 | Getting Started Guide - Page 54
VAIO MX Computer Getting Started Guide Recording songs to a MiniDisc (Check-out) When you record songs from an audio CD to a MiniDisc, the songs are recorded into a Playlist on your hard disk drive, and then checked out to the MiniDisc. ✍ Before recording to a MiniDisc, verify that the media is not - Sony PCV-MXS20 | Getting Started Guide - Page 55
Stick® media or external device that is compliant with OpenMG™ software standards. The songs are recorded to the M drive on your hard disk drive, and then checked out to the Memory Stick media or portable audio device. ✍ Before recording to a Memory Stick media, verify that the media is not write - Sony PCV-MXS20 | Getting Started Guide - Page 56
Follow the on-screen instructions to complete the driver installation. 5 Restart your computer when prompted. 6 Connect your audio device to a USB port on your computer and wait for Windows® to detect it. (A message may display in the Windows task tray.) Open SonicStage Premium software, as follows - Sony PCV-MXS20 | Getting Started Guide - Page 57
SonicStage Premium Software To play songs from an portable audio (external) device or media 1 Click ( automatically display, click the icon with the external device/media connected or inserted into your computer. You can double-click the icon to automatically start playback of the songs on the - Sony PCV-MXS20 | Getting Started Guide - Page 58
VAIO MX Computer Getting Started Guide To Use the Visualizer, Equalizer, and Sound Effects Your VAIO® MX computer has special features to enhance your music experience. You can view synchronized images while listening to music, enhance the sound quality and add special effects to your favorite songs - Sony PCV-MXS20 | Getting Started Guide - Page 59
Software 2 Select the desired sound mode from the drop-down list. 3 Click Close. The next time you play a song, the selected sound mode sound effects have been added. If this occurs, select "Sound Effect Off" to turn off the sound effect. You cannot apply sound effects to songs on a MiniDisc, audio - Sony PCV-MXS20 | Getting Started Guide - Page 60
VAIO MX Computer Getting Started Guide To Use the FM Tuner Your VAIO® MX computer is equipped with a built-in FM tuner, enabling you to listen to and record from FM radio stations. Your FM antenna wire or FM coaxial antenna (supplied) must be connected to your computer before you can listen to FM - Sony PCV-MXS20 | Getting Started Guide - Page 61
SonicStage Premium Software Recording from an FM radio station You can record from an FM radio station and register the audio file to a Playlist on your hard drive. 1 Click . The FM Listening panel appears. 2 Select the desired FM radio station. 3 Set up your audio input and recording settings by - Sony PCV-MXS20 | Getting Started Guide - Page 62
VAIO MX Computer Getting Started Guide To Use the Timer Functions You can use the timer functions to schedule one-time, daily, and weekly playback or recording events. SonicStage Premium enables you to select the date, start time, end time, and timer event duration for the available audio sources. - Sony PCV-MXS20 | Getting Started Guide - Page 63
completed. At every scheduled time, SonicStage Premium software automatically starts the event from the selected audio source. ✍ You can display the Timer Timer duration is 90 minutes. When the timer countdown is completed, the computer goes into Stand by mode. 2 Click the Sleep button to decrease - Sony PCV-MXS20 | Getting Started Guide - Page 64
VAIO MX Computer Getting Started Guide When you attempt to change a timer event, the following aspects cannot This can be useful when you want to listen to songs with SonicStage Premium software while using other software, or whenever you feel that Full mode view is intrusive. The Simple mode - Sony PCV-MXS20 | Getting Started Guide - Page 65
for the first time, you are automatically prompted to set the video input source for watching TV or cable TV (CATV) programs on your computer. Starting Giga Pocket for TV Setup 1 Verify that the computer time and date settings as displayed in the taskbar are correct. To adjust these settings - Sony PCV-MXS20 | Getting Started Guide - Page 66
poor image quality on your display. ✍ In a multi-user environment, Microsoft® Windows® XP operating system supports a single Giga Pocket user at any given time. If one user accesses Giga Pocket, the software is not available to any other computer on the network. For more information, see the - Sony PCV-MXS20 | Getting Started Guide - Page 67
Giga Video Recorder Giga Video Recorder Giga Video Recorder enables you to watch a TV program on your computer display while recording it onto your hard disk drive. Using the Giga Pocket Slip Play feature, you can view a program from the beginning even while it is being recorded. Giga Video Recorder - Sony PCV-MXS20 | Getting Started Guide - Page 68
VAIO MX Computer Getting Started Guide Use the TV/Recording deck to view programs and record Video Capsules. You can use the Playback deck of your Giga Video Recorder to play back a Video Capsule. Playback deck (detail) Giga Video Recorder stores recorded images as Video Capsules. The Video Capsules - Sony PCV-MXS20 | Getting Started Guide - Page 69
that is connected to your computer, the following images may not record or display: ❑ The still images of a paused playback screen. ❑ A screen without images, such as a blue screen. ❑ The menu screens of the attached video player device. ❑ The Giga Pocket software's displayed image or images from - Sony PCV-MXS20 | Getting Started Guide - Page 70
VAIO MX Computer Getting Started Guide Accessing the Giga Pocket online Help file For more information about the Giga Video Recorder feature, follow these steps to access the Giga Pocket online Help file: 1 Click Start in the Windows taskbar, and select All Programs. 2 Select Giga Pocket, and then - Sony PCV-MXS20 | Getting Started Guide - Page 71
system supports a single Giga Pocket user at any given time. If the Timer Recording Manager icon appears in the task tray of the first user to log on to the network, the Giga Pocket software is not available to any other computer on the network. For more information, see the Giga Pocket online - Sony PCV-MXS20 | Getting Started Guide - Page 72
VAIO MX Computer Getting Started Guide Using the Timer Recording Manager 1 Click Start in the Windows® taskbar, select All Programs, and then select Giga Pocket. 2 Click Timer Recording Manager. The Timer Recording Manager window appears, with two options: ❑ Windows Stand by button - The Windows - Sony PCV-MXS20 | Getting Started Guide - Page 73
Timer Recording Manager after you have changed the time setting. ❑ When you are connected to Giga Pocket Server on a network, the Timer Recording Manager appears in the Windows® task tray of the first computer user to log on, after starting Windows XP operating system. Only the first user is able - Sony PCV-MXS20 | Getting Started Guide - Page 74
Computer Getting Started Guide Timer Recording Wizard With the Timer Recording Wizard, you can set, adjust, and cancel the timer recording settings. Timer Recording Wizard dialog box Using the Timer Recording Wizard 1 Click Start in the Windows taskbar, select All Programs, then select Giga Pocket - Sony PCV-MXS20 | Getting Started Guide - Page 75
end as early as 60 seconds sooner than the set stop time. ❑ Scheduled daily or weekly timer recording sessions do not occur if your hard disk drive does not have sufficient space. Giga Pocket software does not allow a new Video Capsule to be created if there is less than 50 MB of free space on the - Sony PCV-MXS20 | Getting Started Guide - Page 76
VAIO MX Computer Getting Started Guide Video Explorer The Video Explorer application serves as a file manager for your video content. Video Capsules and saved Playlists are managed in Cabinets. Video Explorer enables you to play back Video Capsules using Giga Video Recorder, and to play back a - Sony PCV-MXS20 | Getting Started Guide - Page 77
Explorer Toolbar functions From the Video Explorer toolbar, you can: ❑ Launch Giga Video Recorder Video Capsule or Playlist. (Giga Video Recorder) to play a selected ❑ Launch Playlist Builder (Playlist Builder). ❑ Launch Timer Recording Wizard timer recordings. (Timer Recording Wizard) to - Sony PCV-MXS20 | Getting Started Guide - Page 78
as MPEG1 or MPEG2 files. MPEG2 files need a specific system environment for playback: ❑ A VAIO computer that has Giga Pocket Personal Video Recorder installed. ❑ A VAIO computer that has a DVD-ROM or DVD-RW drive. If you wish to play your Video Capsule in a different system environment, you can - Sony PCV-MXS20 | Getting Started Guide - Page 79
in the Windows taskbar, and then select All Programs. 2 Select Giga Pocket, and then click Video Explorer. 3 Click on the Cabinet icon containing the desired Video Capsule. The Video Capsules display in the List area. 2 Select the Video Capsule that you want to register in Playlist Builder. 3 Select - Sony PCV-MXS20 | Getting Started Guide - Page 80
VAIO MX Computer Getting Started Guide The window consists of the following four parts: ❑ Clips area - A list of saved clips is preview monitor. ✍ Playlist Builder does not operate properly if used concurrently with another video application, such as DVgate™ software. Accessing the Giga Pocket online - Sony PCV-MXS20 | Getting Started Guide - Page 81
you connect to Giga Pocket Server. PicoPlayer also allows you to watch TV on computer systems that do not have TV receptions functions or Giga Pocket Personal Video Recorder installed, if such systems support the PicoPlayer software requirements. PicoPlayer software is supported by the following - Sony PCV-MXS20 | Getting Started Guide - Page 82
VAIO MX Computer Getting Started Guide Starting PicoPlayer on a network 1 Click Start in the Windows taskbar, and then select All Programs. 2 Select Giga Pocket and then click PicoPlayer. PicoPlayer launches and a "Connect to Giga Pocket Server" dialog box appears. Connect to Giga Pocket Server - Sony PCV-MXS20 | Getting Started Guide - Page 83
on the specifications of the computer you are using, "Long Play only" may appear in the PicoPlayer title bar. On such computers, you cannot use High Quality or Standard image quality for viewing. ❑ Several PicoPlayer users on a network can simultaneously connect through the Giga Pocket Server and - Sony PCV-MXS20 | Getting Started Guide - Page 84
VAIO MX Computer Getting Started Guide CLIÉ Converter The CLIÉ™ Converter is a plug-in application that enables the conversion of Video Capsules into gMovie format. You are able to change your Giga Pocket™ contents and transfer them onto a Memory Stick® media for viewing with your Sony CLIÉ Handheld - Sony PCV-MXS20 | Getting Started Guide - Page 85
Explorer. Drag and drop all selected capsules to the Giga Pocket -> CLIÉ Converter main window. To transfer converted video files to a Memory Stick media 1 Insert a Memory Stick® media into the Memory Stick media slot on your computer. 2 From the Giga Pocket -> CLIÉ main window, click to select the - Sony PCV-MXS20 | Getting Started Guide - Page 86
VAIO MX Computer Getting Started Guide About the SONY CLIÉ handheld The Sony CLIÉ™ Handheld personal entertainment organizers provide a rich and compelling handheld computing experience. Powered by the Palm™ operating system, the CLIÉ is ready to deliver music and video with amazing clarity. For - Sony PCV-MXS20 | Getting Started Guide - Page 87
Troubleshooting Topics This section describes how to solve common problems you may encounter when using your computer. Many problems have simple solutions, so try these suggestions before you contact Sony Customer Support. About the VAIO time period. ❑ Your computer's audio may be set to Muting - Sony PCV-MXS20 | Getting Started Guide - Page 88
then play your audio CD using SonicStage Premium software. My audio files appear to be corrupted during playback. Do not run SonicStage Premium and RealJukebox® software applications simultaneously. This may cause your audio files to become unstable on your hard disk drive, Memory Stick® media, or - Sony PCV-MXS20 | Getting Started Guide - Page 89
portable audio device must use Plug-ins or drivers that are compatible with SonicStage Premium software, Version 1.0. For more information about plug-in or driver compatibility, visit the device manufacturer Web site. ❑ Do not install OpenMG™ Jukebox software, Version 2.1 or lower, on your computer - Sony PCV-MXS20 | Getting Started Guide - Page 90
VAIO MX Computer Getting Started Guide About Giga Pocket Personal Video Recorder Why can't I see an image or a correctly displayed image when I am using a VCR? Some images from an externally-connected video player device or a video game console, may not display or are not displayed correctly. These - Sony PCV-MXS20 | Getting Started Guide - Page 91
. Why did the Giga Pocket software stop allowing me to create new Video Capsules? You cannot create a new Video Capsule when the remaining free space on your hard disk drive reaches approximately 50 MB. Delete any unnecessary Video Capsules or files to increase the free space on your hard drive. On - Sony PCV-MXS20 | Getting Started Guide - Page 92
Computer Getting Started Guide I cannot record or check out audio files, even though the maximum recording time has not been reached. Small amounts of data from audio files (tracks) may remain "scattered" on a MiniDisc media as you record or erase several times on the same media. The MiniDisc drive - Sony PCV-MXS20 | Getting Started Guide - Page 93
time for track search, audio tracks may skip. I am unable to check-in my audio files. You can only check in audio files that meet the following criteria: ❑ The audio files have not been edited. ❑ The audio files were recorded using your VAIO® MX computer. I cannot copy an audio file that was checked - Sony PCV-MXS20 | Getting Started Guide - Page 94
VAIO MX Computer Getting Started Guide About Recording CDs There is noise when I try to record an audio CD. There may be another application running during the SonicStage™ Premium software's recording session. Avoid performing other operations during a recording session. You can also verify the - Sony PCV-MXS20 | Getting Started Guide - Page 95
doesn't the modem's Wake on Ring (WOR) feature work properly? Your installed Lucent™ Win Modem does not support the Wake on Ring (WOR) feature of the Microsoft® Windows® XP operating system. For optimal use, Sony recommends that you do not change the preset modem settings. See the Windows Help and - Sony PCV-MXS20 | Getting Started Guide - Page 96
VAIO MX Computer Getting Started Guide 96 - Sony PCV-MXS20 | Getting Started Guide - Page 97
This section contains a list of common terms and definitions for the VAIO® MX computer and Giga Pocket™ Personal Video Recorder system. ATRAC3 Adaptive Transform Acoustic Coding 3 (ATRAC3) is an audio compression technology which produces high quality recording and superior compression rates - Sony PCV-MXS20 | Getting Started Guide - Page 98
VAIO MX Computer Getting Started Guide Expiration date Film roll GOP Management information MDLP Memory Stick media MiniDisc drive MP3 MPEG file Net MD technology A Video Capsule is stored on the hard disk drive for a preset period of time. When this time has expired, the Video Capsule is - Sony PCV-MXS20 | Getting Started Guide - Page 99
miniature view displayed on the film roll in Giga Video Recorder, Playlist Builder, and the preview monitor in Video Explorer. Stand by mode A power saving mode that is set using Windows operating system. Your computer stays in this power saving mode until approximately 5 minutes before the timer - Sony PCV-MXS20 | Getting Started Guide - Page 100
video recording event. The mode used when you want to select an FM radio station. The two modes are Preset Tuning and Manual Tuning. A virtual container that holds the video images recorded with Giga Pocket Recorder. A Video Capsule is created on your computer hard disk drive and managed with Video - Sony PCV-MXS20 | Getting Started Guide - Page 101
local TV listings. You can use the Internet Electronic Program Guide service with your Giga Pocket™ Personal Video Recorder for a "one-click" set up of timer recordings and record your favorite TV programs*. Giga Pocket Personal Video Recorder must be set up and configured correctly before you can - Sony PCV-MXS20 | Getting Started Guide - Page 102
Guide. ✍ Sony recommends using Microsoft® Internet Explorer as your Web browser to access the Internet Electronic Program Guide service. To set up Internet Electronic Program Guide service, follow these steps: 1 Click Start in the Windows® taskbar, point to All Programs, and then select Giga Pocket - Sony PCV-MXS20 | Getting Started Guide - Page 103
Giga Pocket applications before downloading your TV listings. If you are using set-top box (STB) mode, you do not need to click Download All Channel Settings. 7 Verify the channel settings and click OK. 8 Your personal channel settings appear whenever you access the Internet Electronic Program Guide - Sony PCV-MXS20 | Getting Started Guide - Page 104
VAIO MX Computer Getting Started Guide Setting Up a Timer Recording 1 Open Internet Explorer and go to the Internet Electronic Program Guide web site. Your online channel guide will appear. Online channel guide main window ✍ The appearance of the online channel guide Web site, its contents, and the - Sony PCV-MXS20 | Getting Started Guide - Page 105
You can schedule up to 100 timer recordings using Giga Pocket Personal Video Recorder. See the Giga Pocket online Help file for more information. To access Image quality is improved, but recording requires more space on the hard disk drive as compared to using SP or LP recording modes. Long Play - Sony PCV-MXS20 | Getting Started Guide - Page 106
VAIO MX Computer Getting Started Guide New Timer Recording - Set stop time and recording mode window 5 From the New Timer details window 6 Select a date for the recorded program to be automatically deleted from your hard disk drive, using the Expiration date of Video Capsule drop-down list. 106 - Sony PCV-MXS20 | Getting Started Guide - Page 107
Up a Timer Recording ✍ To maintain adequate space on your hard disk drive, Giga Pocket Personal Video Recorder enables you to set an expiration date for your Video Capsules to be automatically deleted. 7 Click Decide to review your setting preferences. The New Timer Recording - Confirm window - Sony PCV-MXS20 | Getting Started Guide - Page 108
VAIO MX Computer Getting Started Guide Viewing Your Selected Program Recording Schedule You can easily view the programs you have selected to record, using Giga Pocket Personal Video and any other applications that may access your computer's hard disk drive during the timer recording. ❑ If you are - Sony PCV-MXS20 | Getting Started Guide - Page 109
77 Clip 89 Clip area 72 Compact Disc Database (CDDB) 39 computer cable/satellite STB 26 connecting a TV monitor 31 connecting a video cable 32 FM antenna 21 FM coaxial cable setup 22 FM tuner setup 21 Giga Pocket setup 23 mounting the FM antenna wire 22 setting up 21 standard antenna connection - Sony PCV-MXS20 | Getting Started Guide - Page 110
memory stick media slot 9 110 microphone jack 8 MiniDisc drive 8 MiniDisc eject button 9 Muting button 8 next/fast forward button 9 Overview 7 PC card slot 8 Play button 8 Power button 8 previous/rewind button 9 Stop button 8 USB port 9 volume control buttons 9 Function button 9 G Giga Pocket audio - Sony PCV-MXS20 | Getting Started Guide - Page 111
indicator light 8 Infrared Receiver 8 K Keyboard port 10 modem troubleshooting 87 Modem line jack 11 Monitor port 11 Mounting the FM antenna 22 Mouse port 10 MP3 protecting data on media 17 using media 16 Memory Stick slot 9 Microphone jack 8 MiniDisc drive 8 eject button 9 O OpenMG technology 91 - Sony PCV-MXS20 | Getting Started Guide - Page 112
About the Modem 87 Giga Pocket Personal Video Re- corder 82 MiniDisc Drive/Media 83 Software Playback/Recording 80 Topics 79 VAIO MX Functions 79 Tuning Mode 92 TV connection cable/satellite set-top box 26 TV connections 23 standard antenna 25 standard cable access 23 TV monitor 31 TV/Recording deck - Sony PCV-MXS20 | Getting Started Guide - Page 113
V VAIO MX computer additional features 6 audio capabilities 4 Audio features 4 Overview 3 video capabilities 5 VCR 32 connecting an audio cable 32 VHF/UHF port 11 video cable 32 video cable adapter 31 Video Capsule 92 Video Explorer 5, 68 Video/S-video In port 11 Video/S-video Out port 11 Visualizer
-
 1
1 -
 2
2 -
 3
3 -
 4
4 -
 5
5 -
 6
6 -
 7
7 -
8
-
9
-
10
-
11
-
12
-
13
-
14
-
15
-
16
-
17
-
18
-
19
-
20
-
21
-
22
-
23
-
24
-
25
-
26
-
27
-
28
-
29
-
30
-
31
-
32
-
33
-
34
-
35
-
36
-
37
-
38
-
39
-
40
-
41
-
42
-
43
-
44
-
45
-
46
-
47
-
48
-
49
-
50
-
51
-
52
-
53
-
54
-
55
-
56
-
57
-
58
-
59
-
60
-
61
-
62
-
63
-
64
-
65
-
66
-
67
-
68
-
69
-
70
-
71
-
72
-
73
-
74
-
75
-
76
-
77
-
78
-
79
-
80
-
81
-
82
-
83
-
84
-
85
-
86
-
87
-
88
-
89
-
90
-
91
-
92
-
93
-
94
-
95
-
96
-
97
-
98
-
99
-
100
-
101
-
102
-
103
-
104
-
105
-
106
-
107
-
108
-
109
-
110
-
111
-
112
-
113
 |
 |

VAIO® MX Computer
Getting Started Guide
PCV-MXS20