Sony VPL DX15 Operating Instructions
Sony VPL DX15 - XGA LCD Projector Manual
 |
UPC - 027242762039
View all Sony VPL DX15 manuals
Add to My Manuals
Save this manual to your list of manuals |
Sony VPL DX15 manual content summary:
- Sony VPL DX15 | Operating Instructions - Page 1
-127-12 (2) Data Projector Operating Instructions Before operating the unit, please read this manual thoroughly and retain it for future reference. VPL-DX10/DX11/DX15 Not all models are available in all countries and area. Please check with your local Sony Authorized Dealer. © 2009 Sony Corporation - Sony VPL DX15 | Operating Instructions - Page 2
the risk of fire or electric shock, refer servicing to qualified service personnel. WARNING: THIS WARNING IS APPLICABLE FOR and used in accordance with the instructions, may cause harmful interference to by turning the equipment off and on, the user is encouraged to try to correct the interference - Sony VPL DX15 | Operating Instructions - Page 3
approved in this manual could void your Sony Customer Information Service Center 1-800-222-7669 or http://www.sony.com/ Declaration of Conformity Trade Name: SONY Model: VPL-DX10 VPL-DX11 VPL-DX15 Responsible party: Sony of the used lamp For the customers in the USA Lamp in this product - Sony VPL DX15 | Operating Instructions - Page 4
følgende udstyr VPLDX15/Data Projector overholder de væsentlige krav og øvrige relevante krav i direktiv 1999/5/EF. For yderligere information gå ind på følgende hjemmeside: http://www.compliance.sony.de/ Hierbij verklaart Sony Corporation dat het toestel VPL-DX15/Data Projector in overeenstemming - Sony VPL DX15 | Operating Instructions - Page 5
Informationen erhältlich unter: http://www.compliance.sony.de/ Με την Projector η Sony Corporation VPL-DX15/Data της 1999/5/EK. Για http://www.compliance.sony.de/ Alulírott, Sony Corporation nyilatkozom, hogy a(z) VPL-DX15/Data Projector megfelel a vonatkozó alapvető követelményeknek és az - Sony VPL DX15 | Operating Instructions - Page 6
://www.compliance.sony.de/ Härmed intygar Sony Corporation att denna VPL-DX15/Data Projector står I services) of the Code of electronic communications - with respect to private use, by the Ministerial Decree 12.07.2007 For the customers in Cyprus The end user Wireless Access Systems, including Radio Local - Sony VPL DX15 | Operating Instructions - Page 7
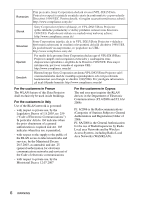
For the customers in Norway Use of this radio equipment is not allowed in the geographical area within a radius of 20 km from the centre of Ny-Ålesund, Svalbard. For kundene i Norge Det er ikke tillatt å bruke dette radioutstyret innen en radius på 20 km fra sentrum av NyÅlesund, Svalbard. For the - Sony VPL DX15 | Operating Instructions - Page 8
Overview About the Supplied Manuals 14 Included Attachments 15 Projector 22 Connecting the Projector 22 Connecting a Computer 23 Connecting a VCR 24 Connecting to a Network (VPL-DX15 only 25 Connecting a USB memory (VPL-DX15 Security Function 33 Security Lock (Password 33 Panel Key Lock 35 - Sony VPL DX15 | Operating Instructions - Page 9
Menu (VPL-DX15 only 55 The Information Menu 56 Maintenance Replacing the Lamp 58 Cleaning the Air Filter 60 Others Troubleshooting 61 Messages List 65 Specifications 66 Installing the Projector and Installation Diagram 70 Floor Installation (Front Projection 70 Ceiling Installation (Front - Sony VPL DX15 | Operating Instructions - Page 10
required, consult with qualified Sony personnel. • Should any liquid or solid • Clean the air filter whenever you replace the lamp. • Refer to the "Cleaning the Air Filter" As incorrect maintenance may impair the performance of the projector, take care with respect to the following: • Avoid - Sony VPL DX15 | Operating Instructions - Page 11
cabinet may deteriorate or the coating may come off. On LCD projector The LCD projector is manufactured using high-precision technology. You may, however block-up, the temperature sensor will function with the message "High temp.! Lamp off in 1 min." The power will be turned off automatically after - Sony VPL DX15 | Operating Instructions - Page 12
preventing the air passing through the filter may cause a rise in the internal temperature of the unit. Clean the air filter whenever you replace the lamp. 12 Notes on Installation and Usage - Sony VPL DX15 | Operating Instructions - Page 13
Unsuitable Conditions Do not use the unit under the following conditions. Do not topple the unit Avoid using as the unit topples over on its side. It may cause malfunction. Do not tilt right/left Avoid using as the unit tilts right or left more than 20 degrees. These installations may cause - Sony VPL DX15 | Operating Instructions - Page 14
You must have Adobe Acrobat Reader 5.0 or higher installed to read the Operating Instructions stored on the CD-ROM. This manual contains explanations for the VPL-DX10, VPL-DX11 and VPL-DX15 together. Be aware that the VPL-DX15 is mainly used for explanation of the display, and there may be an item - Sony VPL DX15 | Operating Instructions - Page 15
. Check them before use. Main unit (projector) (1) Carrying case (1) RM-PJ6 Remote Commander (1) CR2025 Lithium battery (1) (installed in the Remote Commander) AC power cord (1) Operating Instructions (CD-ROM) (1) Quick Reference Manual (1) Safety Regulations (1) Security Label (1) HD D-sub - Sony VPL DX15 | Operating Instructions - Page 16
Location and Function of Controls (Main Unit) Top/Front/Side 1 6 2 3 0 7 4 5 4 Rear/Side/Bottom qa 8 qa 9 0 4 qs 4 qd a Zoom ring Adjusts the picture size. b Focus ring Adjusts the picture focus. 16 Location and Function of Controls (Main Unit) - Sony VPL DX15 | Operating Instructions - Page 17
lever If you operate the Lens shutter lever manually, the image is interrupted. In this case, the video signal is not projected to the screen. page 19. j Ventilation holes (intake) k Ventilation holes (exhaust) l Lamp cover m Ventilation holes (intake)/Air filter cover Notes on ventilation holes • - Sony VPL DX15 | Operating Instructions - Page 18
cover is not secured firmly. • A repetition rate of 3 flashes when the lamp has reached the end of its life or reaches a high temperature. For details, see page 64. e ?/1 (On/Standby) key Turns on the projector when it is in standby mode. When you press ?/1 key, this key flashes in green and then - Sony VPL DX15 | Operating Instructions - Page 19
(type A) (VPL-DX15 only) Uses to view files saved on media with USB connection. Note The projector cannot be connected VIDEO connector (mini DIN 4pin) Connects to the S video output (Y/C video output) of video equipment. f VIDEO connector (phono type) Connects to the composite video output of video - Sony VPL DX15 | Operating Instructions - Page 20
function. For details, refer to "Operating Instructions (For Network/USB File Viewer)" on the Use this to reset the menu, to restore the default value for the adjusted item, and others. Use AUTO FOCUS key This function is not provided in this projector. 20 Remote Commander g D ZOOM (Digital Zoom) - Sony VPL DX15 | Operating Instructions - Page 21
distance between the Remote Commander and the remote control detector is, the wider the angle within which the commander can control the projector becomes. CAUTION Danger of explosion if battery is incorrectly replaced. Replace only with the same or equivalent type recommended by the manufacturer - Sony VPL DX15 | Operating Instructions - Page 22
picture signals. When pulling out a cable, be sure to pull it out by the plug, not the cable itself. For VPL-DX15, when connecting to a (Network) connector or (USB) connector, see "Operating Instructions for Network/USB File Viewer" stored on the CD-ROM. 22 Installing the Projector / Connecting the - Sony VPL DX15 | Operating Instructions - Page 23
the projector to a computer. For more information, refer to the computer's instruction manual. instructions supplied with your computer. Note To connect a Macintosh computer equipped with a video 15-pin cable (supplied) Notes • The projector accepts VGA, SVGA, XGA, WXGA, WXGA+, SXGA and SXGA+ signals. - Sony VPL DX15 | Operating Instructions - Page 24
Connecting a VCR This section describes how to connect the projector to a VCR. For more information, refer to the instruction manuals of the equipment you are connecting. To connect to a video output connector Rear To connect to a video GBR/ Component output connector Rear to INPUT A connector to - Sony VPL DX15 | Operating Instructions - Page 25
the supplied CDROM. Connecting a USB memory (VPL-DX15 only) To see how to connect a USB memory, refer to "Operating Instructions for Network/USB File Viewer" included on the supplied CDROM. Projecting 1 to a wall outlet PUSH ENTER MENU 7 INPUT LAMP/COVER 2 6 4 5 7 INPUT NETWORK USB MENU - Sony VPL DX15 | Operating Instructions - Page 26
signal indicator 2 13 4 Notes • When you adjust the tilt of the projector with the adjuster, the V keystone adjustment is performed at the same time. If this case, adjust it manually. 26 Projecting VPL-DX10/DX11 Input-A Video S-Video VPL-DX15 Input-A Network USB S-Video Video Input - Sony VPL DX15 | Operating Instructions - Page 27
signals are found. In VPL-DX15, if there is no input signal, "Network" is selected. For details, see "Auto Input Search" on page 52. 8 Switch the equipment connected to output to the projector. Depending on the type of your computer, for example a notebook, or an all-in-one LCD type, you may have - Sony VPL DX15 | Operating Instructions - Page 28
turn off the power by holding the ?/1 key for about two seconds instead of above steps 1 and 2. To project again immediately You can make the lamp light by turning on the power again even, while the ?/1 key is flashing in green. There may be a delay, depending on conditions, before the - Sony VPL DX15 | Operating Instructions - Page 29
PUSH ENTER MENU INPUT LAMP/COVER 2 3 Press the MENU key. The menu appears. The menu currently selected is shown as a yellow button. 80 50 50 50 Low 30 (VPL-DX15) 4 Press the the ?/1 key to turn on the projector. The ?/1 key flashes in green, and then lights in green. 30 Selecting the - Sony VPL DX15 | Operating Instructions - Page 30
or ENTER key. Resetting All Setting Values You can reset all setting values to default. To Change from the Menu 6 Press the v/V/b/B key to select a language, is not pressed for one minute. 2,3,4 1 PUSH ENTER MENU INPUT LAMP/COVER 1 RESET INPUT NETWORK USB MENU APA ENTER RESET KEYSTONE AUTO - Sony VPL DX15 | Operating Instructions - Page 31
can be set on Picture menu). To Return the Value of an Adjusted Item to Default Press the RESET key on the Remote Commander. If you press the RESET key while to switch to auto adjustment mode after adjusting manually, switch the V Keystone setting to "Manual" once then return it to "Auto". INPUT - Sony VPL DX15 | Operating Instructions - Page 32
to select the Installation setting menu then press the B or ENTER key. Lamp Mode Direct Power ON Auto Standard Off 3 Select "V Keystone" with the "Auto" for automatic correction or "Manual" to correct it manually. Then, press the ENTER key. 5 If you selected "Manual", use the v/ V/b/B keys. When - Sony VPL DX15 | Operating Instructions - Page 33
28, then cool it down before storing the projector in the carrying case. • When the power is turned on soon after it has been turned off, it may take some time until the lamp will light on. Using the Security Function Security Lock (Password) The projector is equipped with a security lock function - Sony VPL DX15 | Operating Instructions - Page 34
PUSH ENTER 2,3,4,5 1 MENU INPUT LAMP/COVER 6 1 2,3, 4,5 INPUT NETWORK USB MENU APA 6 ENTER menu then press the ENTER key. 4 Enter the password. Use the MENU, v/V/b/B, and ENTER keys to enter the four-digit password. (The default initial password setting is "ENTER, ENTER, ENTER, ENTER." After - Sony VPL DX15 | Operating Instructions - Page 35
the projector cannot be used. In this case, press the ?/1 key to turn off the power. To cancel the security lock 1 Press the MENU key, then set the "Security Lock" setting to "off" in the Function menu. 2 Enter the password. Enter the password that was set. Note If you call Sony personnel because - Sony VPL DX15 | Operating Instructions - Page 36
cancel Panel Key Lock with the key on the projector Press and hold the MENU key for approximately 10 computer is input or an input signal of "Network" or "USB" is selected. (VPL-DX15 only) This function does not work when a video signal is input. 1 Project a normal image, and press the D ZOOM + key - Sony VPL DX15 | Operating Instructions - Page 37
shutter outside the lens. The picture muting shuts off the video signal. Lens Shutter (Recommended for Use on the Floor input signal of "Network" or "USB" is selected. (VPLDX15 only) To restore the original screen, press the FREEZE projector. The projector goes to standby mode approximately two hours after - Sony VPL DX15 | Operating Instructions - Page 38
Picture Muting (Recommended for Use Suspend from a Ceiling) INPUT NETWORK USB MENU APA ENTER RESET KEYSTONE AUTO FOCUS LENS /TILT PIC MUTING D ZOOM VOLUME FREEZE AUDIO MUTING PIC MUTING The projected image is - Sony VPL DX15 | Operating Instructions - Page 39
set to "On", this function works whenever a signal is input. 2~4 1 PUSH ENTER MENU INPUT LAMP/COVER 1 INPUT NETWORK USB MENU APA ENTER RESET KEYSTONE AUTO FOCUS LENS /TILT PIC MUTING D items in the Screen menu when you adjust the picture manually. Adjusting the Image Quality (Smart APA) 39 - Sony VPL DX15 | Operating Instructions - Page 40
of the input signal on some menus. 2~6 1 PUSH ENTER MENU INPUT LAMP/COVER 1 INPUT NETWORK USB MENU APA ENTER RESET KEYSTONE AUTO FOCUS LENS is input or an input signal of Network* or USB* is selected). * VPL-DX15 only 5 Set the items on the Picture menu as desired. The setting values for - Sony VPL DX15 | Operating Instructions - Page 41
the NETWORK or USB key on the Remote Commander. Using the Network Function (VPL-DX15 only) You can use the following functions by using the network function of this product. For details, refer to "Operating Instructions for Network/USB File Viewer" included on the supplied CD-ROM. INPUT INPUT - Sony VPL DX15 | Operating Instructions - Page 42
Projecting the File in the USB Memory Directly (VPL-DX15 only) The file in the USB memory connected to the (USB) port can be displayed directly on the projected display. For details, refer to "Operating Instructions for Network/USB File Viewer" included on the supplied CD-ROM. 42 Projecting the File - Sony VPL DX15 | Operating Instructions - Page 43
MENU 1 Press the MENU key. The menu appears. The projector is equipped with an on-screen menu for making various adjustments " on page 29. VPL-DX15 VPL-DX10/DX11 This manual contains explanations for the VPL-DX10/DX11 and VPL-DX15 all together. Be aware that the VPL-DX15 is mainly used for - Sony VPL DX15 | Operating Instructions - Page 44
adjusted or set do not appear in the menu. For details, see page 56. Storage of the settings The settings are automatically stored in the projector memory. If no signal is input If there is no input signal, "Cannot adjust this item." appears on the screen. 4 Make the setting or adjustment - Sony VPL DX15 | Operating Instructions - Page 45
Input signals and adjustable/setting items" on page 56. When the video signal is input When the signal is input from a computer Adjustments Network* or USB* is selected. Set according to the input signal * VPL-DX15 only The following settings are initialized to their factory preset - values: " - Sony VPL DX15 | Operating Instructions - Page 46
select this option. Reproduces the 2-3 Pull-Down film sources with smooth picture movement. When the video signal with a format other than the 2-3 Pull-Down is input, "Progressive" is automatically • The Picture Mode setting is common between Network and USB. (VPL-DX15 only) 46 The Picture Menu - Sony VPL DX15 | Operating Instructions - Page 47
be displayed for the current input signal. This item is enabled only when an video signal (preset memory numbers 1 to 11) is input. • Zoom: Select the picture while matching one pixel of input picture element to that of the LCD. The picture will be clear but the picture size will be smaller. • - Sony VPL DX15 | Operating Instructions - Page 48
Setting items Adjust Signal APA (Auto Pixel Alignment) Phase Pitch Shift Functions Initial setting Executes the APA when you press the ENTER key. The APA function adjusts PHASE, PITCH, and SHIFT automatically to suit to the input signal. The APA function can be used only for a computer signal. - Sony VPL DX15 | Operating Instructions - Page 49
a Menu About the Preset Memory No. This projector has 46 types (VPL-DX15)/45 types (VPL-DX10/DX11) of preset data for input signals (the preset memory). When a preset signal is input, the projector automatically detects the signal type and recalls the data for the signal from the preset memory to - Sony VPL DX15 | Operating Instructions - Page 50
off and the ?/1 key lights in orange if no signal is input for 10 minutes. The lamp lights again when a signal is input or any key is pressed. • Standby: The projector goes into standby mode and the ?/1 key lights in red if no signal is input for 10 minutes. To use it - Sony VPL DX15 | Operating Instructions - Page 51
the signal from a computer. • Video GBR: Inputs the signal from a TV to the selected system manually. Auto Lamp Timer Reset When replacing the lamps, reset the lamp timer. - Notes • than 1,500 m (4,921 feet), the projector may reduce the reliability of the lamp. • When "High Altitude Mode" is - Sony VPL DX15 | Operating Instructions - Page 52
INPUT key is pressed. • On: Checks if an input signal of Input-A, Network*, USB*, Video and S-Video in order when the INPUT key is pressed, and then displays the input terminal at which the input signal is detected. (* VPL-DX15 only) Network and USB are always displayed, as they have input signals - Sony VPL DX15 | Operating Instructions - Page 53
Setting items Security Lock Functions Sets whether to require the user to input a password when turning on the power. • On: For Security Lock to be active For ," and "Shift" items in the Screen menu when you adjust the picture manually. Adjustments and Settings Using a Menu The Function Menu 53 - Sony VPL DX15 | Operating Instructions - Page 54
menu is used for changing the settings of the projector. Lamp Mode Direct Power ON Auto Standard Off Setting items V Keystone Functions Sets Auto V Keystone correction. • Auto: For Auto V Keystone correction to be active • Manual: For Auto V Keystone correction to be inactive For details - Sony VPL DX15 | Operating Instructions - Page 55
window when you press [ENTER]. Setting items Network Setting Functions The network setting window appears. For details, refer to "Operating Instructions For Network/USB File Viewer" included on the supplied CDROM. Adjustments and Settings Using a Menu The Network Setting Menu (VPL-DX15 only) 55 - Sony VPL DX15 | Operating Instructions - Page 56
usage of the lamp. VPL-DX15 Memory number Signal lamp. Notes • fH (horizontal frequency) and fV(vertical frequency) may not be displayed depending on the input signal used on the projector Mode Contrast Brightness Color Video/ S-Video z z z z*1 Input signal Component Video GBR Computer z z - Sony VPL DX15 | Operating Instructions - Page 57
when the "Picture Mode" is set to "Dynamic" or "Standard" *4: Preset memory No. 3, 4 only *5: VPL-DX15 only/The Picture Mode setting is common between Network and USB. Screen menu Item Video/ S-Video Aspect z Adjust Signal APA - Phase - Pitch - Shift - z : Adjustable/can be set - : Not - Sony VPL DX15 | Operating Instructions - Page 58
projector. Caution The lamp remains hot after the projector is turned off with the ?/1 key. If you touch the lamp, you may burn your finger. When you replace the lamp, wait for at least an hour for the lamp to cool. Notes • If the lamp breaks, contact qualified Sony personnel. • Pull out the lamp - Sony VPL DX15 | Operating Instructions - Page 59
securely. • The power will not turn on if the lamp is not secured properly. 6 Close the lamp cover and tighten one screw. Note Be sure to attach the lamp cover securely as it was. If not, the projector cannot be turned on. 7 Turn the projector back over. 8 Connect the power cord. The ?/1 key lights - Sony VPL DX15 | Operating Instructions - Page 60
ower cord. 2 Place a protective sheet (cloth) beneath the projector and turn the projector over. 3 Remove the air filter cover. 4 Remove the filter air filter, consult with qualified Sony personnel. • Be sure to attach the air filter cover firmly; it may cause a problem if the air filter cover is - Sony VPL DX15 | Operating Instructions - Page 61
B Others Troubleshooting If the projector appears to be operating erratically, try to diagnose and correct the problem using the following instructions. If the problem persists, consult with qualified Sony personnel. Power Symptom Cause and Remedy The power is not turned on. • The AC power - Sony VPL DX15 | Operating Instructions - Page 62
(page 26). • Condensation has accumulated on the lens. c Leave the projector for about two hours with the power on. The image extends beyond the screen " on the Screen setting menu. c You can reset all values to default (page 30). Sound Symptom No sound. Cause and Remedy • A cable Troubleshooting - Sony VPL DX15 | Operating Instructions - Page 63
Lamp Mode is set to "High". c When the Lamp Mode is set to "High", the sound from the fan to cool the lamp, to "On", the sound from the fan to cool the lamp is often excessive. c Check the ventilation holes are not maintain the product reliability of the projector's components, the rotation speed of - Sony VPL DX15 | Operating Instructions - Page 64
wall outlet, and then turn the projector on again. If the ?/1 key flashes in red and the problem persists, the electrical system has failed. Or the interior of the unit reached a high temperature, and the temperature fuse has burned out. c Consult with qualified Sony personnel. 64 Troubleshooting - Sony VPL DX15 | Operating Instructions - Page 65
58). • If this message appears again after you replace the lamp, the lamp replacement process is not complete. c Perform the operations in step 9 to 12 on page 59. Note To erase a message, press any key on the control panel of the projector or on the remote commander. Please clean the filter. It - Sony VPL DX15 | Operating Instructions - Page 66
Light output VPL-DX10: 2500 lumen VPL-DX11/DX15: 3000 lumen (When the Lamp Mode is set to "High.") Electrical characteristics Color system NTSC3.58/PAL/SECAM/ NTSC4.43/PAL-M/PAL-N/ PAL60 system, switched automatically/manually (NTSC4.43 is the color system used when playing back a video recorded - Sony VPL DX15 | Operating Instructions - Page 67
VPL-DX10/DX11: Max. 320 Sony) Carrying case (1) AC power cord (1) Operating Instructions (CD-ROM) (1) Quick Reference Manual (1) Safety Regulations (1) Security Label (1) Design and specifications ANY OTHER REASON WHATSOEVER. Optional accessories Projector Lamp LMP-D200 (for replacement) Presentation - Sony VPL DX15 | Operating Instructions - Page 68
35 36 832 × 624 37 1024 × 768 38 39 40 fH (kHz) fV (Hz) Sync Video 60 Hz 15.734 Video 50 Hz 15.625 DTV 480/60i 15.734 DTV 575/50i 15.625 480/60p (NTSC Progressive - - 800 832 848 800 832 800 864 832 840 832 1024 1056 1040 1056 1048 1152 1344 1328 1312 1376 68 Specifications - Sony VPL DX15 | Operating Instructions - Page 69
1472 1600 1568 1504 1800 1728 1688 1688 1864 1664 1664 1776 1904 1680 Signal Video (VIDEO/S VIDEO connector) Component (INPUT A connector) Video GBR (INPUT A connector) Computer (INPUT A connector) Preset memory No. 1, 2 60 Hz, the picture may not be displayed properly. Others Specifications 69 - Sony VPL DX15 | Operating Instructions - Page 70
Projection) Wall Center of the screen Center of the lens Floor Unit: mm (inches) This section describes the examples of installing the projector on a desk, etc. See the chart on page 71 concerning the installation measurements. The alphabetical letters in the illustration indicate the distances - Sony VPL DX15 | Operating Instructions - Page 71
and the foremost side in cabinet b: distance between the floor and the center of the lens c: distance between the floor and the adjusters of the projector x: distance between the floor and the screen (free) N: minimum M: maximum Others Installing the - Sony VPL DX15 | Operating Instructions - Page 72
and the hole for mounting a projector suspension support (front) Unit: mm (inches) This section describes the examples for installing the projector on the ceiling. When installing the projector on the ceiling, use a Projector Suspension Support recommended by Sony. For ceiling installation, ask for - Sony VPL DX15 | Operating Instructions - Page 73
) a': distance between the hole (front) for mounting a projector suspension support on bottom surface of this projector and the center of the screen b: distance between the projector suspension support mounting surface on bottom of this projector and the ceiling x: distance between the center of the - Sony VPL DX15 | Operating Instructions - Page 74
Dimensions Front 121 (4 3/4) 93 (3 21/32) 62.6 ( 2 15/32) 48.7 (1 29/32) Top 295 (11 5/8) Unit: mm (inches) 204 (8 1/32) 44 (1 23/32) 74 Dimensions Unit: mm (inches) - Sony VPL DX15 | Operating Instructions - Page 75
Side 4.8 ( 3/16) 44 (1 23/32) 204 (8 1/32) 57 (2 1/4) 91 (3 19/32) Others Unit: mm (inches) Dimensions 75 - Sony VPL DX15 | Operating Instructions - Page 76
Rear 295 (11 5/8) 51.4 (2 1/32) 62.6 (2 15/32) 74 (2 29/32) 91 (3 19/32) 12 (15/32) (USB) connector (VPL-DX15 only) (Network) connector (VPL-DX15 only) Bottom Unit: mm (inches) 93 (3 21/32) 84 (3 5/16) 76 Dimensions 104.5 (4 1/8) 102.7 (4 1/32) 73.4 (2 7/8) 16.8 (21/32) Unit: mm (inches - Sony VPL DX15 | Operating Instructions - Page 77
-A Signal Sel 51 Installation Diagram 70 Floor Installation (Front Projection) ... 70 Installation diagram Ceiling installation 72 Installing the projector 22 L Lamp Mode 54 Lamp Timer 56 Lamp Timer Reset 51 LAMP/COVER indicators 18 Language 50 Lens shutter 17, 37 Lens shutter lever 17 - Sony VPL DX15 | Operating Instructions - Page 78
20 Replacing the lamp 58 Reset 45 S Screen size 66 Security lock (Mechanical 17, 36 Security Lock (Password 33, 53 Sharpness 46 Smart APA 39, 52 Specifications 66 Standby Mode 50 Start Up Image 50 Status 50 Storing the settings 44 Supplied accessories 67 T Troubleshooting 61 U USB file - Sony VPL DX15 | Operating Instructions - Page 79
Sony Corporation
-
 1
1 -
 2
2 -
 3
3 -
 4
4 -
 5
5 -
 6
6 -
 7
7 -
8
-
9
-
10
-
11
-
12
-
13
-
14
-
15
-
16
-
17
-
18
-
19
-
20
-
21
-
22
-
23
-
24
-
25
-
26
-
27
-
28
-
29
-
30
-
31
-
32
-
33
-
34
-
35
-
36
-
37
-
38
-
39
-
40
-
41
-
42
-
43
-
44
-
45
-
46
-
47
-
48
-
49
-
50
-
51
-
52
-
53
-
54
-
55
-
56
-
57
-
58
-
59
-
60
-
61
-
62
-
63
-
64
-
65
-
66
-
67
-
68
-
69
-
70
-
71
-
72
-
73
-
74
-
75
-
76
-
77
-
78
-
79
 |
 |

4-128-127-
12
(2)
© 2009 Sony Corporation
Data
Projector
Operating Instructions
Before operating the unit, please read this manual thoroughly
and retain it for future reference.
VPL-DX10/DX11/DX15
Not all models are available in all countries and area. Please check
with your local Sony Authorized Dealer.