TEAC DP-008 DP-008 Owner's Manual - Page 44
Making the first recording, This is the Last Recording Point LRP
 |
View all TEAC DP-008 manuals
Add to My Manuals
Save this manual to your list of manuals |
Page 44 highlights
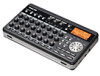
6 - Basic Recording Use the F2 (˙¥) key to switch between INPUT A and B. Use the F3 (§) and F4 (¶) keys to select parameters. Use the DATA wheel to adjust the parameters. Press the F1 (BACK) key to return to the previous INPUT SETTING screen. 3 After making the settings, press the HOME key to return to the Home Screen. NOTE When input EQ is ON for an input, the input is shown on the Home Screen as in the illustration below. Input EQ is ON Making the first recording Before beginning the following recording procedures, prepare your monitors (headphones), connect a recording source to an input and assign that input as the recording source for a track. 1 Press the REC key of the track to record on. The REC indicator blinks red (that status is called "record standby"). A maximum of two tracks can be recorded simultaneously. If you press a different REC key when the REC indicators of two tracks are already blinking, the track that was put into record standby first will become inactive and the REC indicator will turn off. For example, if you press the REC keys for TRACK 1, TRACK 2 and TRACK 3 in that order, TRACK 1, which was pressed first, will no longer be in record standby, but TRACK 2 and TRACK 3, which were 44 TASCAM DP-008 pressed afterwards, will be in record standby. 2 Set the recording level. Turn the (INPUT A or INPUT B) TRIM knob to adjust the input level of the input channel. Watch the display meters and the OL indicator above and to the left of the TRIM knob while setting the level suitably. At the same time, confirm that sound heard from the headphones or the monitor system is not distorted. NOTE • The level meter of the track that has an input signal assigned to it shows the input level after the application of input EQ. Therefore, when using input EQ, you should also watch the level meter of the track that has the affected input signal assigned to it. • The OL indicator lights if the input is too loud. • If the OL indicator stays lit even when you lower the TRIM knob, lower the output level on the signal source connected to the input. 3 Press the playback (Á) key while pressing and holding the record (-) key. Recording starts and the record (-) key indicator lights red. The track REC indicator changes from blinking to lit. 4 Press the stop (ª) key to stop recording. 5 To return to the starting point of the recording, press the key while pressing and holding the stop (ª) key. (This is the Last Recording Point (LRP) function.) To go to the beginning of the song (00:00:00:00), press the Ô key while pressing and holding the stop (ª) key. (This is the Return To Zero (RTZ) function) 6 Press the playback (Á) key to play the recorded track. Use the track LEVEL knob and the MASTER LEVEL knob to adjust the playback level. Use the VOLUME dial or the volume on your monitoring system to adjust the final
-
 1
1 -
2
-
3
-
4
-
5
-
6
-
7
-
8
-
9
-
10
-
11
-
12
-
13
-
14
-
15
-
16
-
17
-
18
-
19
-
20
-
21
-
22
-
23
-
24
-
25
-
26
-
27
-
28
-
29
-
30
-
31
-
32
-
33
-
34
-
35
-
36
-
37
-
38
-
 39
39 -
 40
40 -
 41
41 -
 42
42 -
 43
43 -
 44
44 -
 45
45 -
 46
46 -
 47
47 -
 48
48 -
 49
49 -
50
-
51
-
52
-
53
-
54
-
55
-
56
-
57
-
58
-
59
-
60
-
61
-
62
-
63
-
64
-
65
-
66
-
67
-
68
-
69
-
70
-
71
-
72
-
73
-
74
-
75
-
76
-
77
-
78
-
79
-
80
-
81
-
82
-
83
-
84
-
85
-
86
-
87
-
88
 |
 |
