TRENDnet TEW-634GRU User's Guide - Page 56
Public Port, LAN Server, Update, Delete, Cancel, Special AP, Enable
 |
UPC - 710931600629
View all TRENDnet TEW-634GRU manuals
Add to My Manuals
Save this manual to your list of manuals |
Page 56 highlights
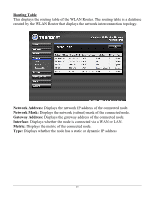
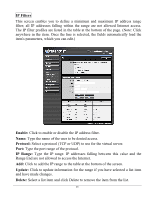
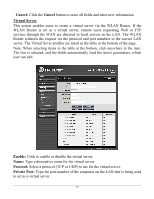
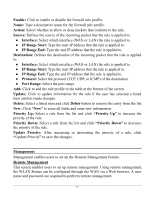
Public Port: Type the port number on the WAN that will be used to provide access to the virtual server. LAN Server: Type the LAN IP address that will be assigned to the virtual server. Add: Click to add the virtual server to the table at the bottom of the screen. Update: Click to update information for the virtual server if the user has selected a listed item and has made changes. Delete: Select a listed item and click "Delete" to remove the item from the list. Cancel: Click Cancel button to erase all fields and enter new information. Special AP This screen enables users to specify special applications, such as games which require multiple connections that are blocked by NAT. The special applications profiles are listed in the table at the bottom of the page. Note: When selecting items in the table at the bottom, click anywhere in the item. The line is selected, and the fields automatically load the item's parameters, which user can edit. Enable: Click to enable or disable the application profile. When enabled, users will be able to connect to the application via the WLAN Router's WAN connection. Click "Disabled" on a profile to prevent users from accessing the application on the WAN connection. 50
-
 1
1 -
2
-
3
-
4
-
5
-
6
-
7
-
8
-
9
-
10
-
11
-
12
-
13
-
14
-
15
-
16
-
17
-
18
-
19
-
20
-
21
-
22
-
23
-
24
-
25
-
26
-
27
-
28
-
29
-
30
-
31
-
32
-
33
-
34
-
35
-
36
-
37
-
38
-
39
-
40
-
41
-
42
-
43
-
44
-
45
-
46
-
47
-
48
-
49
-
50
-
 51
51 -
 52
52 -
 53
53 -
 54
54 -
 55
55 -
 56
56 -
 57
57 -
 58
58 -
 59
59 -
 60
60 -
 61
61 -
62
-
63
-
64
-
65
-
66
-
67
-
68
-
69
-
70
-
71
-
72
-
73
 |
 |