Toshiba 24V4260U User Guide
Toshiba 24V4260U Manual
 |
View all Toshiba 24V4260U manuals
Add to My Manuals
Save this manual to your list of manuals |
Toshiba 24V4260U manual content summary:
- Toshiba 24V4260U | User Guide - Page 1
LED TV/DVD Combination User's Guide: 24V4210U 24V4260U If you need assistance: Toshiba's Support Web site support.toshiba.com Call Toshiba Customer Support Center: Within the United States at (800) 631-3811 Outside the United States at (949) 583-3050 For more information, see "Troubleshooting" on - Toshiba 24V4260U | User Guide - Page 2
Toshiba LED TV. This manual will help you use the many exciting features of your new LED TV/DVD combination. Before operating your LED TV/DVD combination, carefully read this manual not always supported on the UL, CSA, ETL). • Follow all instructions supplied by the display and wall mount - Toshiba 24V4260U | User Guide - Page 3
the manufacturer's instructions. 8) Do ALWAYS contact a service technician to inspect the TV any time it has service. 21) NEVER route the product's power cord inside a wall or similar enclosed area. 22) Never modify this equipment. Changes or modifications may void: a) the warranty, and b) the user - Toshiba 24V4260U | User Guide - Page 4
may weaken and crack over time from the combined effects of chemical agents and mechanical stress (such as the weight of the TV). Failure to follow these instructions could result in serious injury and/or permanent damage to TV and TV pedestal. • Always unplug the TV before cleaning. Gently wipe the - Toshiba 24V4260U | User Guide - Page 5
servicing not specified in this manual to a Toshiba Authorized Service Provider. 46) If you have the TV serviced: • Ask the service TV on a sturdy, level surface that can support the weight of the TV. 3) Be sure to secure the TV the rear of the TV. 3) Follow the instructions provided with your wall - Toshiba 24V4260U | User Guide - Page 6
stand from the TV. CAUTION: Always place the TV on the floor or a sturdy, level, stable surface that can support the weight of the hours, the unit will have warmed up and evaporated any moisture. Leaving the TV connected to the wall outlet will help prevent moisture condensation in the unit. - Toshiba 24V4260U | User Guide - Page 7
liability. About this User's Guide This User's Guide explains the basic instructions of this LED TV/DVD combination. Some TV/DVD combination. Refer to the instruction notes of discs. The following symbol may appear on the TV screen during operation. On Video CDs This LED TV/DVD combination supports - Toshiba 24V4260U | User Guide - Page 8
trouble with the operation of the LED TV/DVD combination. Because of problems and TV/DVD combination, please contact Toshiba Customer Service. is a trademark of DVD Format/Logo Licensing Corporation. FCC Declaration of Conformity Compliance Statement (Part 15): The Toshiba 24V4210U/24V4260U LED TV - Toshiba 24V4260U | User Guide - Page 9
and are not an indication of malfunction; therefore, Toshiba is not responsible for perceived issues resulting from these symptoms. 1) An afterimage (ghost) may appear on the screen if a fixed, non-moving image appears for a long period of time. The afterimage is not permanent and will disappear in - Toshiba 24V4260U | User Guide - Page 10
INDIRECTLY FROM ANY TECHNICAL OR TYPOGRAPHICAL ERRORS OR OMISSIONS CONTAINED HEREIN OR FOR DISCREPANCIES BETWEEN THE PRODUCT AND THE MANUAL. IN NO EVENT SHALL TOSHIBA BE LIABLE FOR ANY INCIDENTAL, CONSEQUENTIAL, SPECIAL, OR EXEMPLARY DAMAGES, WHETHER BASED ON TORT, CONTRACT OR OTHERWISE, ARISING OUT - Toshiba 24V4260U | User Guide - Page 11
, top, and side panel controls and connections 20 Adjusting the screen angle 22 TV back panel connections 22 Chapter 2: Connecting Your TV 24 Overview of cable types 24 Coaxial cable (F-type 24 Standard A/V cables (red/white/yellow 25 Component video cables (red/green/blue) ........25 HDMI - Toshiba 24V4260U | User Guide - Page 12
channel skip 54 Setting the HDMI® audio mode 55 Viewing the Digital Signal Meter 57 Setting the time zone 57 Viewing the system status 58 Reset Factory Defaults 58 Chapter 6: Using the TV's features 59 Selecting the video input source 59 Labeling the video input sources 61 Tuning channels - Toshiba 24V4260U | User Guide - Page 13
Contents 13 Favorites browser 64 Elements of the Channel Browser 65 Adding and clearing channels and inputs in the History List 67 Tuning channels 67 Tuning to a specific channel (programmed or unprogrammed 67 Tuning to the next programmed channel ..........68 Switching between two channels - Toshiba 24V4260U | User Guide - Page 14
Chip 88 Downloading an additional rating system .........89 Displaying ratings 92 Blocking TV programs by Canada rating ...........92 Unlocking programs temporarily 93 Using the music files at the same time 104 Setting the sleep timer 106 Automatic Power Down 107 No Signal Power Down 108 - Toshiba 24V4260U | User Guide - Page 15
information 112 Understanding the auto power off feature 113 Understanding the last mode memory feature ......113 Chapter 7: Using the TV's Advanced Features 114 Using the advanced picture settings 114 Dynamic Contrast 114 Static Gamma 115 Color temperature 115 CableClear® digital Noise - Toshiba 24V4260U | User Guide - Page 16
/VCD/CD 141 Disc playback setup 143 Chapter 10: Troubleshooting 147 General troubleshooting 147 Picture problems 148 Sound problems 149 Remote control problems 150 Channel tuning problems 150 Closed caption problems 151 Rating blocking (V-Chip) problems 151 No HDMI® CEC operation 151 HDMI - Toshiba 24V4260U | User Guide - Page 17
152 light indicator 153 Power indicator 153 If the problem persists after trying the solutions ..153 Appendix A: Specifications 154 Television system 154 Channel coverage 154 Power source 155 Power maximum current 155 Power consumption 155 - Toshiba 24V4260U | User Guide - Page 18
Chapter 1 Introduction Features The following are just a few of the many exciting features of your new Toshiba wide screen, integrated HD, LED TV/DVD combination: ❖ Integrated Digital Tuning (8VSB ATSC and QAM)- Eliminates the need for a separate digital converter set-top box (in most cases). ❖ 1920 - Toshiba 24V4260U | User Guide - Page 19
, care, and service information. Keep this manual for future reference. 1 To choose a location for the TV: ❖ Read "Important notes about your TV/DVD combination" on page 9. ❖ Place the TV on the floor or a sturdy, level, stable surface that can support the weight of the unit. Secure the TV to a wall - Toshiba 24V4260U | User Guide - Page 20
, see chapters 8 and 9. 12 For help, refer to "Troubleshooting" on page 147. 13 For technical specifications and warranty information, see "Specifications" on page 154. 14 For the End User License Agreement, see "License Agreement" on page 160. TV front, top, and side panel controls and connections - Toshiba 24V4260U | User Guide - Page 21
arrow) buttons-Stops the disc playback in DVD mode; changes the channel when in TV mode. ( arrow) button-When an on-screen menu appears, the button functions the menu. When an on-screen menu appears, the MENU button on the TV's control panel functions as the OK button. 9 INPUT/EXIT-Changes the - Toshiba 24V4260U | User Guide - Page 22
adjusting the screen. (This feature is available on select models.) (Sample Illustration) Adjusting the screen angle TV back panel connections For explanations of cable types and connections, see "Overview of cable types" on page 24. 1 7 2 8 Power cord 3 4 56 (Sample Illustration) Back panel - Toshiba 24V4260U | User Guide - Page 23
Introduction 23 TV back panel connections 2 ANALOG AUDIO OUT-Analog audio outputs for connecting an audio optical audio input. 6 ANT/CABLE-Antenna input that supports analog (NTSC) and digital (ATSC) off-air antenna signals and analog and digital Cable TV (QAM) signals. 7 HDMI IN-High-Definition - Toshiba 24V4260U | User Guide - Page 24
can purchase cables from most stores that sell audio/video devices. Coaxial cable (F-type) (Sample Illustration) Coaxial cable Coaxial (F-type) cable connects your antenna, cable TV service, and/or cable converter box to the ANT/CABLE input on your - Toshiba 24V4260U | User Guide - Page 25
audio and composite video output. These cables (and the related inputs on your TV) are typically color-coded according to use: yellow for video, red for stereo connects video devices with component video output. (ColorStream® is Toshiba's brand of component video.) These cables are typically color- - Toshiba 24V4260U | User Guide - Page 26
cable connects a computer to the TV's PC IN terminal, see " manual are representative of typical device connections only. The input/output terminals on your devices may differ from those illustrated herein. For details on connecting and using your specific devices, refer to each device's User's Guide - Toshiba 24V4260U | User Guide - Page 27
box controls to change channels. To view the VCR or camcorder video: Turn ON the VCR or camcorder video. Select VIDEO input source on the TV.* *To select the video input source, press the INPUT button on the remote control, see "Selecting the video input source" on page 59. To program - Toshiba 24V4260U | User Guide - Page 28
Red White (Sample Illustration) Connecting a camcorder You will need standard A/V cables. To view the camcorder video, select the VIDEO input source on the TV.* *To select the video input source, press the INPUT button on the remote control, see "Selecting the video input source" on page 59. NOTE - Toshiba 24V4260U | User Guide - Page 29
) from the DVD player to the COLOR STREAM HD terminal in the TV. The COLOR STREAM HD terminal can be used to display Progressive (480p, 720p) and Interlaced (480i, 1080i). Please note that 1080p is not supported. Check the User's Guide of the DVD player in order to determine the best output signal - Toshiba 24V4260U | User Guide - Page 30
TV. The COLOR STREAM HD terminal can be used to display Progressive (480p, 720p) and Interlaced (480i, 1080i). Please note that 1080p is not supported. Check the User's Guide receiver. Select the ColorStream® HD video input source on the TV.* *To select the video input source, press the INPUT button - Toshiba 24V4260U | User Guide - Page 31
DVI device to the HDMI® input The HDMI® input on your TV receives digital audio and uncompressed digital video from an HDMI® source formats. For detailed signal specifications, see "HDMI® signal formats" on page 158. Supported Audio format: Linear PCM, sampling rate 32/44.1/ 48 kHz. NOTE To - Toshiba 24V4260U | User Guide - Page 32
required (see illustration). (Sample Illustration) Connecting an HDMI® device To view the HDMI® device video: Select HDMI 1 or HDMI 2 video input source on the TV.* *To select the video input source, press the INPUT button on the remote control, see "Selecting the video input source" on page 59. To - Toshiba 24V4260U | User Guide - Page 33
Illustration) DVI Device connections NOTE To ensure that the HDMI® or DVI device is reset properly: ❖ When turning on your electronic components, turn on the TV first, and then the HDMI® or DVI device. ❖ When turning off your electronic components, turn off the HDMI® or DVI device first, and then - Toshiba 24V4260U | User Guide - Page 34
You can control the basic functions of connected audio/video devices using the TV's remote control if you connect a HDMI® CEC compatible audio receiver or must also be set. For details, see the operation manual for each device. ❖ The HDMI® CEC feature uses the CEC technology as regulated by the - Toshiba 24V4260U | User Guide - Page 35
Connecting Your TV 35 Connecting a digital audio system ❖ This feature is limited to models incorporating Toshiba's HDMI® CEC. However, Toshiba is not liable for those operations. For compatibility information, refer to the individual instruction manuals for your other devices that have CEC - Toshiba 24V4260U | User Guide - Page 36
36 Connecting Your TV Connecting a digital audio system 3 Press the ( / arrow) buttons to select Audio Setup, and then press the INPUT button. (Sample Image) Audio Setup screen 4 Press the ( / - Toshiba 24V4260U | User Guide - Page 37
audio cable. For more information, see "Overview of cable types" on page 24. (Sample Illustration) Computer connections To use a computer, set the monitor output resolution on the computer before connecting it to the TV. The supported signal formats are VGA, SVGA, XGA, WXGA and SXGA. For detailed - Toshiba 24V4260U | User Guide - Page 38
with the HDMI 1 analog audio input terminals. For configuration information, see "Setting the PC Audio" on page 98. ❖ Some computer models cannot be connected to this TV. ❖ If the computer has a compatible mini D-sub15-pin terminal, an adapter is not required. ❖ Depending on the content's title and - Toshiba 24V4260U | User Guide - Page 39
audio cables may not be necessary, depending on computer hardware and setup. TV back panel Computer PC audio cable PC audio output HDMI to DVI adapter cable (Sample Illustration) Connections to HDMI® terminal The supported signal formats are VGA, SVGA, XGA, WXGA, SXGA, 480i (60Hz), 480p (60Hz - Toshiba 24V4260U | User Guide - Page 40
Chapter 3 Using the Remote Control Using the remote control The remote control can operate your LED TV/DVD combination and control the basic functions of connected audio/video devices if you connect a HDMI® CEC compatible audio receiver or playback device, see "HDMI® - Toshiba 24V4260U | User Guide - Page 41
. ❖ Always remove batteries from the remote if they are dead or if the remote control is not to be used for an extended period of time. This prevents battery acid from leaking into the battery compartment - Toshiba 24V4260U | User Guide - Page 42
control Learning about the remote control The buttons used for operating the LED TV/DVD combination are described here. For the HDMI® CEC remote control 13 15 14 16 19 17 20 18 21 23 22 25 24 26 28 27 30 29 32 31 34 33 36 35 38 37 40 39 (Sample Illustration) - Toshiba 24V4260U | User Guide - Page 43
accesses the sleep timer, see "Setting the sleep timer" on page 106. 13 The DISPLAY/INFO button displays TV status information as well as program details, when available, see "Displaying TV status information" on page 112. 14 The CH ( / arrow) buttons cycle through programmed channels (when no on - Toshiba 24V4260U | User Guide - Page 44
channel/Subtitle" on page 131. 19 The SETUP/MENU button accesses the main TV menu system, see "Navigating the menu system" on page 48; configures the disc ( ) select or adjust programming menus when a menu is on-screen. 24 The CANCEL/EXIT button closes on-screen menus, or returns you to the - Toshiba 24V4260U | User Guide - Page 45
Using the Remote Control 45 Learning about the remote control 30 The STOP button stops playback of the loaded disc, see "Playing an audio file" on page 136. 31 The SKIP forward button skips forward to locate later DVD chapters, see "Playing an audio file" on page 136. 32 The SKIP reverse button - Toshiba 24V4260U | User Guide - Page 46
contains the Terrestrial and System Status menus. To open the Installation menu, press the MENU button on the remote control or MENU on the TV control panel, open the Setup menu, select Installation, and then press the OK button. Icon Picture Sound Item Mode Picture Settings Noise Reduction Game - Toshiba 24V4260U | User Guide - Page 47
menu contains the Terrestrial and System Status menus. To open the Installation menu, press the MENU button on the remote control or MENU on the TV control panel, open the Setup menu, select Installation, and then press the OK button. - Toshiba 24V4260U | User Guide - Page 48
System Status Item Input Configuration Channel Program Channel Options Time Zone Signal Meter System Information Option Opens the / / / arrow) buttons on the remote control or the arrow) buttons on the TV control panel to move in the corresponding direction in the menu. 3 Press the OK button - Toshiba 24V4260U | User Guide - Page 49
automatically after a few minutes. 5 To close a menu instantly, press the EXIT button. NOTE The menu background may sometimes appear black, depending on the signal the TV is receiving. This is not a sign of malfunction. - Toshiba 24V4260U | User Guide - Page 50
Initial Setup When you first turn on or reset the TV, the Initial Setup window will appear. 1 In the Menu Language field, press the ( / arrow) buttons. 2 Press the ( / arrow) buttons to select Time Zone Setup and set your desired time zone, using the ( / arrow) buttons, and then press the OK button - Toshiba 24V4260U | User Guide - Page 51
Setting up your TV 51 Initial Setup Menu language You can choose from three different menu language settings (English, Français, and Español). Your selection is the language - Toshiba 24V4260U | User Guide - Page 52
TV's memory. Auto Tuning You can configure the TV to detect all active channels in your area and store them in its memory. Then you can manually have to repeat the programming process again unless your Cable TV service lineup changes significantly. To program channels automatically: 1 Configure - Toshiba 24V4260U | User Guide - Page 53
- Channel Program selection (Sample Image) Auto tuning program channels The TV will automatically cycle through all the antenna channels, and store all active channels in the channel memory. While the TV is cycling through the channels, the message "Scanning channels, please wait - Toshiba 24V4260U | User Guide - Page 54
54 Setting up your TV Setting channel skip Setting channel skip To prevent a channel from being viewed, you can set it to be skipped. 1 From the Setup menu, highlight Installation, - Toshiba 24V4260U | User Guide - Page 55
Setting up your TV 55 Setting the HDMI® audio mode 2 Press the ( / arrow) buttons to not been set yet, a warning message appears. 3 To save the setting, press the EXIT button. To manually add digital sub-channels on a physical channel: Use the Channel Numbers and the Dash/100 button on the remote - Toshiba 24V4260U | User Guide - Page 56
Auto Digital Analog Description: When viewing the HDMI 1 input, if digital audio from the HDMI® input is available, it will be output. If not, the TV will automatically detect and output analog audio from the PC Audio input. When viewing the HDMI 1 input, digital audio from the HDMI® input will be - Toshiba 24V4260U | User Guide - Page 57
button. To return to normal viewing, press the CANCEL button. Setting the time zone The Time Zone setup allows you to specify the correct time zone for your region. This feature allows the TV status information to display the correct time zone information for your viewing area. 1 In the Setup menu - Toshiba 24V4260U | User Guide - Page 58
58 Setting up your TV Viewing the system status To set the Daylight Saving Time status, press the ( / arrow) buttons to arrow) buttons to scroll through the menu bar to select Factory Defaults or Support Information. The related information appears. To close the screen and return to the Installation - Toshiba 24V4260U | User Guide - Page 59
features Selecting the video input source To select the video input source to view: 1 Press the INPUT button on the remote control or TV control panel. 2 Choose from the following options: ❖ Press 0-5. ❖ Repeatedly press the ( / arrow) buttons on the remote control, and then press the OK button to - Toshiba 24V4260U | User Guide - Page 60
Navigate (Sample Image) Input Selection screen NOTE ❖ You can label the video input sources according to the specific devices you have connected to the TV, see "Labeling the video input sources" on page 61. ❖ Sources can be "hidden," see "Labeling the video input sources" on page 61. ❖ "No video - Toshiba 24V4260U | User Guide - Page 61
Using the TV's features 61 Labeling the video input sources Press the INPUT button repeatedly to highlight the desired input source, and then press the EXIT button. NOTE ❖ - Toshiba 24V4260U | User Guide - Page 62
62 Using the TV's features Labeling the video input sources To label the video input sources: 1 Press the MENU button to open the Preferences menu. 2 Highlight Input Labeling, and - Toshiba 24V4260U | User Guide - Page 63
Using the TV's features 63 Tuning channels using the Channel Browser Input labeling example: The screen below left shows the default Input Selection screen (with none of the - Toshiba 24V4260U | User Guide - Page 64
64 Using the TV's features Tuning channels using the Channel Browser Favorites browser then press the ( / arrow) buttons to select On/Off. NOTE The History List will be cleared every time the TV is powered off. 4 Press the ( arrow) button to highlight ANT/CABLE List, and then press the ( / arrow - Toshiba 24V4260U | User Guide - Page 65
Using the TV's features 65 Tuning channels using the Channel Browser 5 Press the ( arrow) button to highlight Inputs List, and then press the ( / arrow) buttons to select On/ - Toshiba 24V4260U | User Guide - Page 66
. To tune to a channel or input in Browse mode: 1 While watching TV, press the BACK CB/NEXT CB buttons to display the Channel Browser and surf Browser. To tune to a channel or input in Select mode: 1 While watching TV, press the BACK CB/NEXT CB buttons to display the Channel Browser and surf back - Toshiba 24V4260U | User Guide - Page 67
previously viewed channel or input. Clearing channels from the History List: ❖ Reconfiguring the ANT/CABLE input will clear the History List. ❖ Turning off the TV will clear the History List. Tuning channels To tune to the next programmed channel, use the CH Up/Down buttons on the remote control or - Toshiba 24V4260U | User Guide - Page 68
to switch between two channels without entering an actual channel number each time. 1 Select the first channel you want to view. 2 Select on the remote control. The previous channel will display. Each time you press the CH RTN button, the TV will switch back and forth between the last two channels - Toshiba 24V4260U | User Guide - Page 69
RTN button, the memorized channel will be tuned. The TV will return to the memorized channel one time only. Once you press the CH RTN button and then to you. You can save separate picture size preferences for each input on your TV. To select the picture size: 1 Press the MENU button on the remote. - Toshiba 24V4260U | User Guide - Page 70
70 Using the TV's features Selecting the picture size To select the picture size using the menus: 1 Select Picture Size in the Theater Settings menu. 2 Press the ( / arrow) buttons - Toshiba 24V4260U | User Guide - Page 71
Using the TV's features 71 Selecting the picture size TheaterWide 1 This setting is for viewing in 4:3 format programs. (Sample Illustration) Picture size - TheaterWide 1 The center of the picture - Toshiba 24V4260U | User Guide - Page 72
72 Using the TV's features Selecting the picture size Native These settings are for viewing DVHS movies, Video Games, or computer graphics. ❖ None of the picture is hidden. NOTE ❖ This mode is supported only for HDMI® (1080i, 1080p, 720p, 480i, and 480p), ColorStream® (1080i and 720p), and ANT/ - Toshiba 24V4260U | User Guide - Page 73
Using the TV's features 73 Scrolling the TheaterWide® picture (TheaterWide 2 and 3 only) Normal This setting is for viewing VGA, SVGA, XGA, WXGA, and SXGA sources. (Sample Illustration) Picture - Toshiba 24V4260U | User Guide - Page 74
74 Using the TV's features Using the Auto Aspect feature 2 Highlight Theater Settings, and then is from -5 to +10. Using the Auto Aspect feature When this feature is set to On, the TV will automatically select the picture size when one of the following input sources is received: ❖ A 480i, 480p - Toshiba 24V4260U | User Guide - Page 75
cinema mode When you view a DVD (3:2 pulldown processed) from a DVD player connected to the VIDEO, ColorStream® HD (component video), or HDMI® inputs on the TV, smoother motion can be obtained by setting the Cinema Mode to Film. To set the Cinema Mode to Film: (available for 480i and 1080i signals - Toshiba 24V4260U | User Guide - Page 76
is left in FREEZE mode for more than 15 minutes, the FREEZE mode will automatically release and the TV returns to normal video. Adjusting the picture Selecting the picture mode You can select your desired picture settings from the modes described below. Mode: Dynamic - Toshiba 24V4260U | User Guide - Page 77
Using the TV's features 77 Adjusting the picture 2 Highlight Mode, and then press the OK button. (Sample Image) Mode screen 3 Press the ( / arrow) buttons, and then press the - Toshiba 24V4260U | User Guide - Page 78
78 Using the TV's features Using closed captions **DynaLight®: This function -screen display of the dialogue, narration and sound effects of TV programs and videos that are closed captioned (usually marked "CC" in program guides). ❖ Text-An on-screen display of information not related - Toshiba 24V4260U | User Guide - Page 79
Using the TV's features 79 Using closed captions To view captions, highlight CC1, CC2, CC3, or CC4. (CC1 displays translation of the primary language in your area.) (Sample - Toshiba 24V4260U | User Guide - Page 80
80 Using the TV's features Using closed captions Digital CC settings You can customize the closed caption display characteristics by changing the background color, opacity, text size, type, edge, - Toshiba 24V4260U | User Guide - Page 81
TV's features 81 Adjusting the audio caption setting will automatically change back to the current Base CC Mode setting. You can also use the CC Selector to select digital closed caption services, if available. When such services instructions. Adjusting the the sound. Each time you press the MUTE - Toshiba 24V4260U | User Guide - Page 82
the OK button. (Sample Image) Digital Audio Selector screen 3 Press the ( / arrow) buttons to select the desired service. 4 Press the EXIT button. Selecting stereo/SAP broadcasts The multi-channel TV sound (MTS) feature allows you to output high-fidelity stereo sound. MTS also can transmit a second - Toshiba 24V4260U | User Guide - Page 83
SOUND, MTS. 2 Press the ( / arrow) buttons to select SAP. Press the EXIT button. NOTE ❖ A second audio program (SAP) can be heard only on those TV stations that offer it. For example, a station might broadcast another language as a second audio program. If you have SAP on, you will see the current - Toshiba 24V4260U | User Guide - Page 84
84 Using the TV's features Adjusting the audio To adjust the audio quality: 1 Press the MENU button to open the Sound menu. 2 Highlight Audio Setup, and then press the - Toshiba 24V4260U | User Guide - Page 85
audio output format You can select the optical audio output format when you connect a Dolby® Digital decoder or other digital audio systems to the TV's Digital Audio Out terminal. To select the optical audio output format: 1 Press the MENU button to open the Sound menu. 2 Highlight Audio Setup, and - Toshiba 24V4260U | User Guide - Page 86
86 Using the TV's features Using the Locks menu 2 Highlight Audio Setup, and then press the OK button. 3 In the Dolby® Digital Dynamic Range Control field, select either Compressed. - Toshiba 24V4260U | User Guide - Page 87
Using the TV's features 87 Using the Locks menu 2 Press the ( arrow) button store PIN screen 3 Press the Channel Number buttons to enter a new four-digit code, enter the code a second time to confirm, and then press the OK button. The Locks/Active screen appears if the PIN code is already stored. - Toshiba 24V4260U | User Guide - Page 88
code is now active. NOTE The PIN code cannot be set to "0000." Using parental controls (for USA region) Blocking TV programs and movies by rating (V-Chip) Some TV programs and movies include signals that classify the content of the program (as unsuitable for younger viewers). The V-Chip feature in - Toshiba 24V4260U | User Guide - Page 89
screen appears. Downloading an additional rating system In the future, an additional rating system may become available for use in selectively blocking TV programs and movies. NOTE The currently tuned station must be receiving a digital signal before an additional rating system can be downloaded - Toshiba 24V4260U | User Guide - Page 90
the OK button. NOTE ❖ The additional rating system can only be downloaded one time. You will not be able to download any updates to the rating system should controlled by the TV or Toshiba, nor is the availability of an additional rating system determined or controlled by Toshiba. Similarly, the - Toshiba 24V4260U | User Guide - Page 91
's features 91 Using parental controls (for USA region) Rating system Independent rating system for broadcasters: Ratings: TV-MA TV-14 TV-PG TV-G TV-Y7, TV-Y7FV TV-Y Description and Content themes: Mature Audience Only (This program is specifically designed to be viewed by adults and therefore - Toshiba 24V4260U | User Guide - Page 92
in the INFO screen. If rating information is not provided, no rating will appear in the INFO screen. (Sample Image) Enable Rating Blocking screen Blocking TV programs by Canada rating 1 Press the MENU button to open the Locks menu. 2 Press the ( arrow) button to display the PIN code entering screen - Toshiba 24V4260U | User Guide - Page 93
If you try to tune to a program that exceeds the rating limits you have set, the TV will enter program lock mode and a warning message appears on the screen. Follow the instructions to temporarily unlock the program. (Sample Illustration) Warning - exceeded rating limit You can either temporarily - Toshiba 24V4260U | User Guide - Page 94
94 Using the TV's features Using the input lock feature To temporarily unlock the program: 1 Press the MUTE button. 2 Enter your four-digit PIN code, and then press the - Toshiba 24V4260U | User Guide - Page 95
, press the OK button. 8 Press the EXIT button. Using the GameTimer® You can use the GameTimer® to set a time limit for playing a video game (30-120 minutes). When the GameTimer® expires, the TV enters Input Lock mode and locks out the input source for the video game device. To set the GameTimer - Toshiba 24V4260U | User Guide - Page 96
Off, see "Using the GameTimer®" on page 95. NOTE ❖ A message appears when 10 minutes, 3 minutes, and 1 minute are remaining. ❖ If the TV loses power with time remaining, the TV will enter Input Lock mode when power is restored (as if the GameTimer had been activated). You must deactivate the Input - Toshiba 24V4260U | User Guide - Page 97
a few seconds until the volume icon appears. Using the PC settings feature You can view an image from a PC on the TV screen. When a PC is connected to the TV's PC IN terminal, you can use the PC Settings feature to make adjustments to the image. If the edges of the picture - Toshiba 24V4260U | User Guide - Page 98
98 Using the TV's features Using the PC settings feature NOTE The screen is disrupted momentarily format. Setting the PC Audio You can output or mute sound from your computer when connecting it to your TV, using the AUDIO IN terminal and PC audio cable. To set the PC Audio: 1 Press the MENU - Toshiba 24V4260U | User Guide - Page 99
Using the TV's features 99 Using the Media Player Using the Media Player Using Media Player 1920 x 1080 pixels Music Player specifications: ❖ File format: MP3 ❖ Sampling frequency: 16 kHz, 22.05 kHz, 24 kHz, ❖ 32 kHz, 44.1 kHz, 48 kHz ❖ Bit rate: from 8 to 320 kbps ❖ Maximum number of files: - Toshiba 24V4260U | User Guide - Page 100
Toshiba cannot and does not grant such permission. ❖ Depending on the file size and amount in your USB storage device, it may take some time Media Player Auto Start: 1 Gently insert a supported USB storage device to the USB port on the rear side of the TV. A prompt will appear. NOTE If you - Toshiba 24V4260U | User Guide - Page 101
Using the TV's features Using the Media Player 101 2 Press the ( / arrow) prompt will disappear after about 10 sec. ❖ If Auto Start is set to off, you can start the Media Player manually. Manual Start: 1 Press the MENU button to open the Setup menu. 2 Press the ( arrow) button to select Media - Toshiba 24V4260U | User Guide - Page 102
102 Using the TV's features Using the Media Player This view allows you to files located in the selected directory shall be displayed. This view allows you to change the photo content manually. When moving from Multi View to the Single View, the currently selected photo shall be displayed. 1 Press - Toshiba 24V4260U | User Guide - Page 103
Using the TV's features Using the Media Player 103 Slide show This view allows you to Press the MENU button to open the Quick Menu. 2 Press the ( / arrow) buttons to select either Interval Time or Repeat. 3 Press the ( / arrow) buttons to adjust the setting, and then press the RETURN button. - Toshiba 24V4260U | User Guide - Page 104
104 Using the TV's features Using the Media Player NOTE ❖ If playback finishes before the STOP button is pressed, the next file automatically starts to play from the beginning. ❖ Depending on the file size, it may take some time for playback to begin. To pause playback: ❖ Press the PAUSE button - Toshiba 24V4260U | User Guide - Page 105
Contents Photo Using the TV's features Using the Media Player 105 Description Description Photo list order New-From new to old (according to the date and time the picture was taken). Old-From old to new (according to the date and time the picture was taken). Single View mode Slide Show mode - Toshiba 24V4260U | User Guide - Page 106
adjust the SOUND menu functions from the Quick Menu. Setting the sleep timer You can set the sleep timer to turn off the TV after a set length of time (maximum of 12 hours). To set the sleep timer using the remote control: 1 Press the SLEEP button on the remote control to set - Toshiba 24V4260U | User Guide - Page 107
in 10-minute increments, (maximum of 12 hours). NOTE If a power failure occurs, the sleep timer setting may be cleared. To display the time remaining until the TV turns off, press the SLEEP button. NOTE A message displays on-screen when one minute is remaining on the sleep timer. To cancel the - Toshiba 24V4260U | User Guide - Page 108
that uses CEC technology and allows you to control Toshiba HDMI® CEC compatible devices from the TV remote control via an HDMI® connection. When the Enable enabled. HDMI® CEC playback device (DVD player, etc.) control With your TV's remote control, or using the HDMI® CEC Player Control menu, you can - Toshiba 24V4260U | User Guide - Page 109
Using the TV's features Using HDMI® CEC 109 Button: SKIP Reverse FF REV /// OK Accesses the top menu of the selected device Accesses the contents list when you press the OK button. At this time, the HDMI® CEC Player Control menu disappears. Accesses the Setup menu of a DVD player Accesses the top - Toshiba 24V4260U | User Guide - Page 110
device that is connected to the master HDMI® device using the TV's INPUT button, see "Selecting the video input source" on page 59. VOLUME and MUTE controls of Audio Receiver With your TV's remote control, you can adjust or mute the sound volume of the Audio - Toshiba 24V4260U | User Guide - Page 111
or adjust the sound volume, the sound will be output from the audio receiver's speakers even if TV Speakers has been selected. Turn the TV off and on again to output the sound from the TV speakers. To set the HDMI® CEC Setup: 1 From the Setup menu, highlight HDMI® CEC Setup and press - Toshiba 24V4260U | User Guide - Page 112
the factory defaults, highlight Reset and press the OK button. Displaying TV status information To display TV status information: ❖ Press the INFO button on the remote control. the INFO button again. Pressing the INFO button a third time will remove the entire banner. (Sample Illustration) Banner - Toshiba 24V4260U | User Guide - Page 113
feature to Off, see "No Signal Power Down" on page 108. ❖ If it is possible that you will be away from the TV for an extended period of time, you should unplug the power cord. Understanding the last mode memory feature If the power is cut off while you are viewing the - Toshiba 24V4260U | User Guide - Page 114
Chapter 7 Using the TV's Advanced Features Using the advanced picture settings Dynamic Contrast Dynamic Contrast detects changes in picture quality that affect the appearance of your contrast settings and - Toshiba 24V4260U | User Guide - Page 115
Using the TV's Advanced Features Using the advanced picture settings 115 4 Press the ( / arrow) buttons to select High, Middle, Low or Off. Static Gamma The static gamma feature - Toshiba 24V4260U | User Guide - Page 116
changes to Preference. CableClear® digital Noise Reduction The CableClear® digital Noise Reduction feature allows you to reduce visible interference in your TV picture. This may be useful when receiving a broadcast with a weak signal (especially a Cable channel) or playing a noisy video cassette or - Toshiba 24V4260U | User Guide - Page 117
Using the TV's Advanced Features Using the advanced picture settings 117 NOTE ❖ If the can use the Game Mode feature for shorter frame delays when playing a video game requiring split-second timing between the on-screen display and input from the controller (such as music creation and high-action - Toshiba 24V4260U | User Guide - Page 118
118 Using the TV's Advanced Features Using the advanced picture settings NOTE To use the Game Mode feature, the current Mode, toggle to Off in step 3 above, change the video input, or turn the TV off and then on again. NOTE You can change the video input by pressing INPUT on the remote control. - Toshiba 24V4260U | User Guide - Page 119
basics on how to play a disc. Basic playback (DVD/VCD/CD) 1 Press the POWER button on the TV control panel or on the remote control. The Power LED on the front of the LED TV/DVD combination changes to green. It may take approximately 10 seconds for a picture to appear on-screen - Toshiba 24V4260U | User Guide - Page 120
PLAY button. To stop playback, press the STOP button. Playback resume function: Your LED TV/DVD combination supports playback resume function. If you stopped the disc playback before it is completed, the LED TV/DVD combination records the stop point. Press the PLAY button to resume playback on the - Toshiba 24V4260U | User Guide - Page 121
CDs and CD-R/RW discs. Removing a disc 1 Press the EJECT button on the TV control panel or on the remote control. 2 Wait for the disc to be ejected Reconnect the power cord, then press the POWER button to turn on the LED TV/DVD combination again. ❖ If an incompatible disc is loaded, one of the - Toshiba 24V4260U | User Guide - Page 122
such cases, some playback features may not be available. You may refer to the instructions accompanying the DVD. ❖ Do not put any objects other than compatible discs in the disc slot. Doing so may cause damage to the LED TV/DVD combination. ❖ There may be a few seconds between the action of pressing - Toshiba 24V4260U | User Guide - Page 123
PLAY button. NOTE The sound is muted during frame by frame playback. Playing in slow motion (DVD/VCD) Press the SLOW button during playback. Each time you press the SLOW button, the slow motion speed changes. To resume normal playback, press the PLAY button. NOTE The sound is muted during slow - Toshiba 24V4260U | User Guide - Page 124
track number. Using Zoom (DVD/VCD) 1 Press the ZOOM button during playback. The view will zoom into the center of the image. Each time you press the ZOOM button, the scale increases by the following values: x2, x3, x4. (Sample Image) Disc zoom 2 Press the ( / / / arrow) buttons to pan - Toshiba 24V4260U | User Guide - Page 125
the PLAY button or the OK button to start playback. For Audio CDs and Video CDs, you can locate a scene by track number or record time. - Toshiba 24V4260U | User Guide - Page 126
markers per disc. NOTE The saved scene bookmarks are only accessible during the current session. Once you eject the disc or turn off the LED TV/DVD combination, all bookmarks will be cleared. - Toshiba 24V4260U | User Guide - Page 127
Advanced Disc Playback Scene bookmark 127 Bookmarking a scene (DVD/VCD) 1 During playback, press the MARKER button at the scene you would like to place the bookmark. (Sample Image) Disc scene bookmarking 2 Press the ( / arrow) buttons to select a blank marker, and then press the PLAY button. - Toshiba 24V4260U | User Guide - Page 128
128 Advanced Disc Playback Scene bookmark Viewing a scene bookmark (DVD/VCD) 1 Press the MARKER button to open the bookmark window. 2 Press the ( / arrow) buttons to select the saved marker. (Sample Image) Disc scene bookmarking 3 Press the PLAY button to start playback on the scene saved in the - Toshiba 24V4260U | User Guide - Page 129
Advanced Disc Playback Scene bookmark 129 The LED TV/DVD combination automatically starts repeat playback after finishing the current title or chapter. (Sample Image) Disc enabling repeat playback VCD: ❖ Press the PLAY MODE button - Toshiba 24V4260U | User Guide - Page 130
some DVDs. ❖ The title menu may simply be referred to a "menu" or "title" in the instructions supplied with the DVD. DVD menu (DVD) Some DVDs have an encoded menu that allows users to select a specific disc content, enable a particular DVD feature (e.g. subtitle or sound track language), or choose - Toshiba 24V4260U | User Guide - Page 131
. The available options are Stereo, Left, Right, and Mix. NOTE ❖ If the preferred language option is not heard after selecting it for several times, that language is not recorded on the disc. ❖ The sound track language selected is only applicable for the current session. When you stop playback - Toshiba 24V4260U | User Guide - Page 132
132 Advanced Disc Playback Playback information/VCD playback control To disable subtitles: Press the SUBTITLE button until Off appears. NOTE ❖ Not all DVDs have encoded subtitles. ❖ The subtitle selection may revert to the default language when you stop playback and try to play the DVD again. ❖ - Toshiba 24V4260U | User Guide - Page 133
User's Guide are meant only as a guide. Use of DVD/CD-RW discs for recording MP3 files is not recommended. You must obtain any required permission from copyright owners to download or use copyrighted content. Toshiba the ISO 9660 standard. ❖ This LED TV/DVD combination can read 2000 files per - Toshiba 24V4260U | User Guide - Page 134
can be played back, the file name is displayed (within 20 letters) on the screen. Long file names will be condensed. ❖ This LED TV/DVD combination does not support data disc burned using the Apple Mac OS (Hierarchical File System, HFS format). ❖ MP3/WMA/JPEG CDs cannot be used for recording purpose - Toshiba 24V4260U | User Guide - Page 135
/48 kbps, 44.1 kHz/48 to 92 kbps, 48 kHz/128 to 192 kbps A file recorded in mono (48 kHz/48 kbps) is not supported by this LED TV/DVD combination. About the file browser (Sample Image) File browser (CD) File icons: (Sample Image) File browser (CD) If a CD contains a mixture of - Toshiba 24V4260U | User Guide - Page 136
136 Advanced Disc Playback MP3, WMA, JPEG, and Audio CD operation Viewing image files in thumbnail mode: You can change the browsers view mode from list mode to thumbnail mode. This is convenient when browsing for JPEG files. 1 Press the DVD MENU button during JPEG playback. 2 Press the ( / / / - Toshiba 24V4260U | User Guide - Page 137
Advanced Disc Playback MP3, WMA, JPEG, and Audio CD operation 137 3 Press the PLAY button or the OK button to start playback. To stop playback, press the STOP button. NOTE ❖ If the current directory has more than eight files, press the ( / arrow) buttons to scroll the file list. ❖ To see folder - Toshiba 24V4260U | User Guide - Page 138
Audio CD operation Viewing a slide show If there are multiple JPEG files in the selected directory, you can view them in a slide show. The instructions on how to enable the slide show feature and set the interval period between pictures are listed below. 1 Open the file folder containing the JPEG - Toshiba 24V4260U | User Guide - Page 139
is not available when viewing JPEG images. ❖ During a slide show, the interval time between images may increase if the file size is too big. ❖ When an the current session. Once you eject the disc or turn off the LED TV/DVD combination, these modes will be disabled. Enabling repeat playback 1 During - Toshiba 24V4260U | User Guide - Page 140
140 Advanced Disc Playback MP3, WMA, JPEG, and Audio CD playback modes Programming the playback sequence 1 In the file browser, press the MARKER button to open the file list (Sample Image) Programming the playback sequence NOTE You can not select the same file twice or more. A JPEG file cannot - Toshiba 24V4260U | User Guide - Page 141
Advanced Disc Playback Customizing disc playback 3 Press the MARKER button, The programmed files appear in the Playlist. 141 (Sample Image) Programming the playback sequence 4 In the programmed file list, press the ( / arrow) buttons to select a file, and then press the PLAY button to start - Toshiba 24V4260U | User Guide - Page 142
142 Advanced Disc Playback Customizing disc playback 2 Press the ( / arrow) buttons to select a setup tab, and then press the ( arrow) button. The first setup option is highlight. (Sample Image) Configuring disc playback settings 3 Press the ( / arrow) buttons to select the setup option you wish - Toshiba 24V4260U | User Guide - Page 143
parental 147 control setting. Spdif Output Sets the sound format of the digital output. 147 NOTE These setup settings are retained in the LED TV/DVD combination's memory. It remains active even if the power is turned off. (Sample Image) Playback settings OSD Language Select the language for the - Toshiba 24V4260U | User Guide - Page 144
with a rating level to indicate the recommended audience age. You have the option to select the content rating level allowed for playback in your LED TV/DVD combination. Press the ( / arrow) buttons to select the allowable rating level, and then press the OK button. You will then need to type in - Toshiba 24V4260U | User Guide - Page 145
disc though it's indicated on the disc jacket. Playback restriction will not apply to these discs so make sure to restrict access to it manually. To temporarily cancel the parental restriction: 1 Load the restricted content DVD that you want to play. 2 Use the Channel Number buttons (0-9) to input - Toshiba 24V4260U | User Guide - Page 146
. If you forget the system password: 1 Make sure there is no disc in the disc slot. 2 Press and hold down the VOLUME (-) button on the TV control panel, and then press the number 4 button on the remote control for a few seconds. The "Initializing" message appears on-screen to indicate that the - Toshiba 24V4260U | User Guide - Page 147
General troubleshooting Before calling a service technician, review this chapter or visit the Toshiba technical support Web site at support.toshiba.com for possible causes/solutions for the problem you are experiencing. Before you begin to troubleshoot any problem, first unplug the TV from - Toshiba 24V4260U | User Guide - Page 148
Troubleshooting Picture problems Other problems. If your TV's problem is not addressed in this Troubleshooting chapter or the recommended solution has not worked, use the Reset Factory Defaults procedure, see "Reset Factory Defaults" on page 58. TV "Connecting Your TV" on page 24. Antenna reception - Toshiba 24V4260U | User Guide - Page 149
Troubleshooting Sound problems 149 Video Input Selection problems. If the Input Selection window does not appear when you press INPUT on the remote control or TV, press INPUT a second time. This will cause a change to the next video input source and display the Input Selection window. Poor display - Toshiba 24V4260U | User Guide - Page 150
Troubleshooting Remote control problems problems Remove all obstructions between the remote control and the TV. Replace the remote control's batteries, see "Installing batteries" on page 40. Your TV's remote control may not operate certain features on your external device. Refer to the User's Guide - Toshiba 24V4260U | User Guide - Page 151
device's settings, turn off your TV and unplug the power cord, then plug it in and turn on again. If several devices are connected, the HDMI® CEC feature may not operate properly. Read the instruction manual provided with the connected HDMI® CEC device. HDMI® problems HDMI® cables. Ensure that - Toshiba 24V4260U | User Guide - Page 152
Troubleshooting Media Player problems Legacy HDMI® sources. Some legacy HDMI® sources may not work properly with the latest HDMI® TV products, due to new standard adoption. Media Player problems are supported by this TV, see "Using the Media Player" on page 99. Disc playback problems Playback does - Toshiba 24V4260U | User Guide - Page 153
Troubleshooting light indicator 153 The audio sound track and/or subtitle language when the TV power is On. If the problem persists after trying the solutions Contact Toshiba at: Toshiba's Support Web site: support.toshiba.com. For technical support, call the Toshiba Customer Support Center: - Toshiba 24V4260U | User Guide - Page 154
and specifications are subject to change without notice. ❖ These models may not be compatible with features and/or specifications that 8VSB 64 QAM, 256 QAM; in-the-clear, unencrypted Channel coverage VHF UHF Cable TV 2 through 13 14 through 69 Mid band (A-8 through A-1, A through I) Super band - Toshiba 24V4260U | User Guide - Page 155
Audio power 0.65 A (maximum current) 0.2W (Standby mode) 0.65 A (maximum current) 0.2W (Standby mode) 24V4210U 24V4260U 5W + 5W 5W + 5W Speaker type 24V4210U 24V4260U Two 3 5/8 x 1 x 7/8 inches (91 x 25 x 23mm) Two 3 5/8 x 1 x 7/8 inches (91 x 25 x 23mm) Video/audio terminals Video/audio - Toshiba 24V4260U | User Guide - Page 156
156 Specifications Video/audio terminals ColorStream® (component video) HD input Video Audio Y: 1V(p-p), 75 ohm, negative sync. Y: 1V(p-p), 75 ohm, negative sync. PB: 0.7 V(p-p), 75 ohm Suggested formats: 1080i, 720p, 480p, 480i 200 mV(rms) (-20dBFS, 47K ohm or greater) - Toshiba 24V4260U | User Guide - Page 157
; 32/44.1/48 kHz sampling frequency; 16/ 20/24 bits per sample Digital audio output Optical type PC input 15-Pin D-sub Analog RGB DVD/CD player Signal system NTSC Supported disc size 12 cm Pickup mechanism 1-lens, 2-beams Dimensions 24V4210U 24V4260U Width Height Depth Width Height Depth Mass - Toshiba 24V4260U | User Guide - Page 158
Start Guide ❖ Pedestal stand ❖ Warranty Acceptable signal formats for PC IN, HDMI® PC IN signal formats NOTE Depending on the connected PC, the following status may occur; incorrect display, false format detection, picture position failure, blur, or judder. But this is not a malfunction of your TV - Toshiba 24V4260U | User Guide - Page 159
x 1080i 1920 x 1080p 59.940 Hz 59.940 Hz 60.000 Hz 60.000 Hz 24.000 Hz 60.000 Hz H. Frequency 15.734 kHz 31.469 kHz 45.000 kHz 33. MHz 74.250 MHz 148.500 MHz NOTE ❖ Some illustrations in this User's Guide are for explanation purposes and may differ from the actual unit. ❖ Designs and specifications are - Toshiba 24V4260U | User Guide - Page 160
offering. The Toshiba warranty provided in respect of the Digital TV is the only warranty provided and no additional warranties are provided in respect of the software components subject to EULAs. Some of the software components distributed under EULAs are made available for use by the user on the - Toshiba 24V4260U | User Guide - Page 161
Agreement or fitness for specific uses. All risks associated with the quality or performance of these software components are assumed by the user. TOSHIBA shall not be liable whatsoever for any cost of repair or correction or other incidental expense incurred in connection with a defect found - Toshiba 24V4260U | User Guide - Page 162
is granted only if the user accepts full responsibility for any undesirable consequences; entanglement with the Unisys LZW patent, GIF reading support has been removed altogether, and the GIF of CompuServe Incorporated. GIF(sm) is a Service Mark property of CompuServe Incorporated." Exhibit B The - Toshiba 24V4260U | User Guide - Page 163
163 License Agreement This license was inspired by the BSD, Artistic, and IJG (Independent JPEG Group) licenses, which all encourage inclusion and use of free software in commercial and freeware products alike. As a consequence, its main points are that: ❖ We don't promise that this software works. - Toshiba 24V4260U | User Guide - Page 164
Canada rating 92 C cables 3.5mm to RCA Y-cable 26 analog RGB (15-pin) 26 coaxial (F-type) 24 component video (red/white/ yellow) 25 HDMI® 25 optical audio 26 overview of cables 24 standard A/V (red/white/yellow) 25 channel switching between two channels 68 tuning channels 67 tuning to a specific - Toshiba 24V4260U | User Guide - Page 165
IN 37 DVD player with ColorStream® 29 DVI device to HDMI® input 31 HDMI® device to HDMI® input 31 HDMI®-CEC 34 satellite receiver 30 TV's HDMI® 39 VCR and antenna 27 D digital audio selector using 82 Digital Signal Meter viewing 57 Disc audio channel 131 DVD menu 130 playback information - Toshiba 24V4260U | User Guide - Page 166
166 Index chapter or track 123 fast reverse, fast forward 122 frame by frame 123 slow motion 123 E Elements 65 F factory defaults reset 58 favorites browser 64 features 18 Freeze feature 75 G GameTimer® using 95 H HDMI® audio mode setting 55 HDMI®-CEC additional functions 111 using 108 volume/mute - Toshiba 24V4260U | User Guide - Page 167
accessories 158 TV system 154 video/audio terminals 155 SurfLock™ switching between two channels 68 system status viewing 58 T time zone setting 57 timer sleep timer 106 troubleshooting 147 channel tuning problems 150 closed caption problems 151 contact Toshiba 153 disc playback problems 152 HDMI - Toshiba 24V4260U | User Guide - Page 168
168 Index TV panel controls front 20 left side 20 side 20 TV remote functionality 42 install batteries 40 TV remote control using 40 TV status information show 112 V video input source selecting 59 video input sources labeling 61
-
 1
1 -
 2
2 -
 3
3 -
 4
4 -
 5
5 -
 6
6 -
 7
7 -
8
-
9
-
10
-
11
-
12
-
13
-
14
-
15
-
16
-
17
-
18
-
19
-
20
-
21
-
22
-
23
-
24
-
25
-
26
-
27
-
28
-
29
-
30
-
31
-
32
-
33
-
34
-
35
-
36
-
37
-
38
-
39
-
40
-
41
-
42
-
43
-
44
-
45
-
46
-
47
-
48
-
49
-
50
-
51
-
52
-
53
-
54
-
55
-
56
-
57
-
58
-
59
-
60
-
61
-
62
-
63
-
64
-
65
-
66
-
67
-
68
-
69
-
70
-
71
-
72
-
73
-
74
-
75
-
76
-
77
-
78
-
79
-
80
-
81
-
82
-
83
-
84
-
85
-
86
-
87
-
88
-
89
-
90
-
91
-
92
-
93
-
94
-
95
-
96
-
97
-
98
-
99
-
100
-
101
-
102
-
103
-
104
-
105
-
106
-
107
-
108
-
109
-
110
-
111
-
112
-
113
-
114
-
115
-
116
-
117
-
118
-
119
-
120
-
121
-
122
-
123
-
124
-
125
-
126
-
127
-
128
-
129
-
130
-
131
-
132
-
133
-
134
-
135
-
136
-
137
-
138
-
139
-
140
-
141
-
142
-
143
-
144
-
145
-
146
-
147
-
148
-
149
-
150
-
151
-
152
-
153
-
154
-
155
-
156
-
157
-
158
-
159
-
160
-
161
-
162
-
163
-
164
-
165
-
166
-
167
-
168
 |
 |
GMA300010013
4/12
Note: To display a High Definition
picture, the TV must be receiving a
High Definition signal (such as an over-
the-air High Definition TV broadcast, a
High Definition digital cable program, or
a High Definition digital satellite
program). For details, contact your TV
antenna installer, cable provider, or
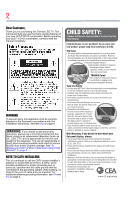
If you need assistance:
Toshiba's Support Web site
support.toshiba.com
Call Toshiba Customer Support Center:
Within the United States at (800) 631-3811
Outside the United States at (949) 583-3050
For more information, see
“Troubleshooting” on page 147
in this guide.
Owner's Record
The model number and serial number are on the back and side of your TV.
Record these numbers in the spaces below. Refer to these numbers whenever you
communicate with your Toshiba dealer about this LED TV/DVD combination.
Model number: ______________________________________________
Serial number: _______________________________________________
Integrated High Definition
LED TV/DVD Combination
User’s Guide:
24V4210U
24V4260U