Toshiba 55SV670U Owner's Manual - English - Page 10
TV front and side panel controls and connections - no power
 |
UPC - 022265002582
View all Toshiba 55SV670U manuals
Add to My Manuals
Save this manual to your list of manuals |
Page 10 highlights
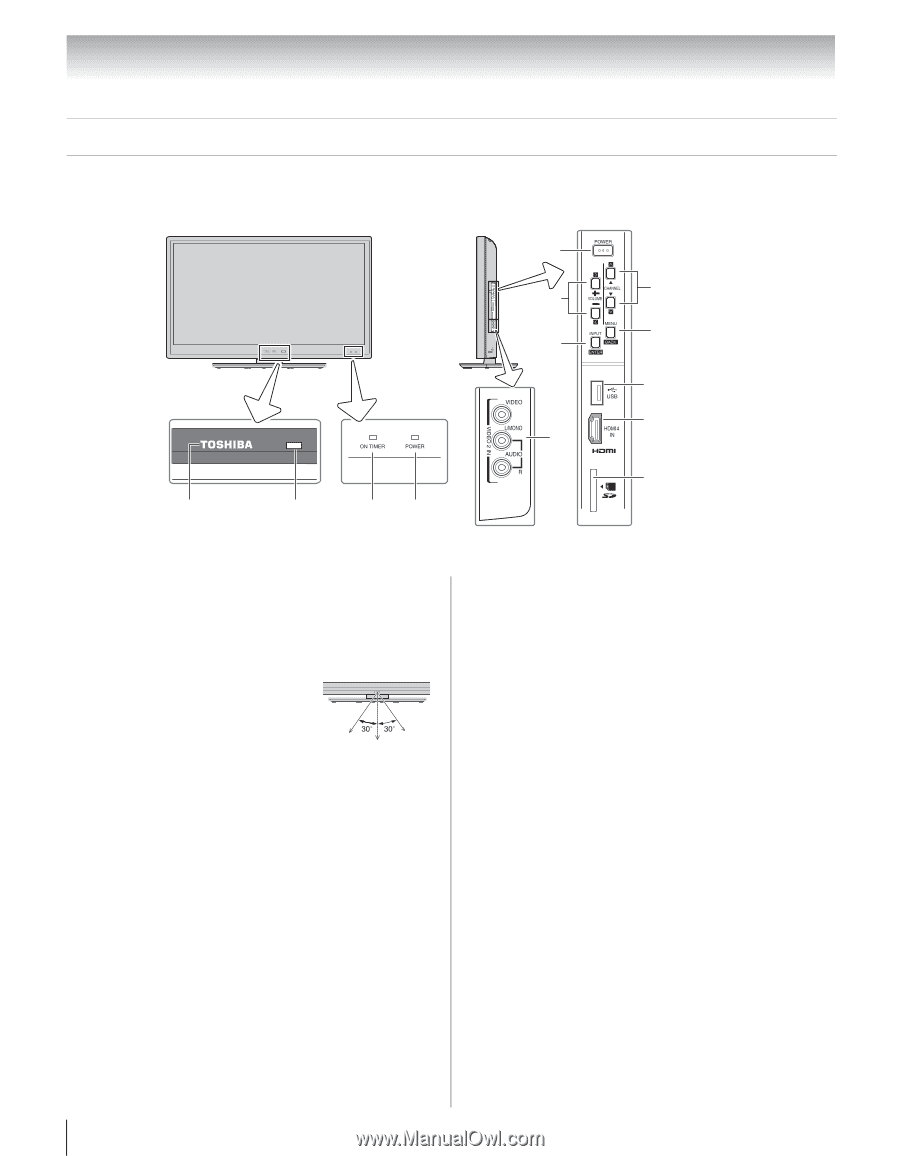
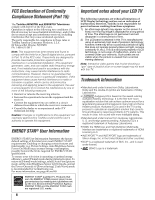
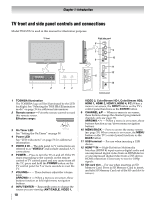
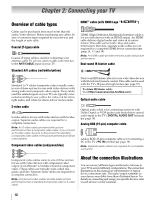
Chapter 1: Introduction TV front and side panel controls and connections Model 55SV670U is used in this manual for illustration purposes. TV front 1 2 34 Right side panel 6 7 9 10 8 11 12 5 13 Control panel 1 TOSHIBA Illumination The TOSHIBA logo will be illuminated by the LED backlight. See "Selecting the TOSHIBA Illumination mode" on page 39 for additional information. 2 Remote sensor - Point the remote control toward this remote sensor. Effective range: 3 On Timer LED 16.4 ft (5m) See "Setting the On Timer" on page 58. 4 Power LED See "LED indications" on page 73 for additional information. 5 VIDEO 2 IN - The side panel A/V connections are referred to as "VIDEO 2" and include standard A/V connections. 6 POWER - Press to turn the TV on and off. If the TV stops responding to the controls on the remote control or TV control panel and you cannot turn off the TV, press and hold the POWER button on the TV control panel for 5 or more seconds to reset the TV. 7 VOLUME+ - - These buttons adjust the volume level. ARROWS I i - When a menu is on-screen, these buttons function as left/right menu navigation buttons. 8 INPUT/ENTER - Repeatedly press to change the source you are viewing (ANT/CABLE, VIDEO 1, 10 VIDEO 2, ColorStream HD1, ColorStream HD2, HDMI 1, HDMI 2, HDMI 3, HDMI 4, PC).When a menu is on-screen, the INPUT button on the TV's control panel functions as the ENTER button. 9 CHANNEL Bb - When no menu is on-screen, these buttons change the channel (programmed channels only; - page 37). ARROWS U u - When a menu is on-screen, these buttons function as up/down menu navigation buttons. 10 MENU/BACK - Press to access the menu system (- page 35). When a menu is on-screen, the MENU button on the TV's control panel functions as the BACK button. 11 USB terminal - For use when inserting a USB device. 12 HDMI™ IN - High-Definition Multimedia Interface (HDMI 4) input receives digital audio and uncompressed digital video from an HDMI device or uncompressed digital video from a DVI device. HDMI connection is necessary to receive 1080p signals. 13 SD card slot - For use when inserting an SD Memory Card. Press in SD Memory Card to insert, and take SD Memory Card out of the SD card slot to remove.
-
 1
1 -
2
-
3
-
4
-
 5
5 -
 6
6 -
 7
7 -
 8
8 -
 9
9 -
 10
10 -
 11
11 -
 12
12 -
 13
13 -
 14
14 -
 15
15 -
16
-
17
-
18
-
19
-
20
-
21
-
22
-
23
-
24
-
25
-
26
-
27
-
28
-
29
-
30
-
31
-
32
-
33
-
34
-
35
-
36
-
37
-
38
-
39
-
40
-
41
-
42
-
43
-
44
-
45
-
46
-
47
-
48
-
49
-
50
-
51
-
52
-
53
-
54
-
55
-
56
-
57
-
58
-
59
-
60
-
61
-
62
-
63
-
64
-
65
-
66
-
67
-
68
-
69
-
70
-
71
-
72
-
73
-
74
-
75
-
76
-
77
-
78
-
79
-
80
-
81
-
82
-
83
 |
 |