Toshiba 55SV670U Owner's Manual - English - Page 36
Setting up your TV - zones
 |
UPC - 022265002582
View all Toshiba 55SV670U manuals
Add to My Manuals
Save this manual to your list of manuals |
Page 36 highlights
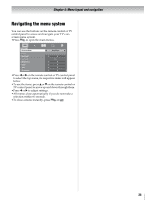
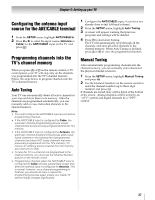
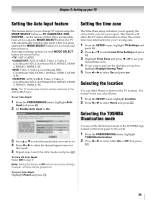
Chapter 5: Setting up your TV Initial Setup When you first turn on or reset the TV, the Initial Setup window will appear. 1 In the Menu Language field, press C or c to select your preferred language. 2 Press B or b to select Time Zone and set your desired time zone with C or c and press T. 3 Next, the Location setting window will appear. For normal home use, press C or c to select Home and press T. 4 If Store is selected in step 3, the Auto Demo setting window will appear. For normal TV usage, select Off. To enable the on-screen demonstration, select On. Note: The on-screen demonstration will automatically restart after 120 seconds of inactivity. 5 Next, ANT/CABLE In setup window will appear. Press C or c to select the input source (Cable or Antenna) for the ANT/CABLE input on the TV. 6 If you select Antenna, the Channel Tuning Mode setup window will appear. To tune only digital channels, select Digital. To tune digital channels preferentially over analog when entering channel number directly, select Auto. For normal tuning, select Standard. Press T to continue to Auto Tuning. 7 Press T to select Start Scan and continue with the Auto Tuning. You can stop the Initial Setup with O. However if you do not finish the entire Initial Setup process, the Initial Setup window will appear every time you turn on the TV. Quick Setup from the SETUP menu You can conveniently change various basic TV settings from the Quick Setup item located under the SETUP menu. 1 Press Y to open the SETUP menu. 2 Press B or b to select Quick Setup and press T. 3 A confirmation message will appear on the screen, press C or c to select Yes and press T. 4 Other procedures are the same as Initial Setup (- left-hand column). Selecting the menu language You can choose from three different languages (English, Français and Español) for the on-screen display of menus and messages. 1 From the SETUP menu, highlight Menu Language. 2 Press C or c to select your preferred menu language. 36
-
 1
1 -
2
-
3
-
4
-
5
-
6
-
7
-
8
-
9
-
10
-
11
-
12
-
13
-
14
-
15
-
16
-
17
-
18
-
19
-
20
-
21
-
22
-
23
-
24
-
25
-
26
-
27
-
28
-
29
-
30
-
 31
31 -
 32
32 -
 33
33 -
 34
34 -
 35
35 -
 36
36 -
 37
37 -
 38
38 -
 39
39 -
 40
40 -
 41
41 -
42
-
43
-
44
-
45
-
46
-
47
-
48
-
49
-
50
-
51
-
52
-
53
-
54
-
55
-
56
-
57
-
58
-
59
-
60
-
61
-
62
-
63
-
64
-
65
-
66
-
67
-
68
-
69
-
70
-
71
-
72
-
73
-
74
-
75
-
76
-
77
-
78
-
79
-
80
-
81
-
82
-
83
 |
 |
