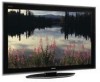
Toshiba 55SV670U Owner's Manual - English - Page 63
Using the TV's advanced features
 |
UPC - 022265002582
View all Toshiba 55SV670U manuals
Add to My Manuals
Save this manual to your list of manuals |
Page 63 highlights
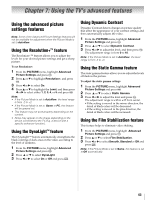
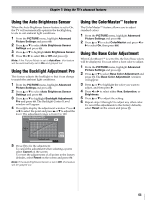
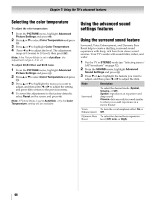
Chapter 7: Using the TV's advanced features Using the advanced picture settings features Note: Some of the Advanced Picture Settings features will not be available for adjustment when the Picture Mode is set to AutoView. Using the Resolution+™ feature The Resolution+™ feature allows you to adjust the levels for your desired picture settings and get a sharp picture. To set Resolution+: 1 From the PICTURE menu, highlight Advanced Picture Settings and press T. 2 Press B or b to highlight Resolution+, and press T. 3 Press C or c to select On. 4 Press B or b to highlight the Level, and then press C or c to select either 1, 2, 3, 4, or 5 and press T. Note: • If the Picture Mode is set to AutoView, the level range is from -2 to +2. • If the Picture Mode is set to Game or PC, this feature will be grayed out. • This feature may not work properly depending on the content. • Noise may appear on the image depending on the device connected to the TV (e.g. a device with a specific enhancer function). Using the DynaLight™ feature The DynaLight™ feature automatically strengthens the black coloring of dark areas in the video according to the level of darkness. 1 From the PICTURE menu, highlight Advanced Picture Settings and press T. 2 Press B or b to select DynaLight. 3 Press C or c to select On or Off and press O. Using Dynamic Contrast Dynamic Contrast detects changes in picture quality that affect the appearance of your contrast settings and then automatically adjusts the video. 1 From the PICTURE menu, highlight Advanced Picture Settings and press T. 2 Press B or b to select Dynamic Contrast. 3 Press C or c to adjust the level, and then press T. The adjustment range is from 0 to 10. Note: If the Picture Mode is set to AutoView, the level range is from -5 to +5. Using the Static Gamma feature The static gamma feature allows you to adjust the levels of black in the picture. To adjust the static gamma settings: 1 From the PICTURE menu, highlight Advanced Picture Settings and press T. 2 Press B or b to select Static Gamma. 3 Press C or c to adjust the level and press T. The adjustment range is within ±15 from center. • If the setting is moved in the minus direction, the detail of black colors will be decreased. • If the setting is moved in the plus direction, the detail of black colors will be increased. Using the Film Stabilization feature This feature helps to eliminate video shaking. 1 From the PICTURE menu, highlight Advanced Picture Settings and press T. 2 Press B or b to select Film Stabilization. 3 Press C or c to select Smooth, Standard or Off and press O. Note: If the Picture Mode is set to Game, this feature is set to Off automatically. 63
-
 1
1 -
2
-
3
-
4
-
5
-
6
-
7
-
8
-
9
-
10
-
11
-
12
-
13
-
14
-
15
-
16
-
17
-
18
-
19
-
20
-
21
-
22
-
23
-
24
-
25
-
26
-
27
-
28
-
29
-
30
-
31
-
32
-
33
-
34
-
35
-
36
-
37
-
38
-
39
-
40
-
41
-
42
-
43
-
44
-
45
-
46
-
47
-
48
-
49
-
50
-
51
-
52
-
53
-
54
-
55
-
56
-
57
-
 58
58 -
 59
59 -
 60
60 -
 61
61 -
 62
62 -
 63
63 -
 64
64 -
 65
65 -
 66
66 -
 67
67 -
 68
68 -
69
-
70
-
71
-
72
-
73
-
74
-
75
-
76
-
77
-
78
-
79
-
80
-
81
-
82
-
83
 |
 |
